5
Installation
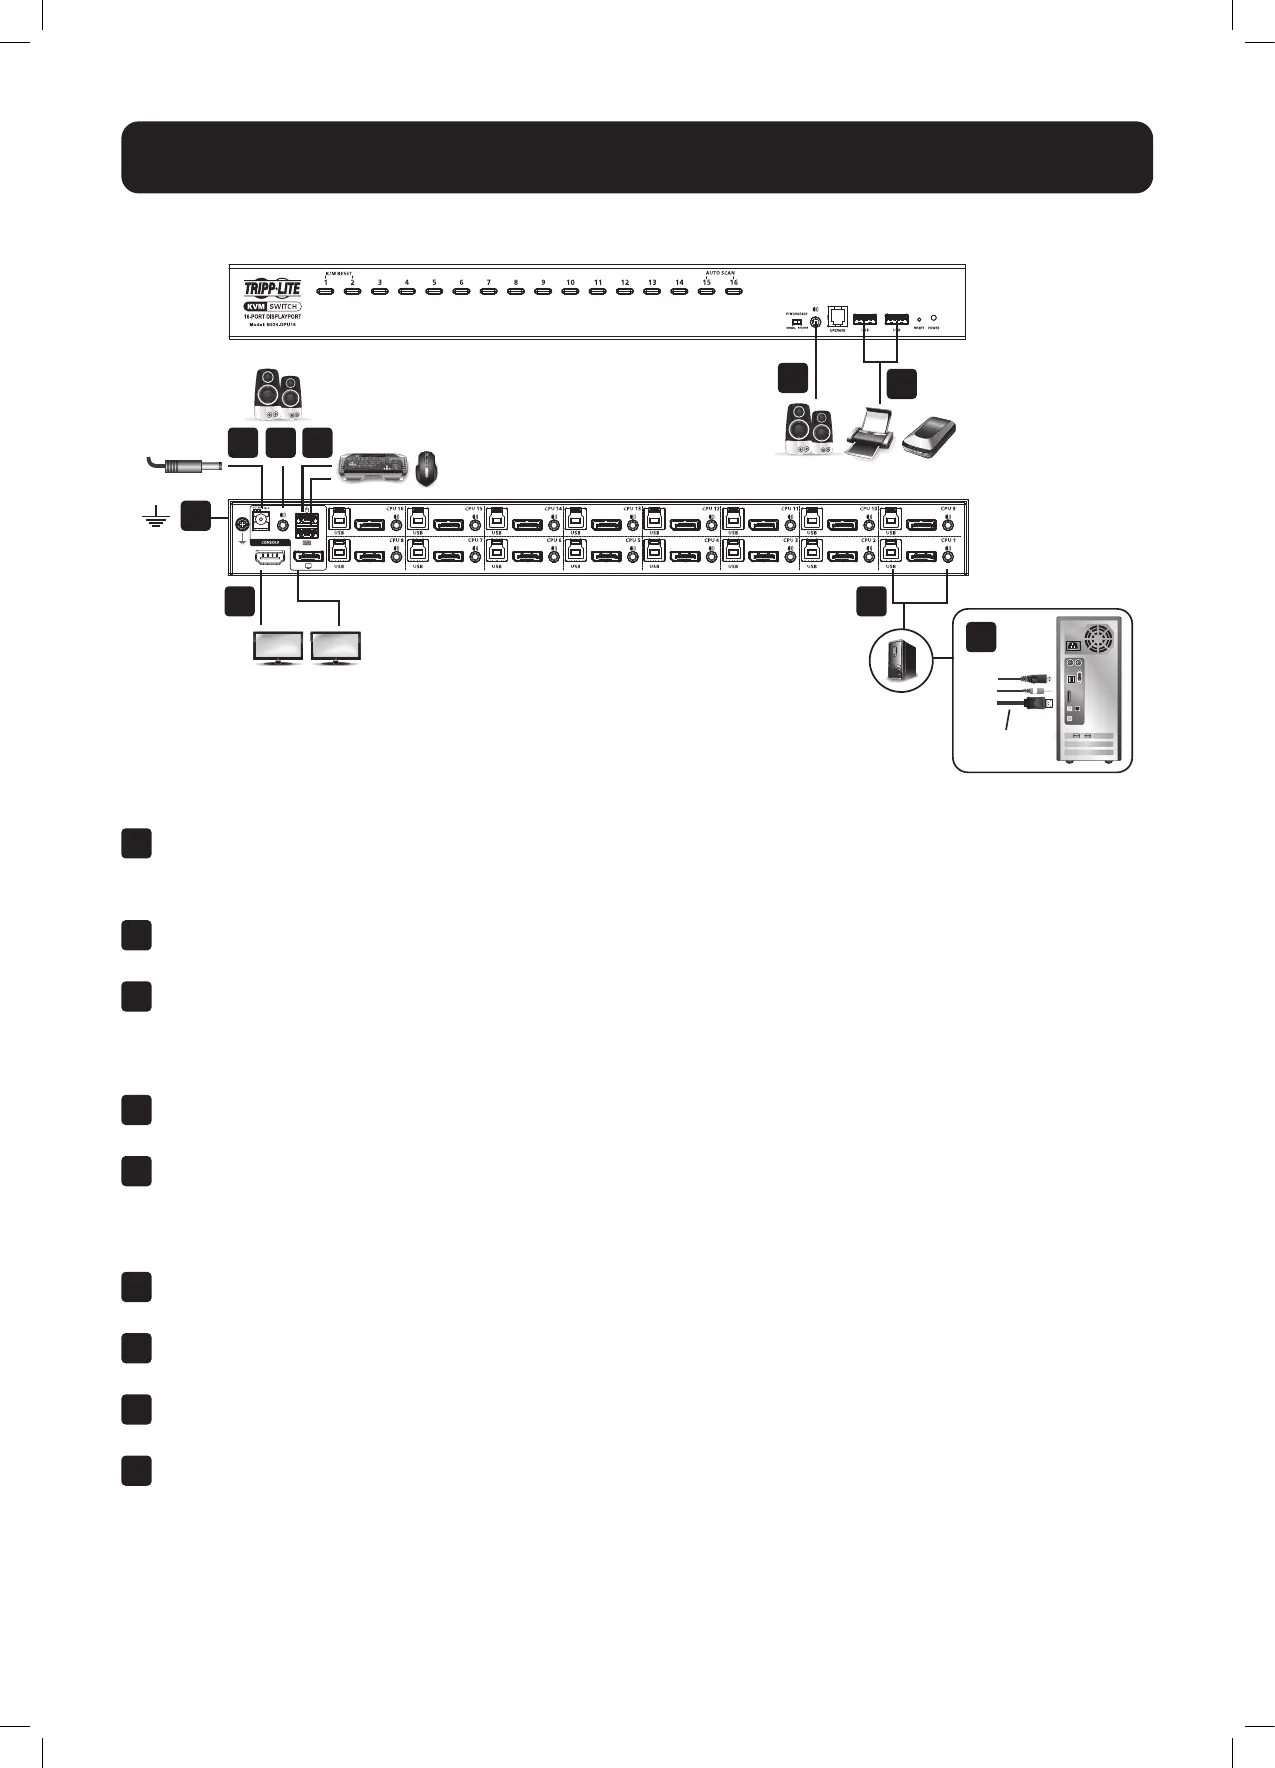
Single-Stage Installation
To install the switch, refer to the installation diagram and perform the following steps:
1
Ground the B024-DPU08 / B024-DPU16 by connecting one end of a grounding wire to the Grounding Terminal and
the other end to a suitable grounded object.
Note: Do not omit this step. Proper grounding helps to prevent damage to the unit from power surges or static electricity.
2
Plug your USB keyboard and USB mouse into the USB console ports from the console ports section located on the
unit’s rear panel.
3
Plug your DisplayPort and/or HDMI monitor(s) into the DisplayPort and/or HDMI console port(s) from the console
ports section located on the unit’s rear panel and power on the monitor(s).
Note: The B024-DPU08 / B024-DPU16 displays the same source content on both the DisplayPort and HDMI monitors when
DisplayPort and HDMI console ports are plugged in simultaneously.
4
Plug your speakers into the audio jacks located on the unit’s front and rear panel. Speakers plugged into the front
panel have priority over those plugged into the rear panel.
5
Use the provided cable sets (DisplayPort cable, USB 3.0 cable and audio cable) with this package. Plug the
DisplayPort connector into any available DisplayPort port in the KVM ports section of the switch (CPU 1, CPU 2, etc.),
and then plug the USB 3.0 cable and audio cable into their corresponding ports.
Note: Verify that all the connectors are in the same KVM ports section (all in CPU 1, all in CPU 2, etc.).
6
Plug the other ends of the DisplayPort cable, USB 3.0 cable and audio cable into their respective ports on the
computer. Repeat steps 5 and 6 for other PCs you are installing.
7
(Optional) Plug your USB peripherals into the USB Type-A ports in the USB 3.1 Gen 1 peripheral hub section
located on the unit’s front panel.
8
Plug the power adapter that came with your switch into an AC power source, then plug the power adapter cable into
the switch’s power jack. The B024-DPU08 / B024-DPU16 is now on.
9
Power on the computers.
1
3 5
6
8 4
4
7
2
HDMI and/or DisplayPort
DisplayPort
Cable