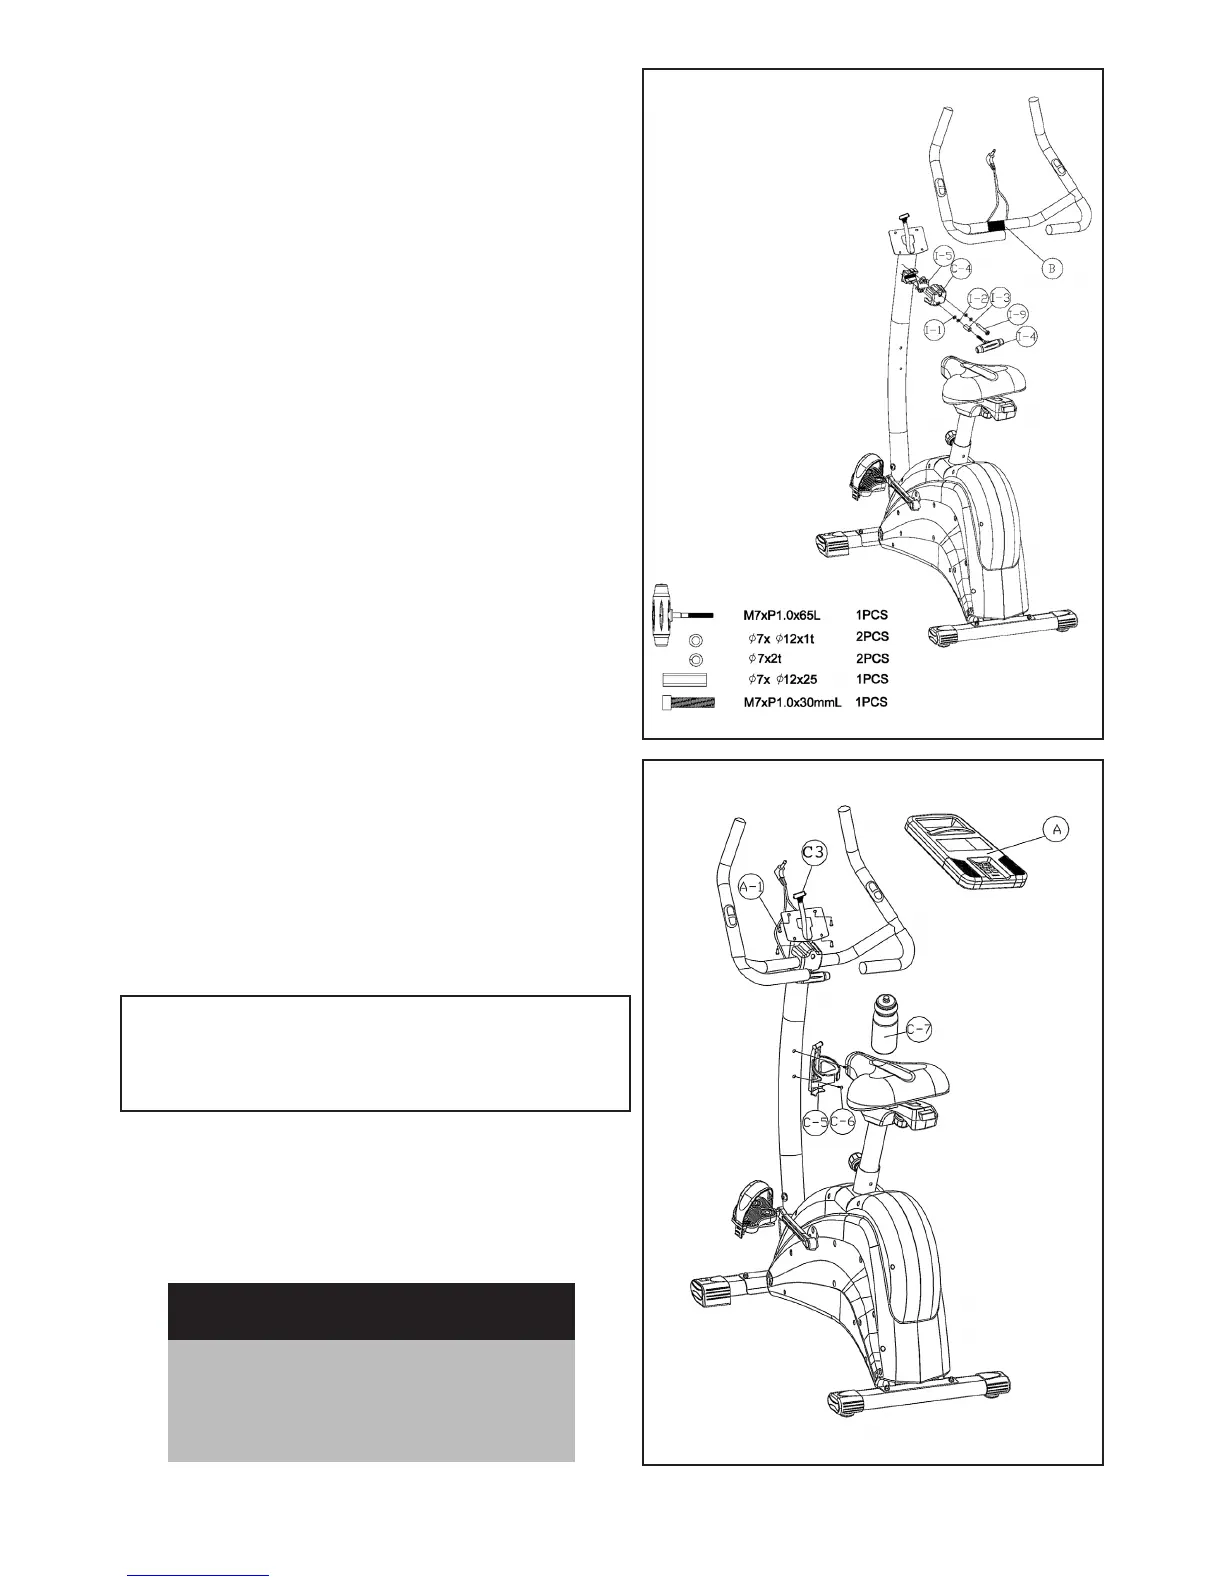
Step 5-Handlebar post Assembly
• Place Handlebar (B) on the Handlebar base, and posi-
tion the Metal Cover (I-5) on the top of Handlebar (B).
• Secure the Handlebar (B) and Metal Cover (I-5) with
a Screw (I-9), Spring Washer (I-2), and Flat Washer (I-1).
Please ensure it is securely tightened.
• Place the Front Cover (C-4) on the Handlebar (B) and
insert T-shape Knob (I-4) into the Metal Cover (C-4) and
secure with Spring Washer (I-2), Flat washer (I-1) and
Bushing (I-3). Please ensure it is securely tightened.
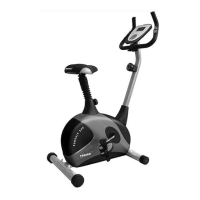
Step 6 - Handlebar Post
Assembly
• Connect the Upper Computer Cable (C3) to the
back of the Computer (A)
• Attach the Computer (A) to the plate on top of
the Handlebar Pole with 4 Screws (A-1).
CAUTION:
Ensure that cables are not damaged during
assembly or when tightening screws
• Plug the Hand-Pulse wire (for measuring your pulse
rate) in the socket on the back of the Computer (A).
• Fasten the Bottle Cage (C-5) to the Handlebar Post
with 2 Cone Cross Screws (C-6), and insert Water
Bottle (C-7)
Recheck
all bolts and nuts are
tightened securely
before using the machine