13
ENG
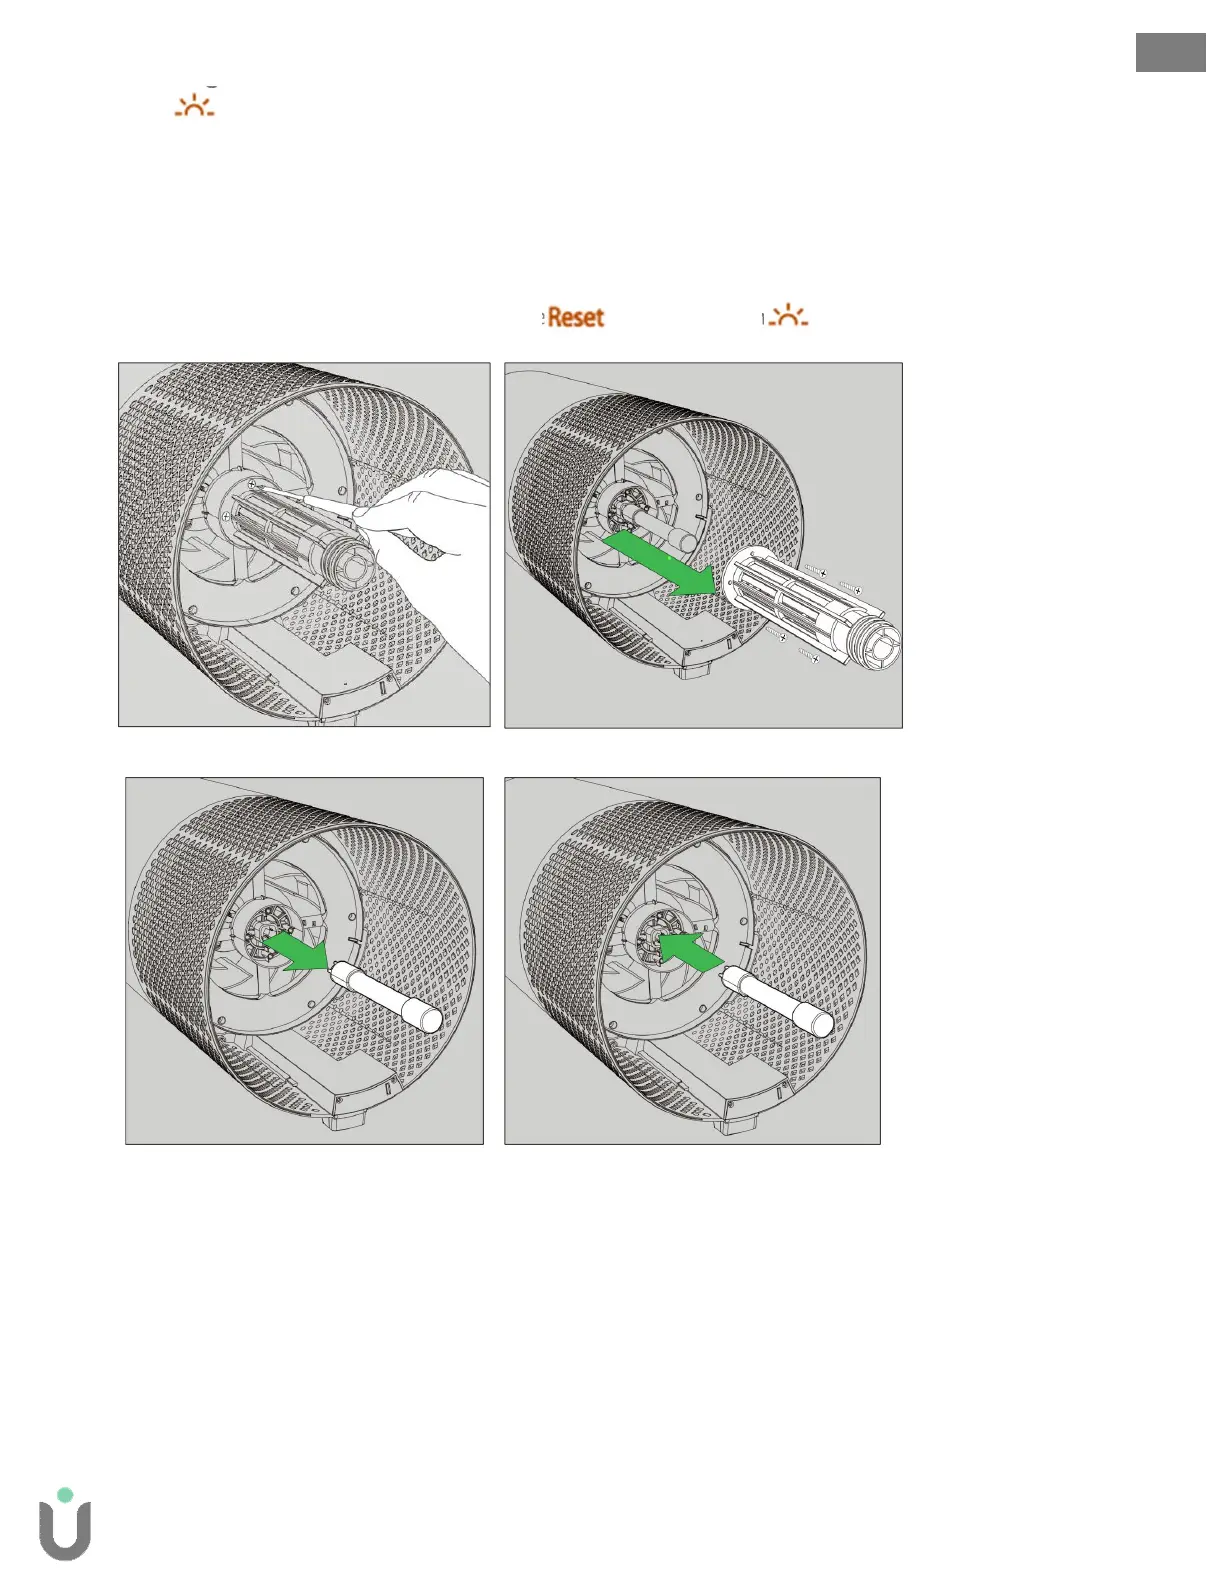
Replacing the UV lamp
1. The indicator will glow red when it is time to replace the UV lamp.
2. Once the filter drum is removed (Fig. A, Fig B), use a screwdriver to remove the 4 screws securing
the UV housing (Fig. G).
3. Gently remove the UV housing (Fig. H).
4. Disconnect the plug of the UV lamp from the socket within the purifier (Fig. I).
5. Your replacement UV lamp will plug directly into the same socket (Fig. J).
6. Replace the UV housing and use a screwdriver to tighten the fastening screws.
7. Once the purifier is powered-on, hold the button until the indicator turns white.
Fig. G Fig. H
Fig. G Fig. H
Cleaning the air quality sensor within the SensorPod
The SensorPoduses an infrared light to detect particulate matter, so it is important that you clean the
viewing chamber every 1-2 months to remove any dust or particles that may affect the accuracy of the
sensor’s readings.
1. Turn-off the SensorPod by unplugging the power cord.
2. Open the cover on the front side by sliding the door downward and rotating outward at a 90° angle.
3. Use a damp cotton swab to wipe the lens and intake area of the dust sensor.
4. Use a dry cotton swab to wipe away any remaining moisture.
5. Close the cover by rotating the door back down and sliding it back into place until you hear a click.