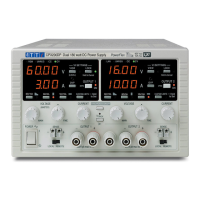
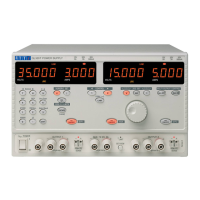
Calibration - 5V/4A
Equipment Required
A 5.5 digit multimeter.
A small switch, 560 Ohm resistor and a diode.
VOLTAGE - Differential Gain
Remove the link between + O/P and + sense only and fit a diode, cathode to + sense and anode
to + O/P. Connect the small switch across the diode. Connect the 560 Ohm resistor between -
O/P and + sense. Connect the DVM, set to 20V range, to the sense terminals.
Close the switch.
Set the DC output switch on.
Set the output voltage to approximately 5V.
Note the reading.
Open the small switch and adjust VR4 for the same reading ± 0.5mV.
Close and open the small switch and check the reading.
VOLTAGE - Output
Remove the switch and resistor and refit the link between ± O/P and + sense.
Set the voltage control to maximum and adjust VR5 for 6.0V to 6.05V output.
CURRENT
Set current limit to maximum.
Connect a load of 4.1A and adjust VR2 until the current limit LED just comes on; check the LED
is off at 4A.
Circuit Description - 5V/1.5A (PL310QMT)
An extra winding on the master output transformer provides approximately 8V rms off load. D1 to
D4 form a bridge rectifier and C1 and C2 the reservoir capacitor.
IC1 is a fixed 5V three terminal low drop out regulator, D5 and D6 provide protection.
No calibration is required, see Technical Specification section for performance figure.
19