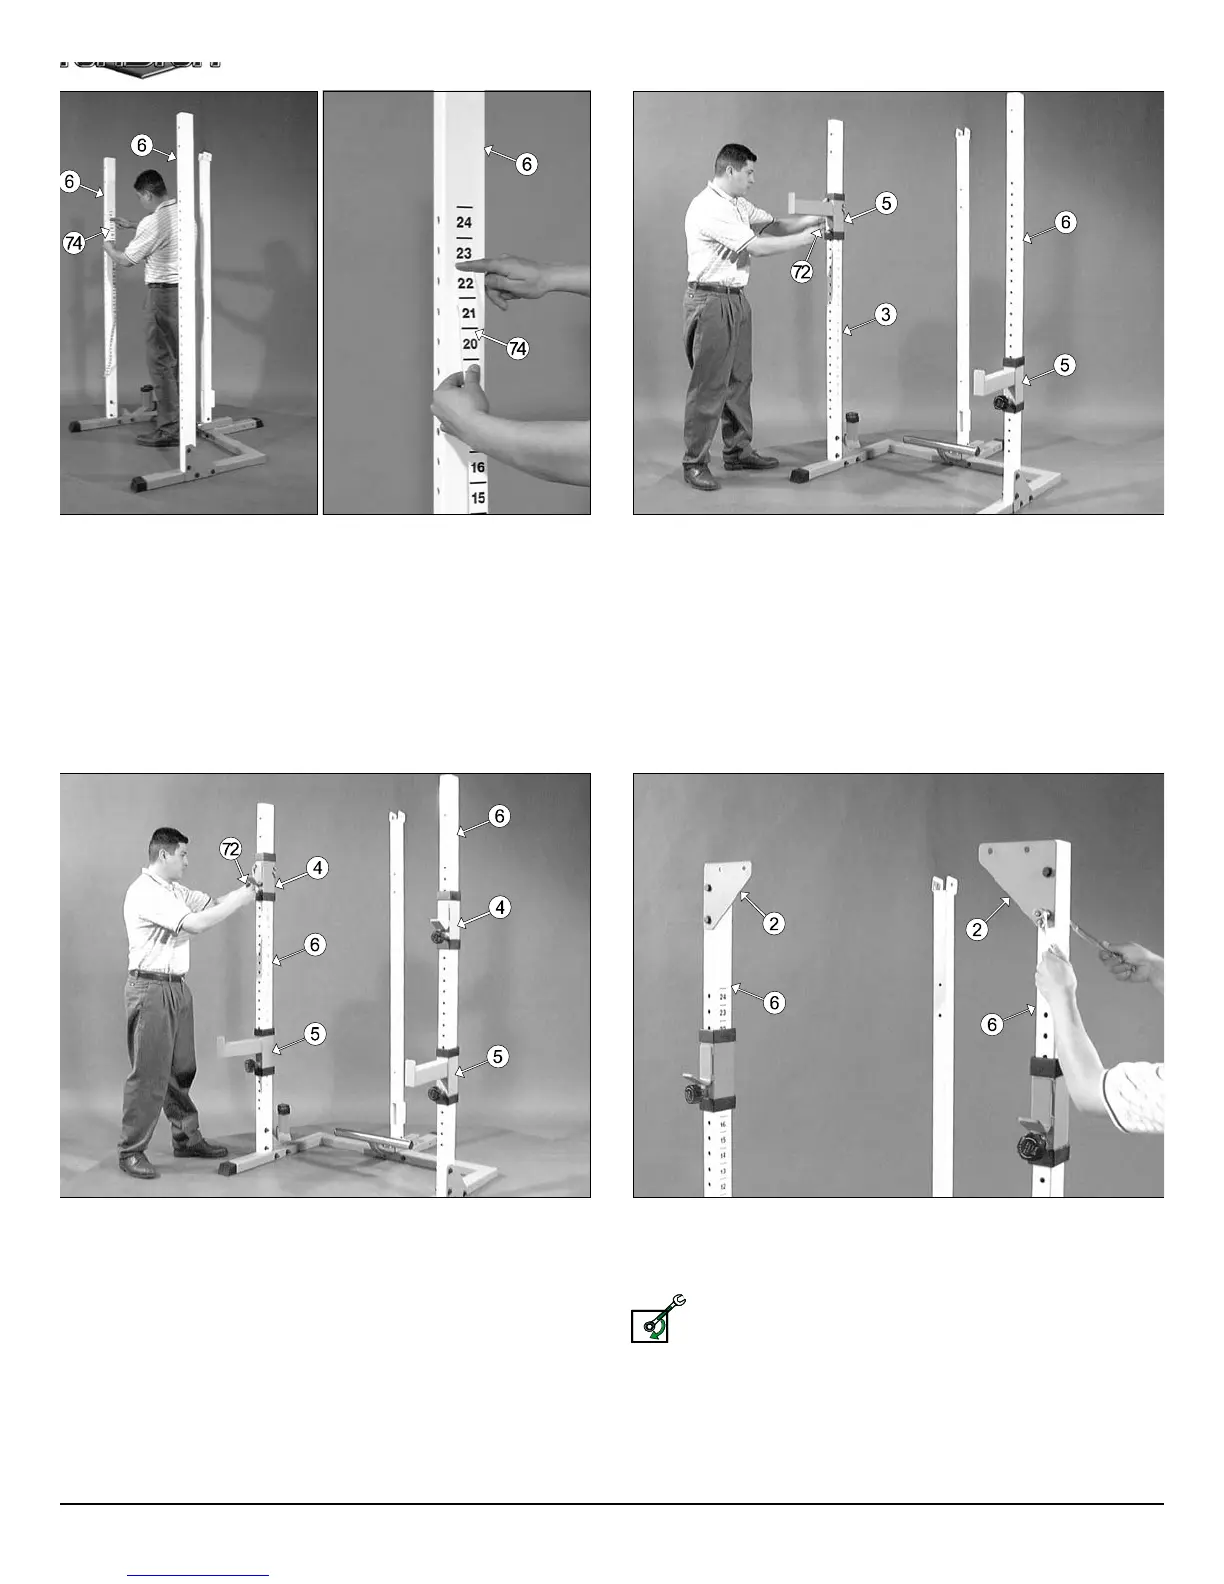
g. 9 Next, attach the Decal Numbers 1-24 (#74) on the inside of the
lectorized Uprights (#6). Center the number 24 with the top adjustment
le of the Selectorized Uprights (#6). A great way to make sure you don’t
p any air bubbles under the decal is by using the wedge method. Press
e side of your index finger against the decal and as you slide your finger
wn, with the other hand, slowly remove the rest of the backing off the de-
l.
Fig. 10 Slide one Bar Safety (#5), in the position as shown above, ov
each one of the Selectorized Uprights (#6). Be sure to pull the Turn P
Pin w/Knob (#72) as you perform this assembly.
g. 11 Slide one Bar Holder (#4), in the position as shown above, over
ch one of the Selectorized Uprights (#6). Be sure to pull the Turn Pull
n w/Knob (#72) as you perform this assembly.
Fig. 12 Attach two Triangular Corner Plates (#2) to the front of the t
Selectorized Uprights (#6), in the position as shown above, using four H
Head Cap Screws 1/2-13 X 4 1/4 (#12), eight Flat Washers SAE 1/2” (#10
and four Nylon Insert Lock Nuts 1/2-13 (#9).
Loosely Fasten: Do not completely fasten this hardware assemb
at this time, as it will be completely fastened later in the assemb
process.
LOOSELY FASTEN
TDH 345 Half Cage Ensembl