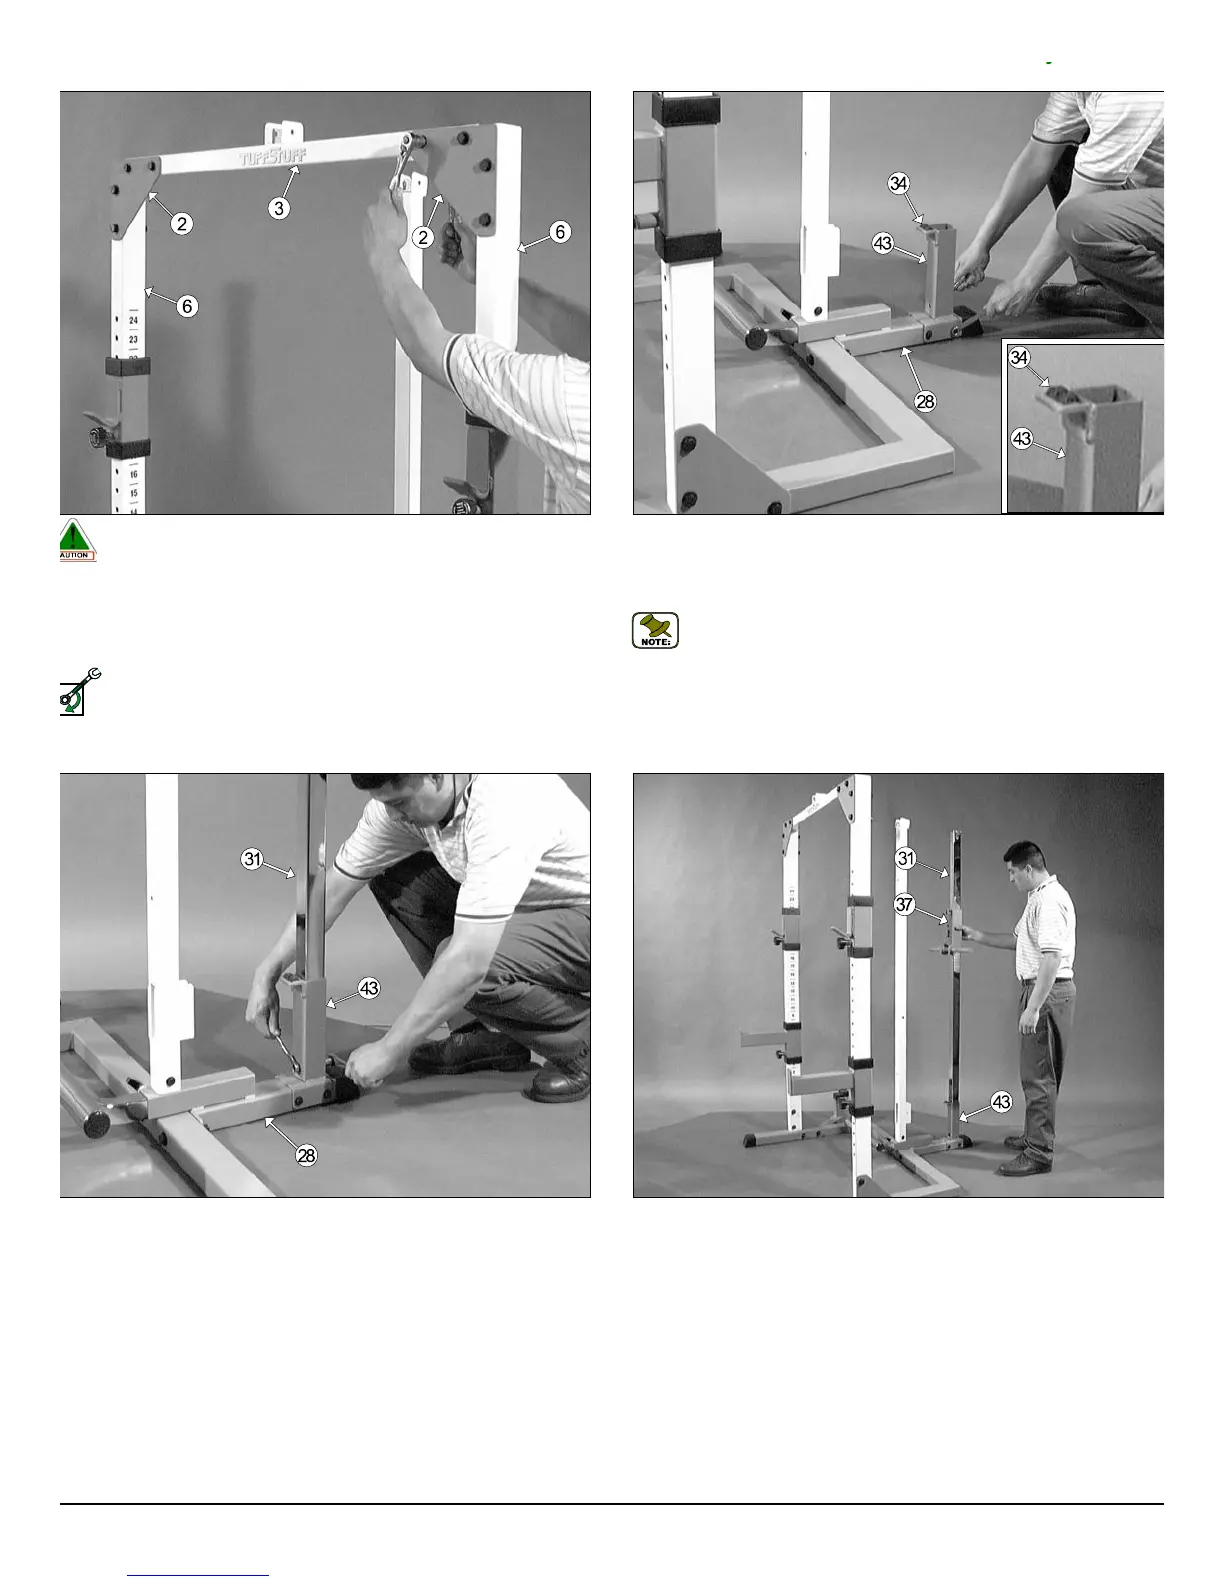
Fig. 14 Mount the Chrome Post Receptacle (#43) onto the Bottom A
sembly Holder (#28), in the position as shown above, and secure it in
place using two Hex Head Cap Screws 3/8-16 x 4 (#32), four Flat Washe
SAE 3/8” (#45), and two Nylon Insert Jam Lock Nuts 3/8-16 (#46).
Note: The two Pyramid Rubber Bumpers (#34) located on t
Chrome Post Receptacle (#43) have been assembled by the fa
tory.
g. 15 Next, insert the Chrome Post (#31) into the Chrome Post Re-
ptacle (#43), in the position as shown above, and secure it into place
ing one Hex Head Cap Screw 3/8-16 X 2 3/4 (#33), two Flat Washers
E 3/8” (#45), and one Nylon Insert Jam Lock Nut 3/8-16 (#46). Refer to
e Exploded View Diagram on page 18 for further illustration on this assem-
y.
Fig. 16 Carefully slide the Weight Carriage (#37) onto the Chrome Po
(#31), with the weight prongs toward the inside of the unit, as shown above
Caution: It is recommended to use another person in assisting with
this assembly.
g. 13 Affix the Top Stabilizer (#3) to the two Triangular Corner Plates
2), in the position as shown above, and secure it into place using four Hex
ead Cap Screws 1/2-13 X 4 1/4 (#12), eight Flat Washers SAE 1/2” (#10),
d four Nylon Insert Lock Nuts 1/2-13 (#9).
Loosely Fasten: Do not completely fasten this hardware assembly
at this time, as it will be completely fastened later in the assembly
process.
ELY FASTEN
TDH 345 Half Cage Ensemble
6