Do you have a question about the Two-Rock Studio Pro 35 and is the answer not in the manual?
High impedance input for connecting your instrument to the amplifier.
Adjusts high frequency response; push/pull for BRIGHT feature.
Adjusts midrange frequencies; push/pull for BOOST feature.
Adjusts bass response; push/pull for DEEP feature.
Controls the amplifier's overall gain and tone character.
Adjusts the overall output level of the amplifier.
Controls the amount of signal sent to the reverb tank.
Mixes the reverb effect signal with the dry signal.
Active wide band sweep for tone shaping and frequency response adjustment.
Switch for powering up/down the amplifier to prolong tube life.
Connects the amplifier to AC power via the supplied power cord.
Turns the amplifier's power on and off.
Connect speaker cabinets with matching impedance to the amplifier.
A half-active loop for integrating external effects units.
Use this jack to send the amplifier's signal to effects.
Use this jack to connect effects output back to the amplifier.
Adjusts impedance for tone shaping and reducing high-frequency artifacts.
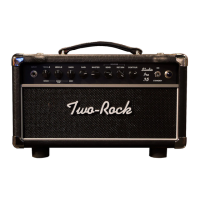
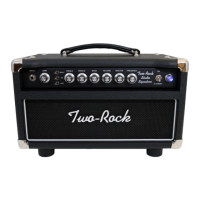
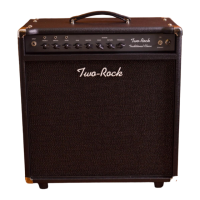
The Two-Rock Studio Pro 35 is a high-quality audio power amplifier designed for discerning guitarists, emphasizing great tone through carefully selected components and a hand-built approach. This versatile instrument is designed to provide many hours of enjoyment and inspiration.
The Studio Pro 35 functions as a guitar amplifier, taking the input signal from a guitar and amplifying it to drive a speaker. Its design focuses on delivering a wide range of tonal characteristics, from clean and bright to fat and warm, with various controls to shape the sound. The amplifier includes a comprehensive set of front and rear panel controls that allow for precise adjustment of the input signal, equalization, gain, master volume, and effects loop integration. The internal tube complement, featuring 12AX7, 12AT7, and 6L6 tubes, is central to its sonic character, providing the warmth and dynamics associated with tube amplification.
The amplifier's front panel offers intuitive controls for shaping your sound. The INPUT is a high impedance jack where you connect your instrument.
The TREBLE + Push/Pull BRIGHT control adjusts the high-frequency response. Lower settings produce a warmer, smoother tone, while turning it up increases prominence and aggressiveness in the highs, adding gain. This control interacts significantly with the MID control and the DEEP switch. In its full counter-clockwise position, high frequencies are bypassed to ground, and in the full clockwise position, they pass to the next gain stage. Pulling the knob to the "out" position boosts the high-frequency response, which is particularly effective for adding sparkle to clean tones when the Gain control is at or below 12 o'clock. Its effect becomes less dramatic as the Gain control is increased past this point.
The MID + Push/Pull BOOST control adjusts the midrange response. Low settings "scoop" the midrange, emphasizing highs and lows. Increasing this control boosts midrange frequencies, adding "body" to your guitar's tone, which is crucial for the amplifier's overall tonality, feel, and response. Higher settings help your tone cut through a mix, whether in a live band setting or outdoors. In the full clockwise position, midrange frequencies pass to the next gain stage. Pulling the knob to the "out" position passively bypasses the EQ section, boosting the natural high and mid frequencies of the guitar and increasing the input signal driving the gain stage.
The BASS + Push/Pull DEEP control adjusts the bass response. In the full counter-clockwise position, low frequencies are cut, and the response of the treble and midrange controls is significantly reduced. It's recommended to start this control at noon and adjust to taste. In the full clockwise position, low frequencies pass to the next gain stage. Pulling the knob to the "out" position boosts the lower bass frequencies. This low-frequency contour switch also shifts emphasis from upper bass and low-mid frequencies to lower bass frequencies, which helps smooth out and clarify the midrange response.
The GAIN control adjusts the amplifier's overall gain. Starting at the 12 o'clock position and adjusting to taste is recommended. This control determines the initial character of your tone, offering cleaner/brighter tones at low settings and fatter/warmer tones at higher settings. Increasing the gain also introduces more gain and bass into the signal path and reduces available clean headroom, especially when the master volume is set higher.
The MASTER control adjusts the overall output level of the amplifier. At lower settings, the amp sounds cleaner and is lower in volume. As this control is turned up, the power section works harder, increasing sustain, fullness, touch dynamics, and overall volume. At higher settings, the power section can be pushed into natural overdrive, especially if the Gain control is set higher.
The REVERB SEND control determines the amount of signal applied to the reverb tank. Low settings create an open, small-room reverb effect with a short decay time. Turning the control clockwise increases the signal to the reverb driver stage, creating a saturated effect with a sharp attack and a longer decay.
The REVERB RETURN control mixes the reverb effect signal with the dry signal. At full counter-clockwise rotation, the reverb effect is defeated. Used in conjunction with the reverb drive control on the rear panel, this control allows for a wide range of natural reverb effects.
The CONTOUR control is an active wide-band sweep. In the 12 o'clock position, the amp's frequency response is flat. Counter-clockwise rotation reduces high-end response and increases low frequencies, while clockwise rotation decreases low-end and increases high-frequency response. This control is useful for maintaining preamp tone control settings while globally adjusting for differences in room acoustics, speaker cabinets, or bright-to-dark guitars (e.g., single coils to humbuckers). This control also actively reduces articulation, allowing for a softer or extremely open and revealing setting, depending on your individual style and requirements.
The STANDBY switch should be in the down/STANDBY position before placing the Power switch to the up/ON position. After 20 seconds or more, move the Standby switch to the "up" position to play. When taking a break, leaving the amp "powered up" and switching to "stand-by" mutes the output and prolongs power tube life.
The INDICATOR LAMP illuminates when the rear panel power switch is in the "up" position, indicating the unit is receiving A/C power.
The rear panel features include the A/C Input for connecting the power cord. The amplifier is designed to operate on 120 volts A/C, 60 cycles, unless otherwise specified. A Fuse is present, and its type can be found in the Fuse Chart. The Power Switch turns the unit on.
There are three Speaker Output Jacks for 4, 8, and 16 ohms. It is crucial to NEVER OPERATE YOUR AMPLIFIER WITHOUT A PROPER SPEAKER LOAD CONNECTED and to match the impedance of your cabinet with the amplifier's output impedance.
The Effects Loop is a "half active" type. The RETURN LEVEL + Push/Pull BRIGHT control adjusts the effects loop return level. The loop is active even without effects connected, so this control can also serve as an additional master volume. For unity gain when not using the effects loop, set this control at 11:00. The pull-bright feature is useful at lower volumes or when connecting multiple pedals that might cause high-frequency insertion loss. The SEND jack sends the amplifier's signal to effects, and the RETURN jack connects the output from effects back to the amplifier.
The Pickup Loading control changes the impedance relationship between the pickup and the amplifier's first gain stage, reducing inductive "ringing" in the pickup coils. This results in a more controlled high-frequency response and a reduction in high-frequency artifacts, leading to a cleaner waveform and an apparent lack of harshness in the upper frequencies. This control has 5 settings: the first position (fully counterclockwise) has no additional pickup loading, with 4 additional settings available, up to full loading in the fully clockwise (last) position.
The S/N indicates your serial number, which should be recorded for service or in case of loss, theft, or damage.
Proper maintenance ensures the longevity and optimal performance of your Two-Rock Studio Pro 35. The manual provides crucial information regarding tube replacement and bias adjustment.
The amplifier uses a specific Tube Complement: V1-12AX7 (Input and Gain), V2-12AT7 (Reverb Drive), V3-12AX7 (Reverb Send & Return), V4-12AX7 (Effects buffer & Mixing Stage), V5-12AX7 (Phase Inverter), and V6 & V7-6L6 (35 watt). Each production tube is tested and matched to exacting specifications.
When power tubes need replacing, it is essential to use high-quality, matched sets of power tubes. It is also critical to reset the bias of the amp after installing new or NOS power tubes. External bias adjustment and test points are located on the bottom of the chassis near the output tube sockets. A digital voltmeter and a small screwdriver are required for bias adjustment.
The BIAS ADJUSTMENT PROCEDURE involves powering up the amplifier with a proper speaker load connected (no instrument in the input). Switch the amp out of standby and allow a few seconds for stabilization. Set the voltmeter to read DC Volts. Ground the meter to the chassis and insert the positive probe into the test point to measure the voltage. Use a small flat-head screwdriver to adjust the bias pot until the desired bias voltage is achieved.
For 35-watt 6L6 type tubes (6L6GC, 6L6WGC, 5881, 7581), the recommended bias range is .060v to .070v, with a factory setting of .064v. For 22-watt 6V6 type tubes (6V6GT, 6V6S, 5871, CV511), the recommended bias range is .040v to .050v, with a factory setting of .047v. It is crucial NOT to set bias higher than recommended levels as this can lead to tube failure and possible damage to other components.
The manual explicitly states: WARNING! No user serviceable parts inside! Refer to qualified service person only. This emphasizes that internal maintenance beyond basic user adjustments should be performed by qualified professionals.
For safety, the LINE CORD must be connected to a grounded A/C receptacle only.
The Fuse Chart specifies that all fuses are 3AG Type 250 Volt, SLO-BLO. For Export 100V, a 2A-35 Watt fuse is required. For Domestic 120V, a 2A-35 Watt fuse is needed. For Export 220V, 230V, 240V, a 1A-35 Watt fuse is specified.
Cleaning the apparatus should only be done with a dry cloth. It is important not to block any ventilation openings and to install the unit according to the manufacturer's instructions, away from heat sources. The power cord should be protected from being walked on or pinched. The apparatus should be unplugged during lightning storms or when unused for long periods. Servicing is required if the apparatus is damaged in any way, such as a damaged power-supply cord or plug, liquid spills, objects falling into the apparatus, exposure to rain or moisture, abnormal operation, or if it has been dropped. To completely disconnect the unit from the MAINS, unplug the unit, as turning the power switch off does not fully disconnect it.
| Type | Tube Amplifier |
|---|---|
| Power Output | 35 Watts |
| Channels | 2 |
| Speaker Configuration | 1x12" |
| Effects Loop | Yes |
| Reverb | Yes |
| Speaker Outputs | 1 x 8 Ohm, 1 x 16 Ohm |
| Tubes | 12AX7, 6L6 |
| Controls | Treble, Mid, Bass, Reverb, Master |