0807
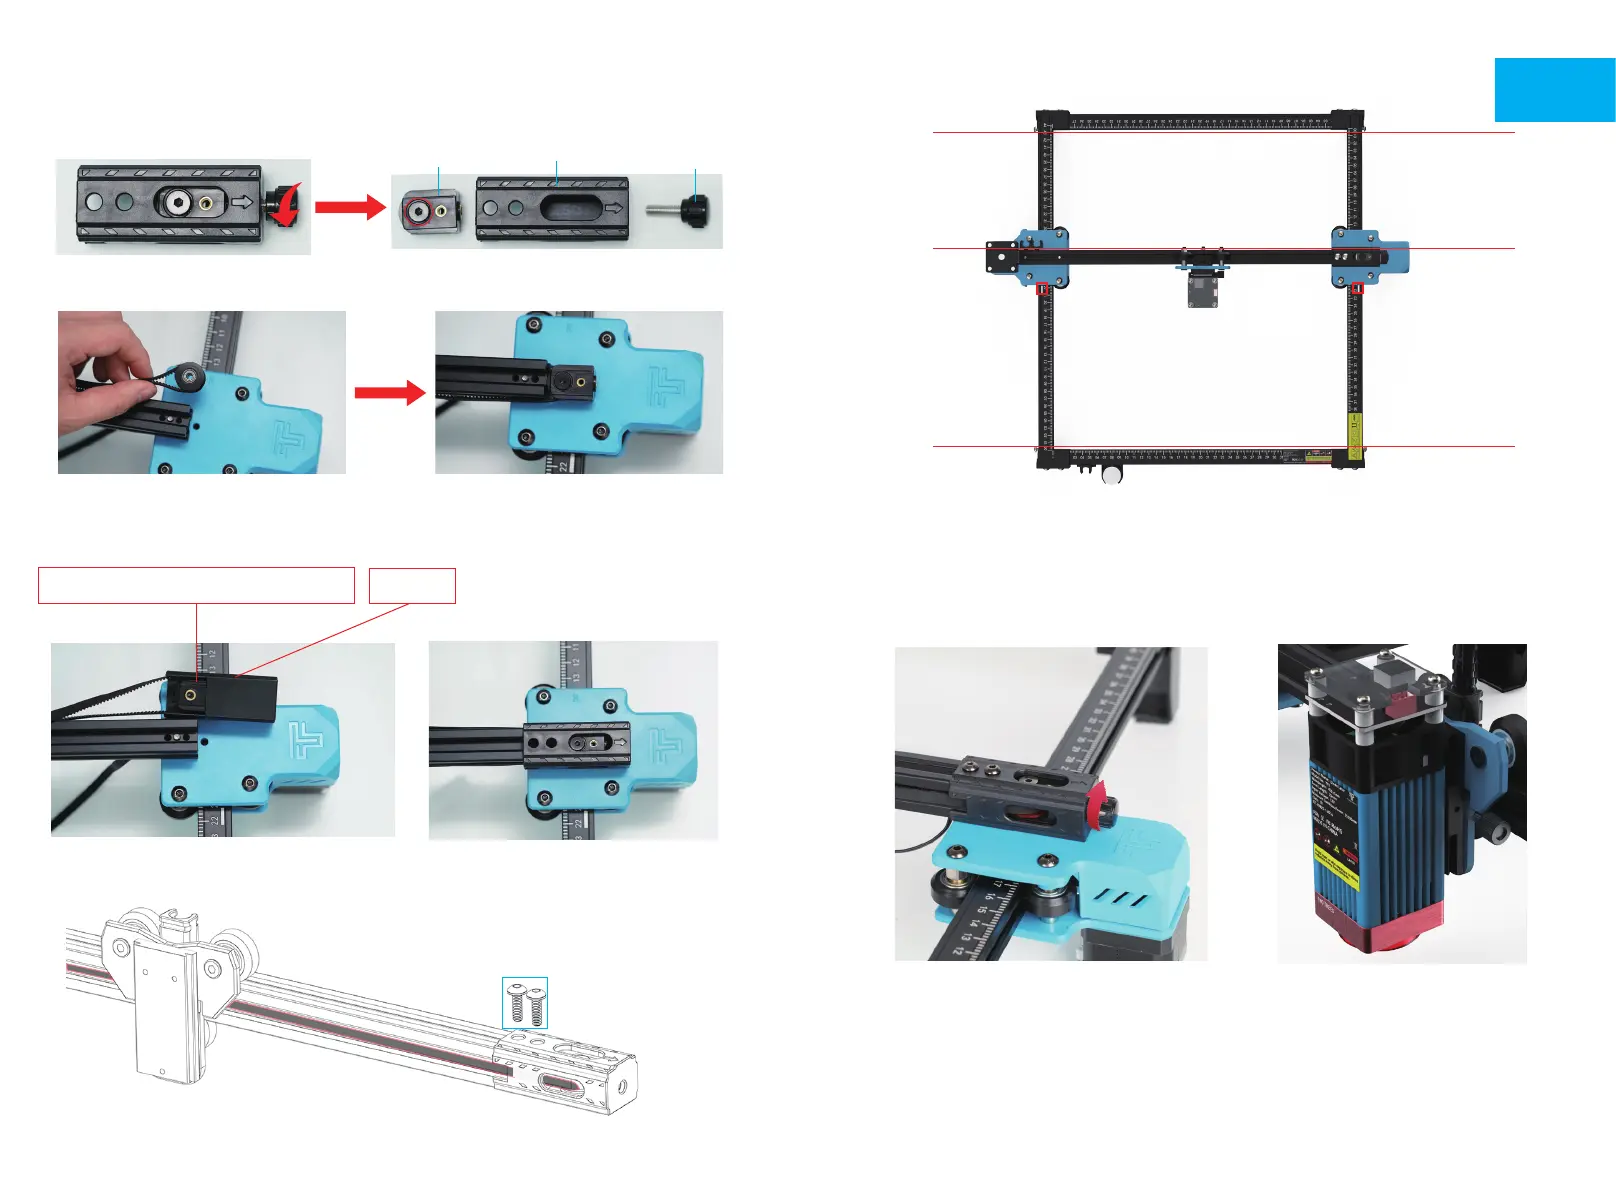
3.5 Tensioner Installation
Tensioner
Internal parts
Tensioner
shell
Thumb
screws
① You need to disassemble the tensioner first, unscrew the hand screw of the tensioner
to take out the Tensioner Inner Parts and unscrew the top screw to take out the idler.
② Put the timing belt of the carriage on the idler of the tensioner, and then lock the
screw to the inner part of the tensioner
③ Push the tensioner internals into the tensioner housing shell (Tensioner has a fixed
slot, pay attention to the installation method)
Tensioner has slot, pay attention to assemble them in
right direction and push them in into the right position
Tensioner
housing shell
screw M4*20 x2
④ Lock up the tensioner retaining screws
The teeth of the timing belt should face the guide groove
M4*20
EN
Note: When installing, please make sure that the X-axis beam is parallel to the front and
rear beam profiles. You can use the rectangle on the scale for auxiliary adjustment.
Without parallelism, the Y-axis will be difficult to move and affect the engraving effect.
4. Adjust the X-axis beam to make sure it is parallel with the front
and back frame.
5. Tighten the X-axis synchronous belt.
Tighten the thumb screw
Note:
Synchronous belt needs to be tightened, otherwise it
may cause the problem of engraving misalignment.
Thumb screw
Note: Install the laser module
at a vertical angle (90°).
Note:
① It is the most appropriate position to feel a
little friction between the POM wheel and the profile
when rotating the POM wheel.
② If the wheel rotates in the air and does not fit
the profile, the eccentric nut can be adjusted
clockwise from the direction of the screw head with
an open-end wrench.