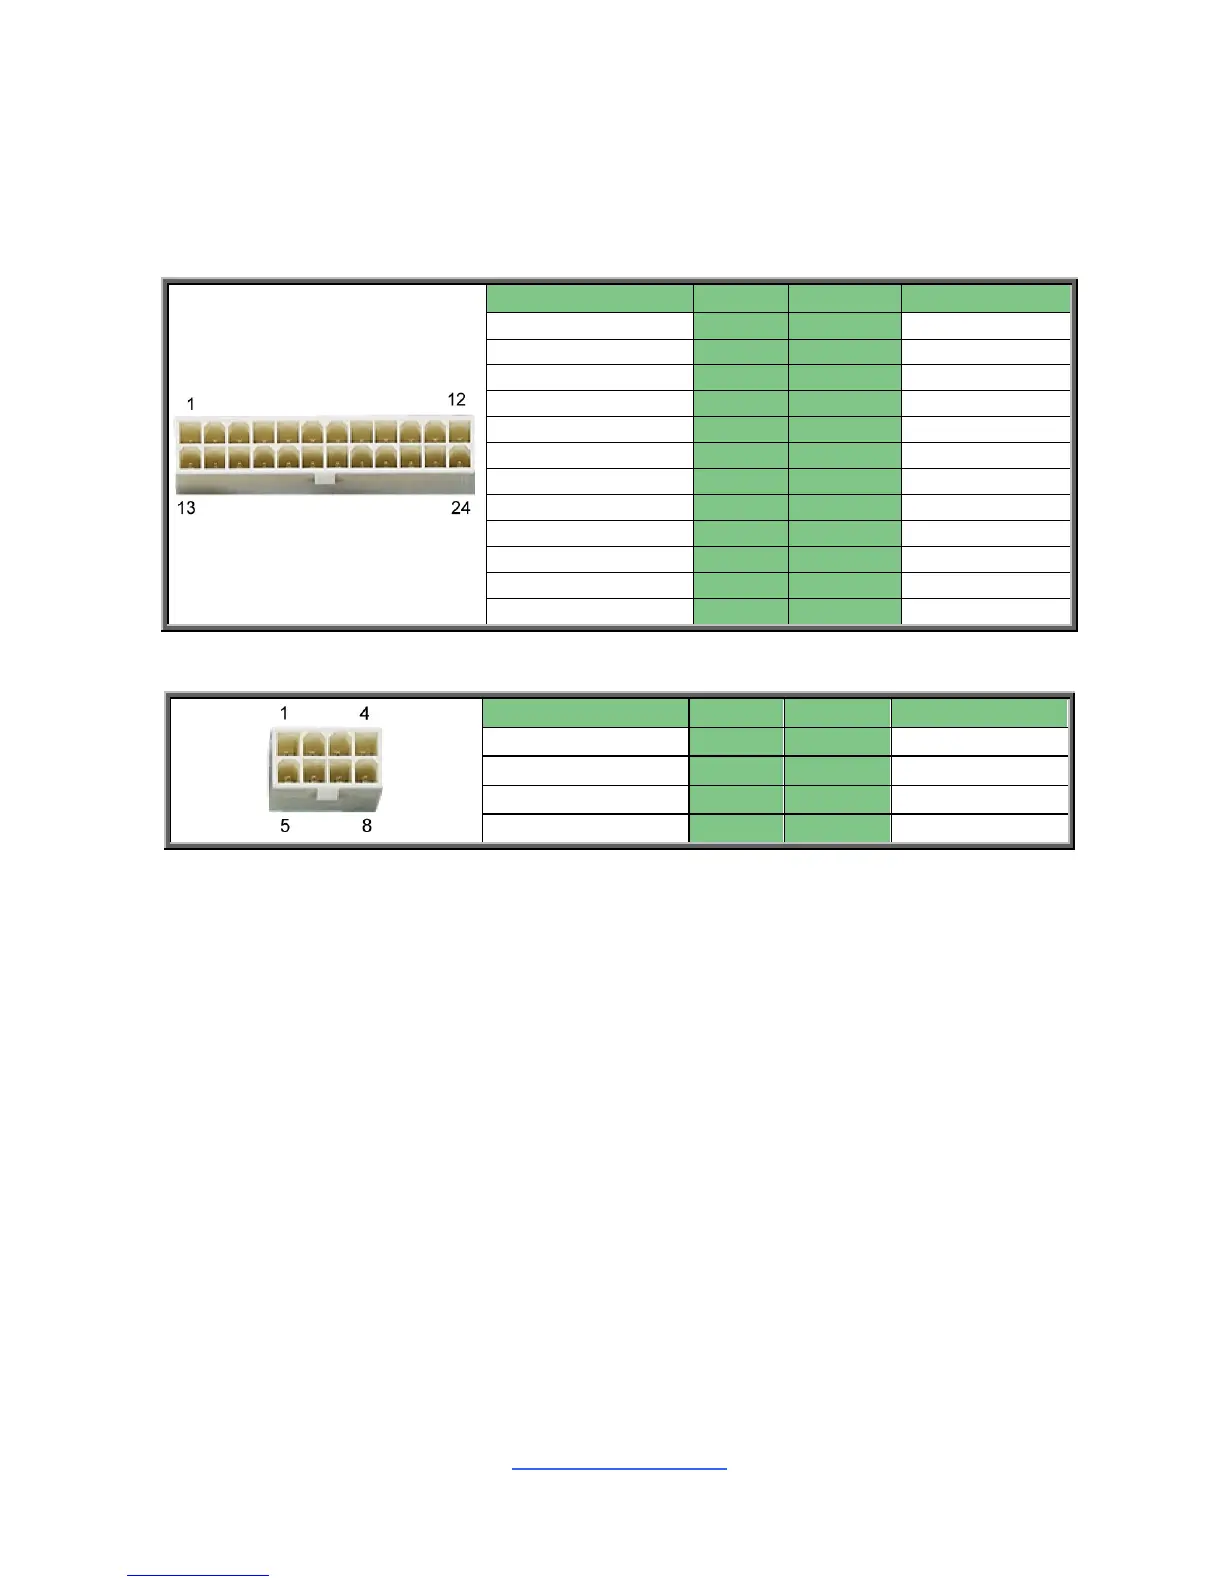
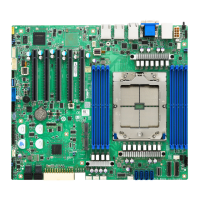
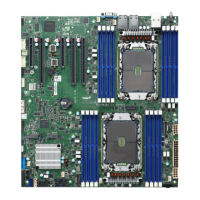
2.13 Installing the Power Supply
There are Three (3) power connectors on your S8026 motherboard. The S8026
supports EPS 12V power supply.
PWR1: ATX 24-Pin Power Connector
2.14 Finishing Up
Congratulations on making it this far! You have finished setting up the hardware
aspect of your computer. Before closing up your chassis, make sure that all cables
and wires are connected properly, especially SATA cables and most importantly,
jumpers. You may have difficulty powering on your system if the motherboard
jumpers are not set correctly.
In the rare circumstance that you have experienced difficulty, you can find help by
asking your vendor for assistance. If they are not available for assistance, please find
setup information and documentation online at our website or by calling your vendor‟s
support line.