3/4
Customer Support: www.TygerAuto.com/Contact
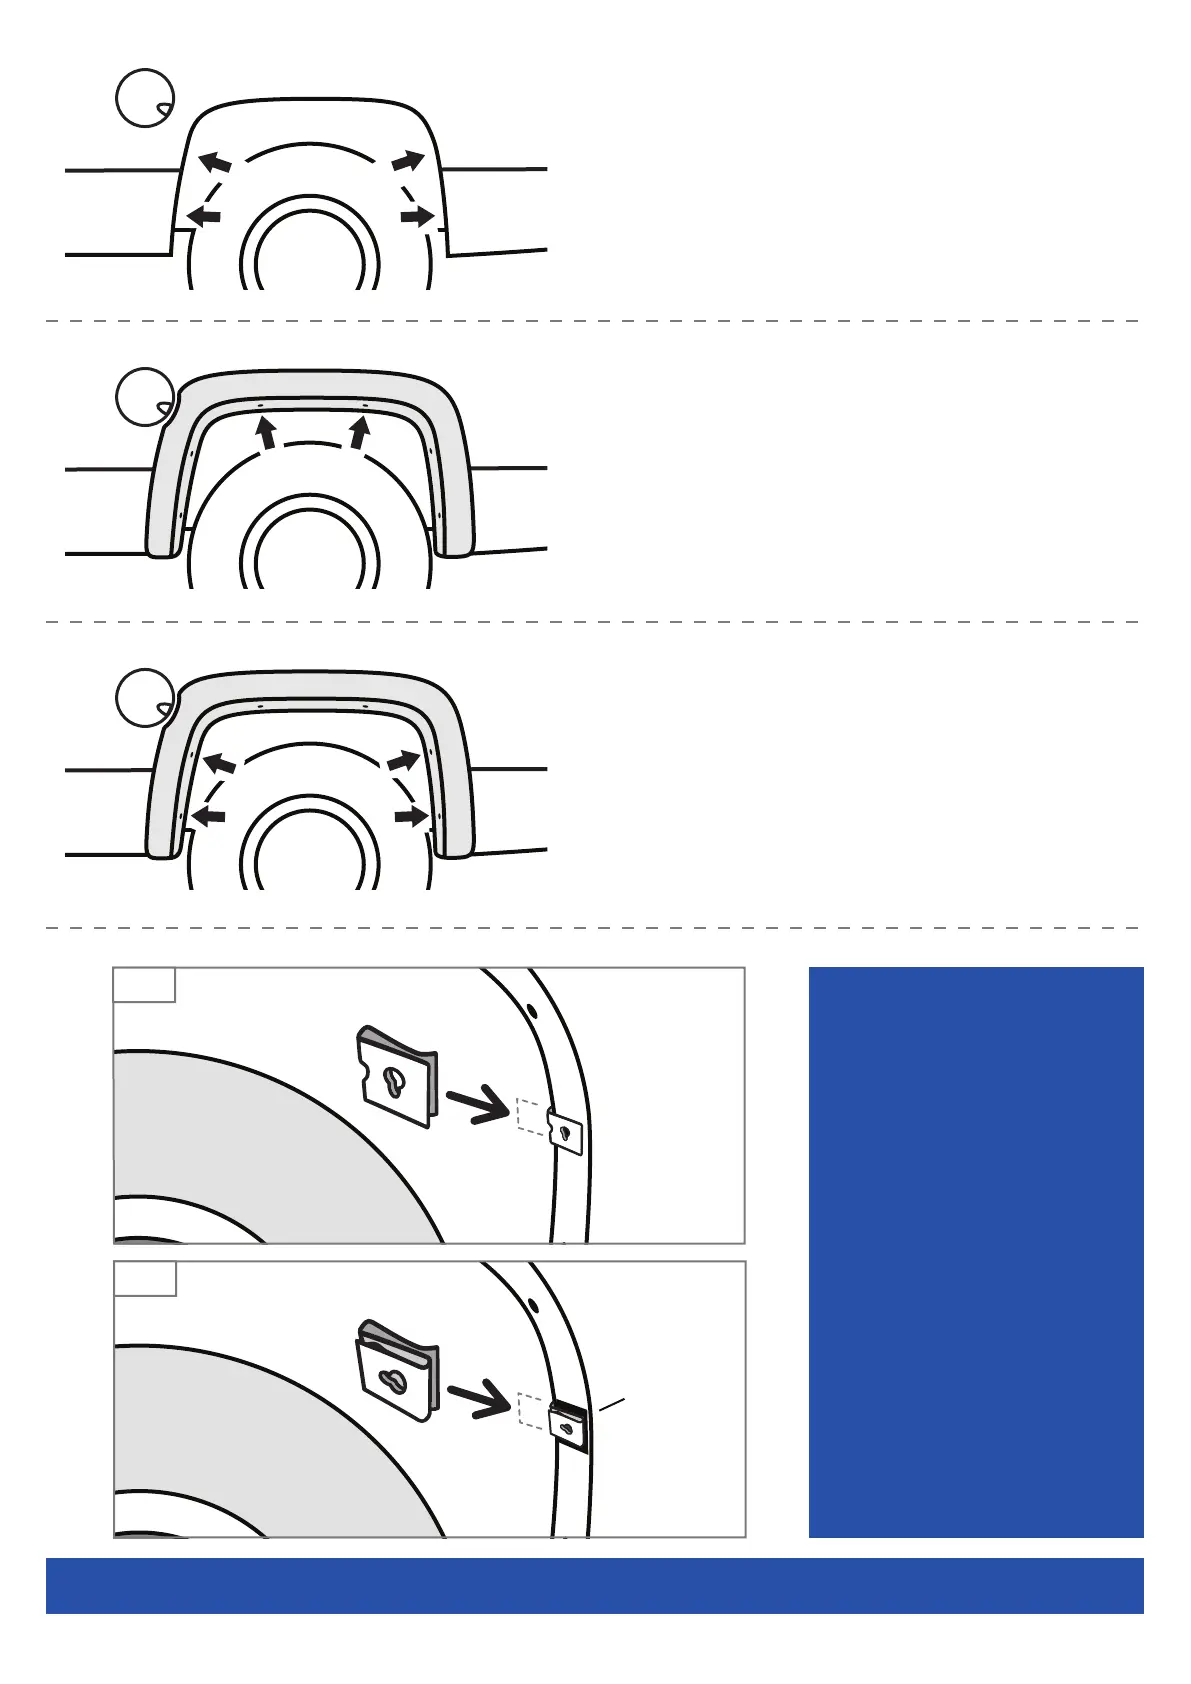
(5) Stick the supplied Tabs [B] over the other 4 marks made in
Step 3, align one side of the Tab with the inside edge of the fender
lip.
(6) Slide the supplied S-Clip [C] over each Tab installed in Step 5.
Refer to Fig 2 on the last page.
NOTE: S-clips on the bottom may need to be pinched in order to
stay in position on the fender.
(7) Reposition flare. Install 2 supplied PH Truss Tap Screws [D]
through top 2 holes in flare, into U-clips installed in Step 4, and into
vehicle's factory holes. Do not tighten.
(8) Install 4 supplied PH Metal Screws [E] through remaining holes
in flare and into S-clips installed in Step 6. Ensure proper flare
fitment, then tighten all screws.
Repeat Step 3 - 8 for rear passenger side flare installation.
Fig 1
Fig 2
Tab
[B]
• All exposed fasteners and
bare metal should be treated
with rust resistant paint before
installing flares. Spray inner
fender wells with undercoat-
ing after flare installation.
• Modifications may be neces-
sary to maintain a minimum 4”
clearance between flares and
exhaust pipes. (Exhaust gases
should not vent directly onto
flares)
• For vehicle with large tires
may require lowering bump
stops and/or installing steer-
ing stops to prevent tire from
contacting flare.
EXTRA NOTES