6
WARNING!
• Make sure that there are no non-unsuitable object on top of the heater or
in the sauna room before starting the sauna heater.
• Do not cover the sauna heater. This creates a fire hazard.
• Do not touch the top of the heater. This will cause severe burns.
• Incorrect ventilation or an incorrectly located sauna heater can, under certain
circumstances, cause excessive drying of the wood in the sauna and create a
fire hazard.
• Cover sauna floors with a non-slip material.
• Never hose down the sauna.
• There must always be at least 50 mm insulation directly behind the wood
panelling in the sauna (no other material may be used, such as particle board,
plaster, etc).
• Sauna doors must always open outwards. All that should be needed to open
the sauna door is just a little light pressure.
• Do not use the sauna for any purpose other than sauna bathing.
• Do not install more than one sauna heater in a sauna room, unless you follow
exactly the special instructions for twin-heater installations.
• Sauna fragrances, etc. may ignite if poured undiluted into the stone
compartment.
• Never leave young children unattended in the sauna.
• Sauna bathing is not always suitable for persons in poor health. Consult your
doctor for advice.
• Store this information in a safe place.
INSTALLATION
Fig. 1.
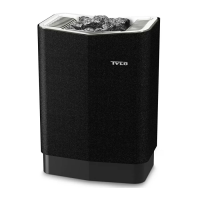
Sauna heater Tylö MPE with separate control panel. The control panel is
mounted on the wall inside the sauna room, no more than 1000 mm above
floor level.
Fig. 2.
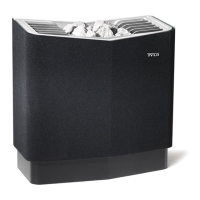
Tylö Sport sauna heater with integral control panel.
Fig. 3.
Tylö SK, SE, SD or SDK sauna heater with separate TS or CC control
panel (type SE only uses a CC panel).
Installing the sauna heater.
The sauna heater should be placed on the same wall as the door, see
figure 13. In an exceptional circumstance, the heater may be placed on a
side wall, but as close as possible to the wall with the door. Fit the heater
270 mm above the floor, observing the regulations for the minimum
distance to the side wall. You can use the box which contains the sauna
stones to help you when installing Tylö heaters. When placed on its short
end, the box is 270 mm high.
Tylö sauna heaters are connected by a standard cable (Fk or EKK)
approved for permanent installation. The cable (EKK) or conduit is laid on
the outside of any heating insulation; see figs. 9, 10 and 11. A single-core
cable (Fk) should be protected by a plastic conduit up to the heater, or in
flexible metal conduit with internal insulation.
When the heater has been installed, a set screw (I, figs. 9, 10 and 11)
locks it in place so that the heater cannot be removed from the wall.
Fig. 4 – Minimum safety distances.
A = standard installation. B = recess installation. Please refer to the table
for minimum distances to side wall (X,Y). When installing SK, SE, SD,
MPE or SDK sauna heaters in a recess, the sensor (C) should be placed
250 mm from the rear wall of the recess and 1500 mm above floor level.
Fig. 5 – Minimum safety distances.
Minimum distance to sauna fittings in front of a sauna heater.
Fig. 6 – Sauna
(Sauna heater types SK, SD, SDK and control panel type CC).
1 = sauna heater. 2 = thermistor (sensor). 3 = control panel CC 10/
CC 50/ CC 100. 4 = external power switch (if any). 5 = distribution box. 6 =
relay box RB30/60.
Fig. 7 – Sauna
(Sauna heater type MPE and control panel type CC MPE).
1 = sauna heater. 2 = thermistor (sensor). 3 = control panel CC MPE. 4 =
distribution box.
Fig. 8 – Sauna
(Sauna heater type SE and control panel type CC).
1 = sauna heater. 2 = thermistor (sensor). 3 = control panel CC 10/ CC 50/
CC 100. 4 = external power switch (if any). 5 = distribution box.
Fig. 9 – MPE.
A = electric conduit. B = wooden panel. C = insulation behind control
panel. D = sensor. E = capillary tube/thermistor wire. F =
separate
control panel (MPE CC). G = vent. H = wooden batten. I = set screw.
Fig. 10 – Sport.
A = electric conduit. B = wooden panel. C = insulation. D = built-in sensor.
F = built-in control panel (Sport). G = vent. H = wooden batten. I = set
screw.
Wiring diagram, fig. 21, 31, 37.
Fig. 11 – SK, SE, SD and SDK.
A = electric conduit. B = wooden panel. C = insulation behind control
panel. D = sensor. E = capillary tube/thermistor wire. F = TS separate
control panel (CC panel in folded figure). G = vent.
H = wooden batten. I = set screw.
Amperage and conductor area:
kW
230-
240V 3~
230-
240V~
400-
415V 3~
400-
415V 2N~
200-208V~ 200-
208V 3~
amp mm² amp mm² amp mm² amp mm² amp mm² amp mm²
6,6 17 4 29 10 10 1,5 - - 33 10 19 4
8 20 4 35 10 12 2,5 - - 40 16 23 6
10,7 27 10 47* 16* 16 2,5 - - - - 31 10
16 40 16 - - 23 6 - - - - 47 16
20 50 16 - - 29 10 - - - - 58 25
*) 10,7 kW not approwed for single-phase in Europe.
Volume and minimum installation distances:
Sauna volume Min. distance from side wall (mm)
Minimum
ceiling height
kW min/max m³ standard installation
“X”
recess installation
“Y”
in sauna (mm)
6.6 4 – 8 110 200 1900
8 6 – 12 110 200 1900
10.7 10 – 18 150 200 1900
16 15 – 35 150 350 2100
20 22 – 43 150 350 2100
*) Saunas with a heater installed in a recess must have a minimum volume of 4 cu.m.
Sauna heater – separate control panel combinations
Heater Suitable control panel
model
230-240V 3~ 230-240V~ 400-415V 3~ 200-208V~ 200-208V 3~
SE 6,
SE 8
CC 10, CC 50,
CC 100
CC 10, CC 50,
CC 100
CC 10, CC 50,
CC 100
CC 10, CC 50,
CC 100
CC 10, CC 50,
CC 100
SK 6,
SK 8,
SD 10,
SDK 10
TS 30,
CC 10 / RB 30,
CC 50 / RB 30,
CC 100/RB30
*TS 30,
CC 10 / RB 30,
CC 50 / RB 30,
CC 100 / RB30
TS 16, TS 30,
CC 10 / RB 30,
CC 50 / RB 30,
CC 100 / RB30
*TS 30,
CC 10 / RB 30,
CC 50 / RB 30,
CC 100 / RB30
TS 30,
CC 10 / RB 30,
CC 50 / RB 30,
CC 100 / RB 30
SD 16
TS 58 -12 RB
CC 10 / RB 60,
CC 50 / RB 60
CC100 / RB 60
-
TS 30,
CC 10 / RB 30,
CC 50 / RB 30,
CC 100 / RB 30
-
TS 58 -12 RB
CC 10 / RB 60,
CC 50 / RB 60
CC100 / RB 60
SD 20
TS 58 -12 RB
CC 10 / RB 60,
CC 50 / RB 60
CC100 / RB 60
-
TS 58 -12 RB
CC 10 / RB 60,
CC 50 / RB 60
CC100 / RB 60
-
TS 58 -12 RB
CC 10 / RB 60,
CC 50 / RB 60
CC100 / RB 60
*) 10,7 kW not approwed for single-phase in Europe.
Installation of separate control panels.
Must be assembled outside the sauna. Control panel type TS or CC + RB
is required for Tylö SK, SD and SDK heaters. The Tylö SE sauna heater
must be combined with separate control panel CC.
TS-type control panels
TS panels are thermally operated and have a patented divided output.
They can either be surface-mounted or recessed for a flush fit (fig. 11). It is
essential to fit insulation behind control panels recessed into the wall. The
standard length of the capillary tube is 1850 mm, but a 5000 mm capillary
tube is also available.
Installing a sensor for a TS control panel (fig. 12). A = capillary tube. B =
sensor holder. C = plastic holder for capillary tube. D = sensor that is
installed 1500 mm above floor level (fig. 11, not above the sauna heater).
Extra equipment for the TS control panel.
Locking cover in transparent plastic to fit over the control panel. Available
in designs to prevent unauthorised interference with time and temperature
settings, or temperature only.
Figs. 22–26, 32, 33, 38 Wiring diagrams.
(With sauna heater SK, SD, SDK and control panel TS).
1 = sauna heater. 2 = control panel. 3 = relay box.
Check the heater’s type identification plate to ensure that the heater is
connected to the right voltage. Don’t forget – The installation must be
earthed!
Remote control operation.
TS control panels use contactors for remote control operation.