3
Fig. 16. Recommendations for sauna construction:
A. Floor frame, corner posts, studs, ceiling frame.
B. Battens, rafters, vents.
C. 3 in. mineral wool as heat insulation, approx. 3/4 in. air gap between insulation
and outer wall.
D. 1/2 in. wooden panel in walls and ceilings. There should always be at least 3 in. of
insulation behind the wooden panel; no other material, such as particle board or
plaster, may be used.
E. Bonded, non-slip plastic floor-covering, extending approx. 2 in. up the walls behind
the wooden panelling.
F. Inlet vents should always be fully open. May be fitted with a shuttered vent on the
outside.
G. Outlet vent, can be fitted with a sliding hatch to adjust through-flow.
H. Benches of at least 7/8 in. thick knot-free pine (alternatively aspen, lime or
obeche).
I. Drainage channel (recommended in public saunas). Never place a drainage
channel or drain under the sauna heater.
Fig. 17. Heater guard.
The stones and the top of the sauna heater get very hot! In order to reduce the risk of
accidental contact, Tylö always recommend that a heater guard be fixed as shown in
the sketches.
Some words of advice:
• There should never be a drain in a sauna. However, all public saunas should have
a drainage channel (I, fig. 16) connected to a drain out-side the sauna (no drainage
channel is needed in a private sauna).
• If the sauna has a window in the door or wall, treat the lower molding with boat
varnish and seal the joint between the glass and the molding with a water-resistant
silicone sealant. This prevents any condensation on the glass from seeping into the
wood.
• Varnish the threshold and door handles a few times with boat varnish to maintain
the finish and simplify cleaning the sauna. Benches, decorative edging and back
supports should be oiled on both sides with Tylö sauna oil (this is particularly
important in the Tylarium).
Note: All other wood in the sauna should be untreated.
• Install floor decking only if the floor is slippery. Floor decking is impractical and
prolongs the drying time for any water spilt on the floor.
• Treat the bucket and ladle with boat varnish, or oil them with Tylö sauna oil. The
bucket will remain watertight and the wood will be beautifully preserved. Never
leave the wooden bucket in the sauna after a sauna bath.
• Before you enjoy your first sauna bath, heat the sauna room up to 195ºF and leave
the heater to run for about 1 hour. This will rid the room of that “new” smell.
• Clean your sauna regularly. Scrub the benches and floor with soft soap. It is a mild,
gentle detergent and leaves a pleasant fragrance.
General Information
Fig. 18. Filling the rock compartment.
Only use rocks of the dolerite type (Tylö sauna rocks), as “ordinary” rocks can damage
the unit. Fill the rock compartment around the elements from bottom to top, stacking
the rocks approx. 3 in. above the front edge at the top of the unit. Do not press the
stones into place.
Fig. 19.
Never place stones above the side air chambers. This prevents air circulation, the unit
becomes overheated and the temperature limit control is triggered.
Check the stone compartment at least once a year.
This is especially important for public saunas and saunas in frequent use. Remove all
stones from the compartment. Clean any small stones, grit, gravel and chalky
deposits from the bottom of the stone compartment. Use only stones which are whole
and intact, replacing them when necessary with new dolerite stones.
Temperature limit control.
Tylö sauna heaters have a temperature limit control built into the terminal box on the
heater. This is activated automatically if there is any risk of overheating. More often
than not, the cut-off is triggered because of incorrect sauna ventilation or an incorrectly
located sauna heater. Call an expert to reset the temperature limit control.
Fig. 20. Built-in humidifier (5.3 – 8.3 kW).
Fill the built-in reservoir with water before turning on the sauna, and you will have a
pleasantly humid sauna right from the start, which accelerates and stimulates
perspiration. You can also add a few drops of sauna fragrance to the water in the
humidifier.
Sprinkling water on the stones
Should always be done with the ladle, never with a hose or bucket.
Note: The stones must be hot.
Operating Instructions
SuperSport, Sport-U and TS
Temperature setting.
The Roman numerals indicate a rising temperature scale. Experiment to find the
temperature that suits you best. Begin for example by turning the thermostat dial to
position IV. If you later find that you would prefer a higher or lower temperature, adjust
the dial up or down until you find the ideal bathing temperature for you (usually 160-
190°F). Once you have found the right temperature, you can leave the dial on this
setting.
How to use the timer.
As standard, the sauna heaters and control panels have a 60-minute timer without
pre-set time.
Start the heater by turning the timer knob to the position ”60”. The heater turns off
automatically. You may turn the knob at any time back and forth to change the timing
or turn off the unit.
Operating Instructions
Combi-U
General
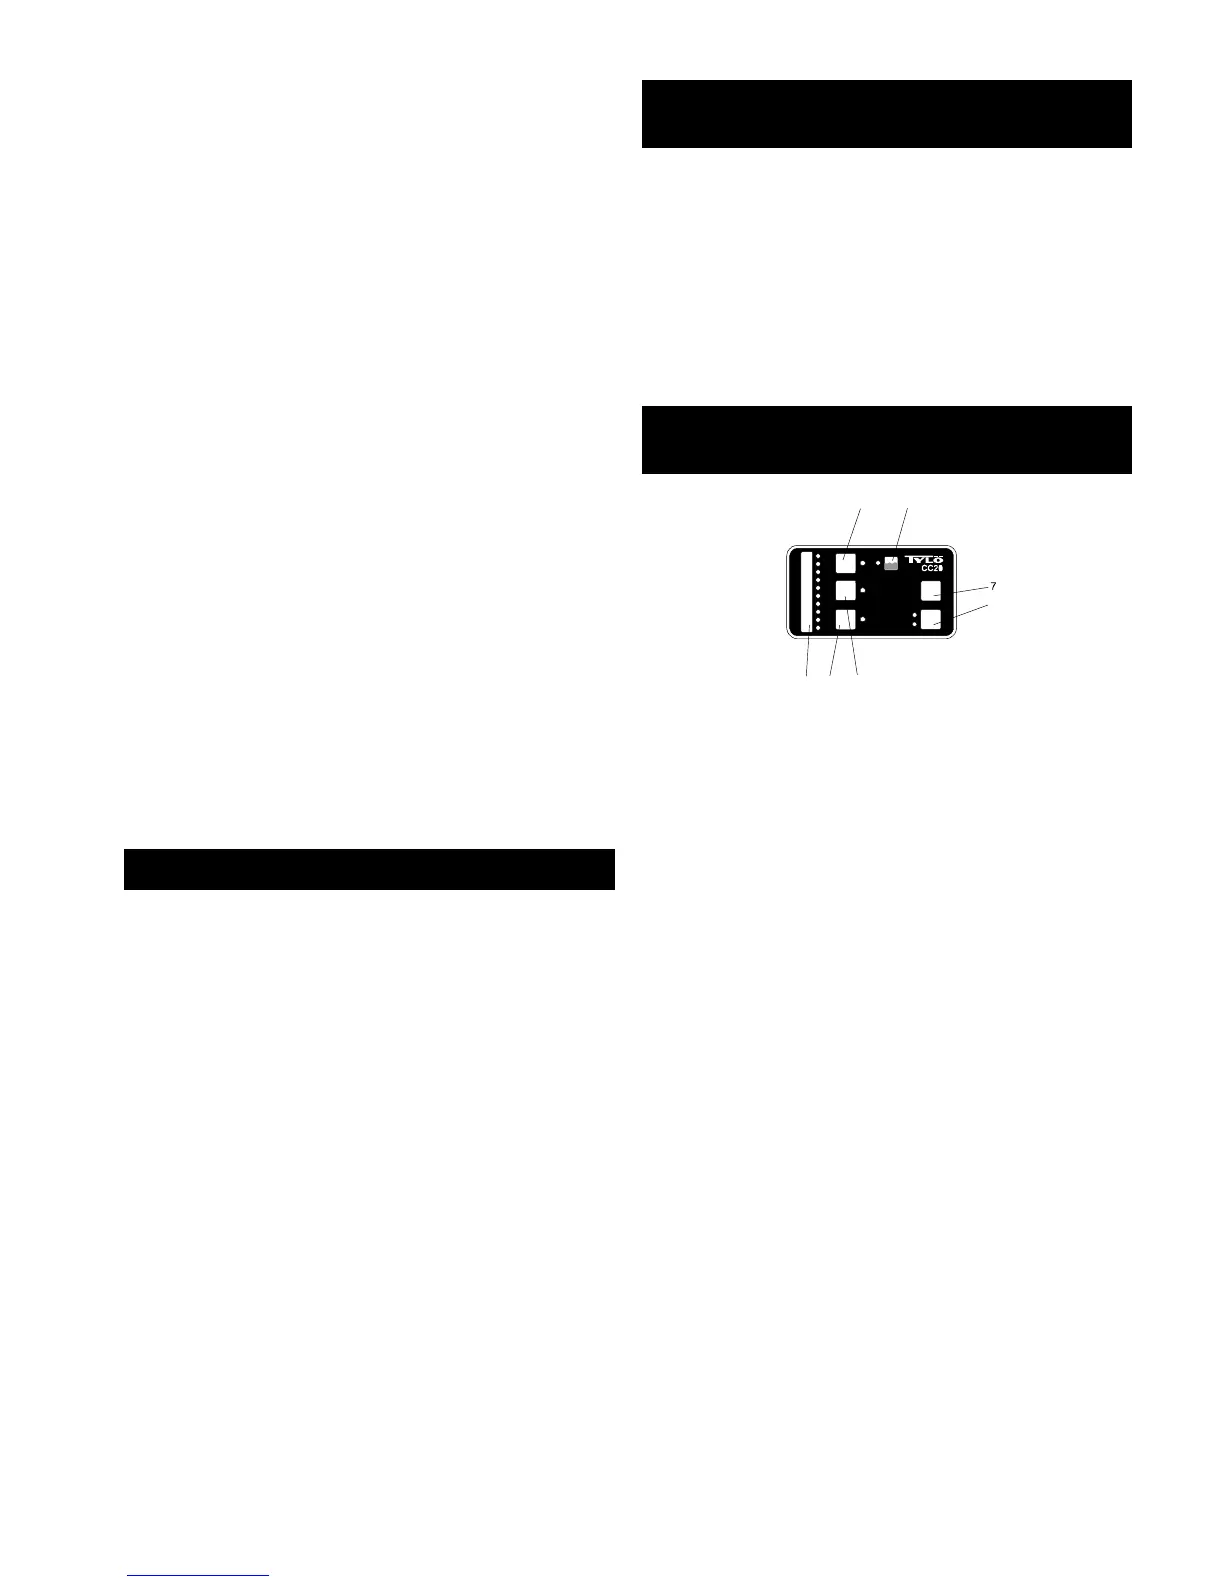
Functions.
1=setting scale. 2=time settings. 3=temperature settings. 4=humidity settings.
5=water level LED. 6=Green (on). 7=Red (off).
Main power switch.
A mains switch on the base of the sauna heater can be used to interrupt the electricity
supply to the heater. This switch should be used if the sauna will not be used for a
longer period, such as several weeks. Note: The memory function must be reset each
time the power has been interrupted.
Temperature setting.
(Unit in ON position)
Press TEMP – the previous temperature setting is displayed.
The numbers indicate a rising temperature scale. Experiment to find the temperature
that suits you best. Begin for example by setting the temperature at position 4. If you
find that you would prefer a higher or lower temperature, adjust the setting until you
find the ideal bathing temperature for you (usually 158-194°F for traditional dry and
wet sauna baths, 113-167°F for steam saunas and herbal saunas).
Humidity settings.
(Unit in ON position)
Press RH% – the previous humidity setting is displayed. The numbers indicate a rising
scale. Experiment to find the humidity that suits you best. Begin for example by setting
the humidity at position 4. If you find that you would prefer a higher or lower humidity,
adjust the dial until you find the ideal humidity for you.
Note: The electronic control logic’s limits the maximum humidity at given
temperatures.
Timer settings.
(Unit in OFF position)
The numbers in this case represent the pre-set time setting (= the number of hours
before the sauna heater automatically switches on). To set the timer:
Press TIME – to select the desired time, 1–10 hours.
Press Green (ON) – the timer is activated and the time LED flashes during the pre-
set time period. The unit will start with the sauna settings that were last used. Once
the sauna heater has been activated, it remains on for 1 hour, after which it
automatically switches off. If you want to switch it off earlier, just press Red (OFF).
Traditional sauna bathing.
Dry and wet saunas
(158-194°F, 5–30 RH%)
Press Green (ON) – only the sauna LED should be lit. The memory function
automatically sets the previous temperatureand humidity (if any).
Press TEMP – if you want to change the pre-set temperature.
The built-in timer automatically switches the sauna heater off after 1 hour. If you want
to switch it off earlier, just press Red (OFF). To extend the bathing time, press Green
(ON) – only the sauna LED should be lit.
 Loading...