PAGE 5 OF 18 1022 IH-161
TROUBLESHOOTING CONTINUED
OPERATING ISSUE RECOMMENDATIONS
Sealer stops sealing, but the sealing light still
comes on.
The heating element may need to be adjusted or
replaced.
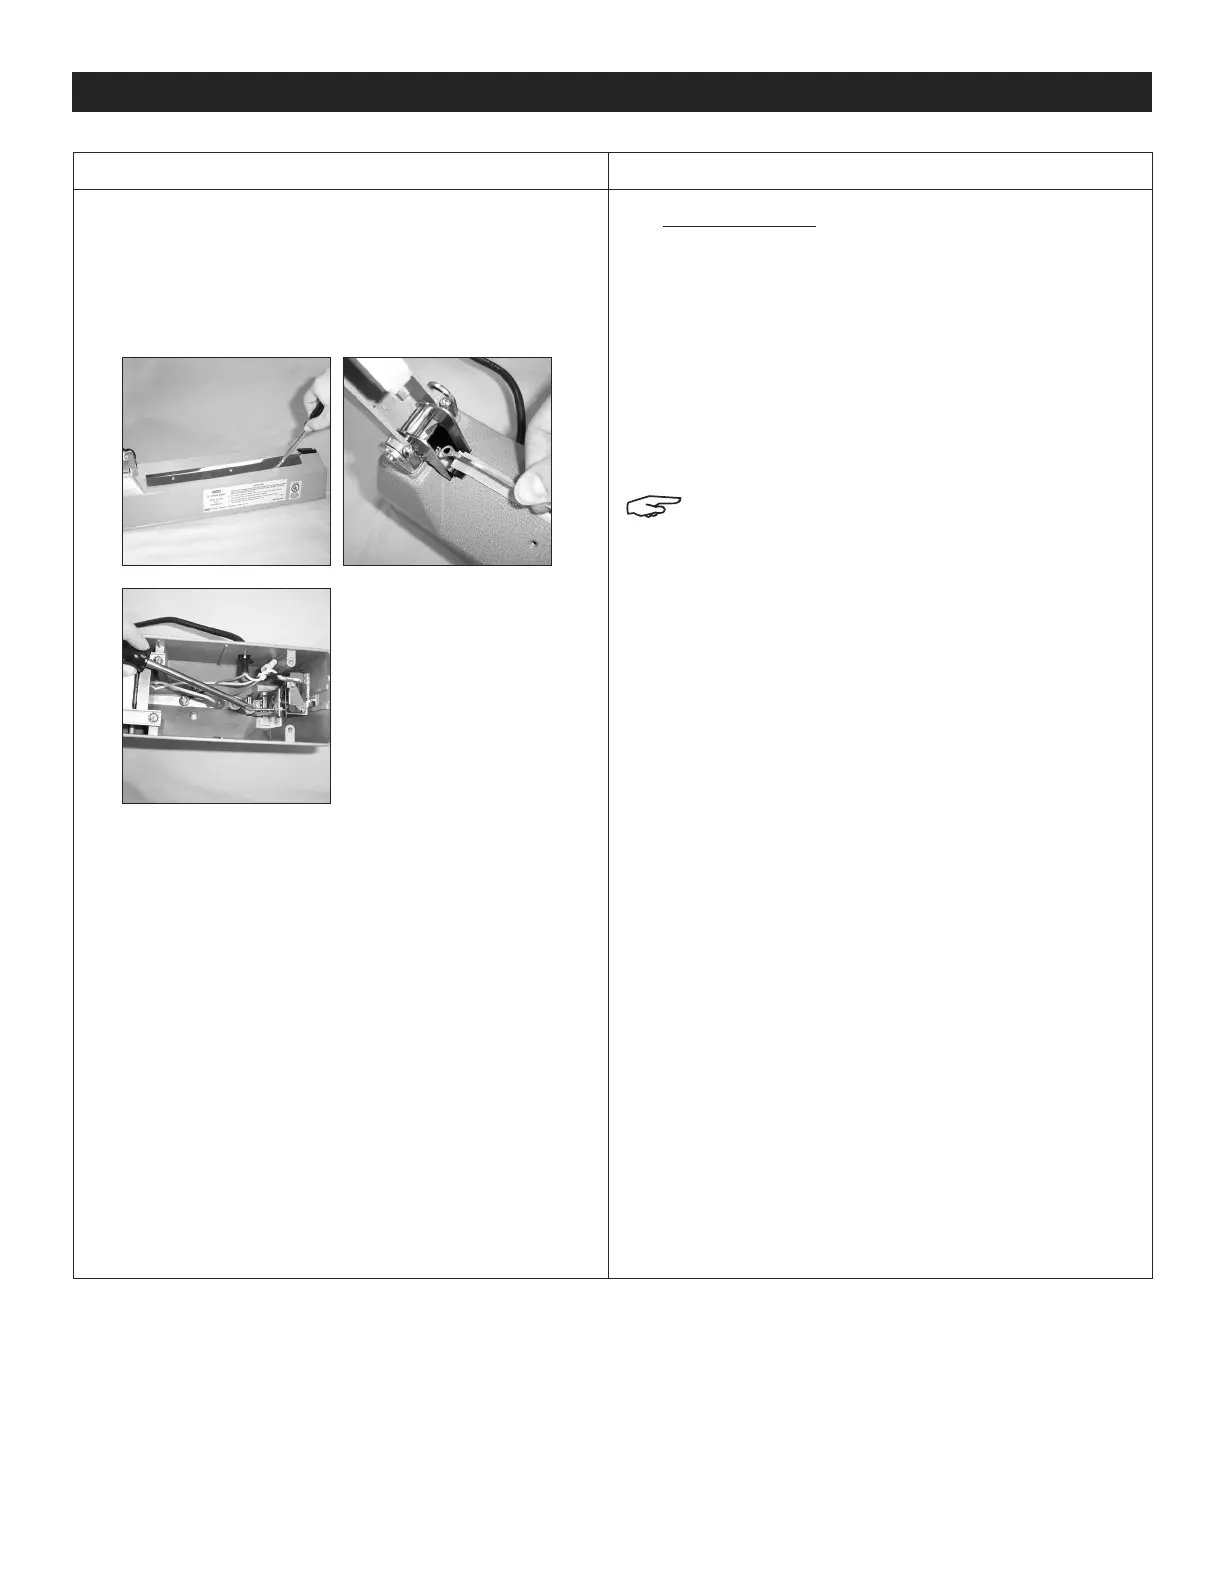
1. Unplug unit.
2. Remove metal plates and teflon strip to reveal
heating element (see photo).
3. Check to ensure element is attached at both
ends. Loop should be secured around tension rod
near arm hinge and secured by screw at outer
edge.
NOTE: If already connected at both points
and not heating, unit must be replaced.
Continue to step 4.
4. Carefully remove screw that holds the black
plastic protective cover in place.
5. Starting near the hinge, remove heating element
one end at a time by gently pulling tension rods.
6. Pull new element from included kit and place it
over tension rods starting near hinge (see photo).
7. Replace screw, teflon strip and metal plates. Plug
in unit to test.
8. If issues persist, microswitch may need to be
adjusted.
9. Check to ensure microswitch is properly aligned. If
microswitch is properly engaged, user will hear a
"click" after pressing arm down.
10. Unscrew rubber foot screws to remove bottom of
sealer.
11. Turn sealer upside down, and press down arm to
see if activation screw extends to contact black
microswitch button.
12. If it does not make contact, extend activation
screw approximately 1/16 to 1/8".
13. Continue to adjust and test until you hear a "click"
when pressing down arm.
STEP 2 STEP 5
STE P 11
 Loading...