EasyManua.ls Logo

U-Line H-747 - User Manual

U-Line H-747
4 pages
Print Icon
To Next Page IconTo Next Page
Loading...
PAGE 1 OF 4 0114 IH-670
INDUSTRIAL PLATFORM
SCALE
1-800-295-5510
uline.com
π
H-670, H-747
H-794, H-4593
1. Remove scale parts from packaging.
2. Lift the Scale Pan off the Platform Base.
3. Remove the four styrofoam blocks from the Platform
Base. (See Figure 1)
4. Replace the Scale Pan.
Figure 1
Allen Wrench Power Cord Support Bracket Tower Platform Base Display Indicator
PARTS
ASSEMBLY INSTRUCTIONS

Other manuals for U-Line H-747

Question and Answer IconNeed help?

Do you have a question about the U-Line H-747 and is the answer not in the manual?

Summary

Assembly Instructions

Initial Setup and Preparation

Prepare for assembly by unpacking parts, removing the scale pan, and clearing styrofoam blocks.

Assembly Instructions Continued

Scale Placement and Leveling

Position the scale on a stable surface and use the bubble level to adjust the feet for a level setup.

Connecting Support Bracket and Display Indicator

Thread the data cable through the support bracket, attach it to the tower, and mount the display.

Finalizing Connections

Plug the data cable and power cord into the display indicator to complete the setup.

Quick Users Guide

Counting Function Operation

Learn to use the counting function by selecting sample sizes and initiating the count.

Calibration Instructions

Activating Calibration Mode

Initiate the calibration process by adjusting the jumper switch and following on-screen prompts.

Overview

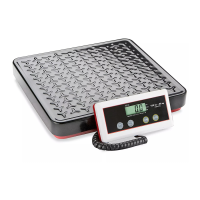
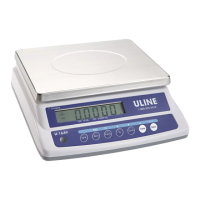
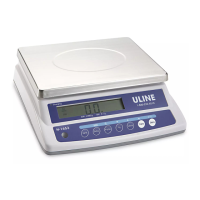
The Uline Industrial Platform Scale, available in models H-670, H-747, H-794, and H-4593, is designed for accurate weighing and counting applications in industrial settings. This robust scale is built to provide reliable measurements and features a user-friendly interface for various functions.

Function Description:

The primary function of the Uline Industrial Platform Scale is to accurately weigh items and perform counting operations. It is particularly useful for inventory management, shipping, and receiving, where precise piece counts and weights are crucial. The scale offers both weighing and counting modes, allowing users to switch between these functions as needed. In counting mode, the scale can determine the number of pieces based on a sample weight, significantly streamlining tasks involving large quantities of small items. The scale is designed to be placed on a stable, level surface for optimal performance, and its adjustable leveling feet ensure accuracy even on slightly uneven floors.

Important Technical Specifications:

The scale models H-670 and H-4593 share similar operational characteristics, as do models H-747 and H-794. The scale's display indicator provides clear readings of weight and count, along with status indicators such as "STABLE" and "charging." The counting function utilizes fixed sample sizes of 10, 20, 50, and 100 pieces. Larger sample sizes are recommended for improved accuracy in unit weight determination. The scale can display weight in both pounds (lb) and kilograms (kg), offering flexibility for different measurement standards. Power is supplied via an AC adapter, and a monitor cable connects the platform base to the display indicator.

Usage Features:

The Uline Industrial Platform Scale is designed for ease of use, from initial setup to daily operation.

Assembly:

  1. Unpackaging: Remove all scale parts from the packaging.
  2. Scale Pan Removal: Lift the scale pan off the platform base.
  3. Styrofoam Removal: Remove the four styrofoam blocks located within the platform base.
  4. Scale Pan Replacement: Place the scale pan back onto the platform base.
  5. Placement: Position the scale on a stable, level surface where it will be used.
  6. Leveling: Utilize the bubble level on the base bracket as a guide. Adjust the four leveling feet until the scale is perfectly level.
  7. Data Cable Routing: Feed the data cable from the base bracket up through the tower.
  8. Base Bracket Tightening: Secure the base bracket using the included Allen wrench.
  9. Data Cable Threading (Support Bracket): Unscrew the knob on the support bracket and separate its pieces. Thread the data cable through the support bracket.
  10. Support Bracket Placement: Once the data cable is threaded, tighten the knob and place the support bracket onto the tower.
  11. Support Bracket Securing: Tighten the bolt at the base of the support bracket.
  12. Display Indicator Attachment: Slide the display indicator onto the support bracket. Adjust the angle of the display by loosening the knob on the support bracket, then tighten the knob once the desired angle is set.
  13. Connections: Plug the data cable and the power cord into the display indicator.

Counting Function:

  1. Preparation: Before placing any object on the scale, press the "CE" key (1) to clear any previous readings.
  2. Sample Size Selection: Select a fixed sample size (10, 20, 50, or 100 pieces) using the corresponding key (2).
  3. Sample Placement: Place the selected number of samples onto the scale.
  4. Count Activation: Press the "count" key (4).
  5. Sample Removal: Remove all parts from the scale.
  6. Bulk Counting: Place the desired number of pieces onto the scale. The scale will provide an accurate count reading.
  7. Clear Scale: Remove all parts from the scale after counting.
  8. Return to Weight Display (H-670 & H-4593): Press the "UNITS" key (8) to return to the weight display screen.
  9. Return to Weight Display (H-747 & H-794): Press the "KG" key (8) to return to the weight display screen.

Calibration Instructions:

Calibration is essential for maintaining the accuracy of the scale and should only be performed using standard calibrated scale weights.

  1. Preparation: Ensure nothing is on the scale and that the scale is level.
  2. Activate Calibration Mode: Turn on the scale. While the scale counts down to zero, press and hold the "Zero" key until "02001" appears on the display.
  3. Release Zero Key: Release the "Zero" key. "F0" will appear on the display.
  4. Jumper Switch: Locate the mini jumper SWA1 under a panel on the right side of the keypad housing. Switch SWA1 to the "ADJ" (Adjust) position (down). The "Lock" position is up.
  5. Enter Key (ZEro): Press the "Enter" key. The display will show "ZEro."
  6. Enter Key (0---,-Ckg): Press the "Enter" key again. The display will show "0---,-Ckg."
  7. Unit Selection: Press the "UNITS" or "Kg" key to set the scale to either pounds (lb) or kilograms (kg) as needed for calibration.
  8. Preset Weight: Use the "Up" and "Enter" keys to preset the weight of the calibrated weight you will be using. The "Up" key increments the number, and the "Enter" key moves to the next digit. For example, to set 3.0 kg, press "Enter" three times to move three spaces, then press "Up" three times to enter "3."
  9. Place Weight: Place your calibrated weight onto the scale. The display will show "WAlt."
  10. Calibration Complete: The scale will display the weight and beep, indicating that calibration is complete. It will then automatically return to the weighing mode.
  11. Jumper Switch Reset: Switch the mini jumper SWA1 back to the "LOCK" position.

Maintenance Features:

The scale is designed for durability and minimal maintenance. Regular cleaning of the platform and display indicator is recommended to ensure optimal performance and readability. The robust construction of the platform base and tower ensures stability and longevity in demanding industrial environments. Proper handling of the data cable and power cord, as well as securing all connections, will prevent damage and ensure consistent operation. Calibration, as outlined above, is a key maintenance procedure to ensure continued accuracy. The modular design, with separate platform, tower, and display indicator components, simplifies potential troubleshooting or part replacement if necessary.

U-Line H-747 Specifications

General IconGeneral
BrandU-Line
ModelH-747
CategoryScales
LanguageEnglish

Related product manuals