Part # 3052000 (09/16/09) Page 27
SERVICING
Regular maintenance and servicing by competent and
qualied personnel is recommended for the continued safe
and ecient operation of cooking equipment.
WARNING: Before working on any appliance, SHUT OFF
the gas supply at the main shut-o valve and electrical
supply at the main disconnect. On completion of any
servicing work, test for gas leaks before returning the
equipment into service.
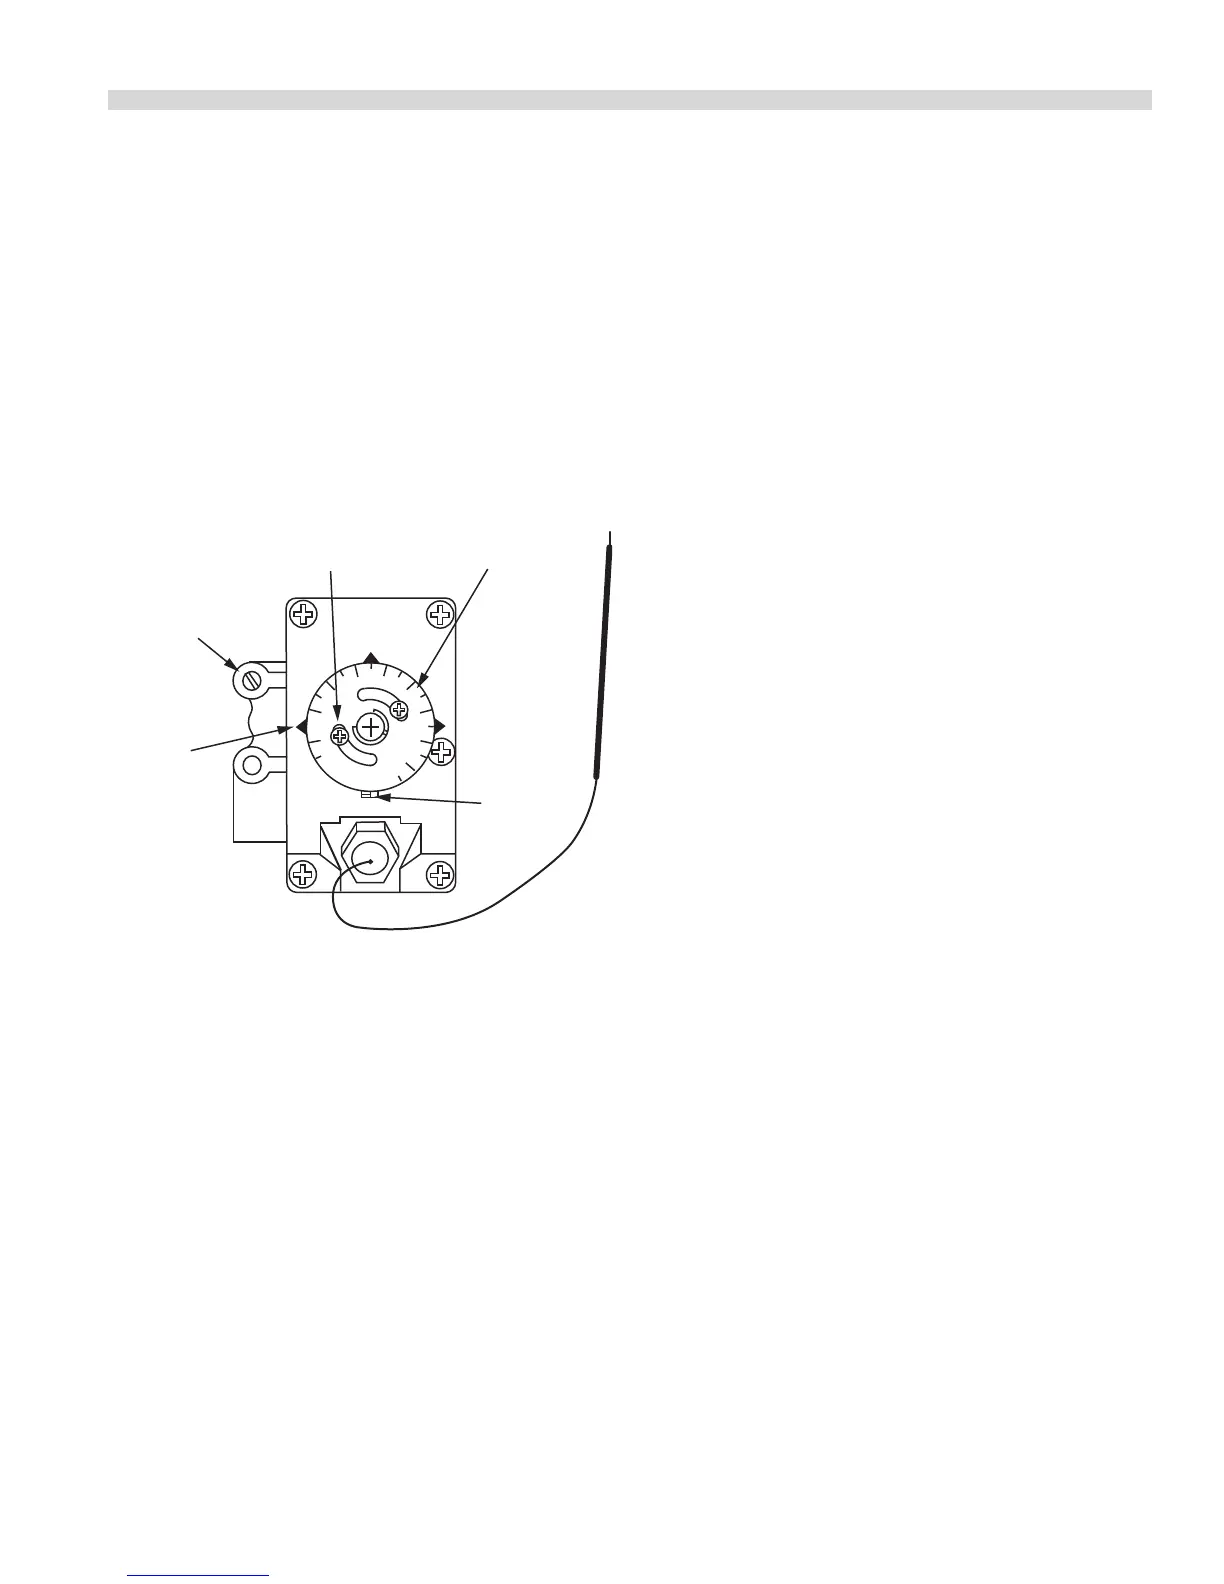
Thermostat Calibration
Oven
R
O
B
E
R
T
S
H
A
W
MODEL
FDO
1/2 PSI
By-Pass
Flame Adjuster
Indicator
Mark
Calibration
Lock Screw
Calibration
Plate
Dial
Stop
To check the calibration, follow this procedure:
1 Place the thermocouple of the test instrument or a
mercury thermometer in the center of the oven.
2. Turn the oven control dial to 400°F (202°C) to allow the
oven temperature to stabilize. Allow the oven to cycle
twice before taking a test reading.
3. Check the temperature reading when the control cuts
down to bypass. If the temperature does not read within
15° (5°C) of the dial setting recalibrate as follows.
4. Remove the control dial, making sure not to disturb the
setting.
5. Hold the calibration plate and loosen the two calibration
lock screws until the plate can be rotated independently
of the control.
6. Turn the calibration plate until the temperature indicated
on the plate corresponds with the reading of a test
instrument. Hold the plate and tighten the screws rmly.
7. Repeat the temperature reading and check when the
control cuts down to bypass to make sure the correct
adjustment has been made.
Cleaning/Servicing Burners
Open-Type Burners
1. Life and remove the pan open top grate
2. Lift the front burner and slide it backwards o the orice
3. Remove the rear burner in the same manner.
4. Clean the burners in hot soapy water with a sti
scrubbing brush.
5. Rinse the burners and shake them well to remove the
water.
6. Make sure the gas ports are free of debris. Clear ports of
debris if necessary.
7. Reassemble the units in reverse order.
Front Fired Solid Top Burners
1 Remove the key plates from the top of the range.
2. Remove the two screws that retain the air shield in place
and remove shield.
3. Lift the burner to disengage the locating peg and slide it
backwards o the orice.
4. Clean the burners in hot soapy water with a sti
scrubbing brush.
5. Rinse the burners and shake them well to remove the
water.
6. Make sure the ports are free of debris. Clear ports of
debris if necessary.
7. Reassemble the burners in reverse order.
Solid Hot Plate/Griddle Burners
1 Lift o the griddle or solid plates as applicable.
2. Lift the rear of the burner and slide it backwards o the
orice.


 To Next Page