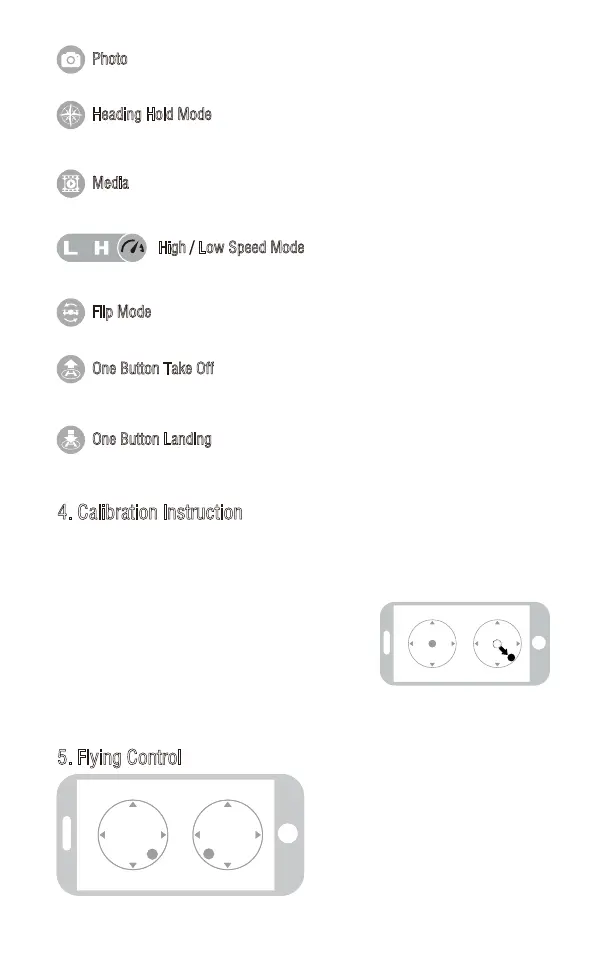
5. Flying Control
4. Calibration Instruction
If the drone becomes imbalance after crashing during the flight, and can not be
adjusted by trimmer button and cause difficult operation, please calibrate the drone.
1. Please refer to the Frequency Pairing between Mobile Phone and Drone WiFi to
calibrate the drone.
2. Do not push the Left Ball before successful
calibration. Move the Right Ball as the picture
shown on the right. The drone body lights flash,
which indicates that the drone is calibrating.
When the drone body lights get solid, which indicates successful calibration
and the drone is ready to be controlled.
Move the Left Ball and Right Ball as
picture shown at the same time to
start the drone. Or click One Button
Take Off icon to start the drone.
Click on this icon and it turns red, which indicates that the drone enter Heading Hold Mode.
Click again to exit from Heading Hold Mode. The icon turns white.
Click on this icon to take photo.
Photo
Heading Hold Mode
Click on this icon to view or delete the aerial video and photo. Click on the arrow to exit.
Media
By default, the drone is in Low Speed Mode “L”. Click on “H” to enter High Speed Mode.
High / Low Speed Mode
Click this icon, the drone will do 360° flip and the icon will turn red shortly.
Click this icon and it turns red shortly. The drone will fly up automatically and stay flying at a
altitude of 1.2 meters.
Flip Mode
One Button Take Off
Click this icon and the icon turns red, the drone will fly down slowly and land on the ground.
All propellers also will stop.
One Button Landing
18