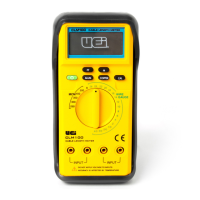
10. Turn off the 220 V AC power source to the HA1. Connect the
white “COM” cable to the common terminal of the
compressor motor.
11. Press, in turn, the “GROUND, TEST, START TEST, and RUN
TEST” switches. The appropriate indicator will light indicating
continuity in the circuit being tested. If either the run or start
winding indicate open, stop the test and replace the unit.
12. Select the appropriate motor start capacitor.
13. Press the “FAULT/CONT./START” switch to the “START”
position and, holding it there, throw the “REV/OFF/FWD” switch
to the “FWD” position. If the compressor starts, release the
“START” switch. The compressor will continue to run. The
compressor may be stopped by returning the “REV/OFF/FWD”
switch to the “OFF” position.
If the compressor does not start immediately, the rotor may be
locked. Release the “START” switch and return the
“REV/OFF/FWD” switch to the “OFF” position.
14. To “Bump” the compressor, press the “FAULT/CONT./START”
switch to the “START” position and, holding it there, throw the
“REV/OFF/FWD” switch to the “REV” position. If the
compressor starts immediately then release both switches.
Repeat step 13 to assure that the compressor will run in the
forwards direction.
If the compressor does not start immediately in reverse, then
release both switches. A locked rotor will result in excessive
current being drawn by the compressor.
15. Steps 13 and 14 may be repeated a few times in an attempt to
free a locked rotor, but care should be taken not to overheat the
motor windings. If the compressor still does not start, then it
should be replaced.
16. Turn off the 220 V AC power source to the HA1. Disconnect the
HA1 test cables from the motor.
M a i n t e n a n c e
Periodic Service
WARNING!
Repair and service of this instrument is to be performed by qualified
personnel only. Improper repair or service could result in physical
degradation of the meter. This could alter the protection from
electrical shock and personal injury this meter provides to the
operator. Perform only those maintenance tasks that you are
qualified to do.
These guidelines will help you attain long and reliable service from
your meter:
• Calibrate your meter annually to ensure it meets original
performance specifications
• Keep your meter dry. If it gets wet, wipe dry immediately.
Liquids can degrade electronic circuits
• Whenever practical, keep the meter away from dust and
dirt that can cause premature wear
• Although your meter is built to withstand the rigors of daily
use, it can be damaged by severe impacts. Use reasonable
caution when using and storing the meter
Cleaning
Periodically clean your meter’s case using a damp cloth. DO NOT use
abrasive, flammable liquids, cleaning solvents, or strong detergents as
they may damage the finish, impair safety, or affect the reliability of the
structural components.
HA1-MAN P. 4
 Loading...