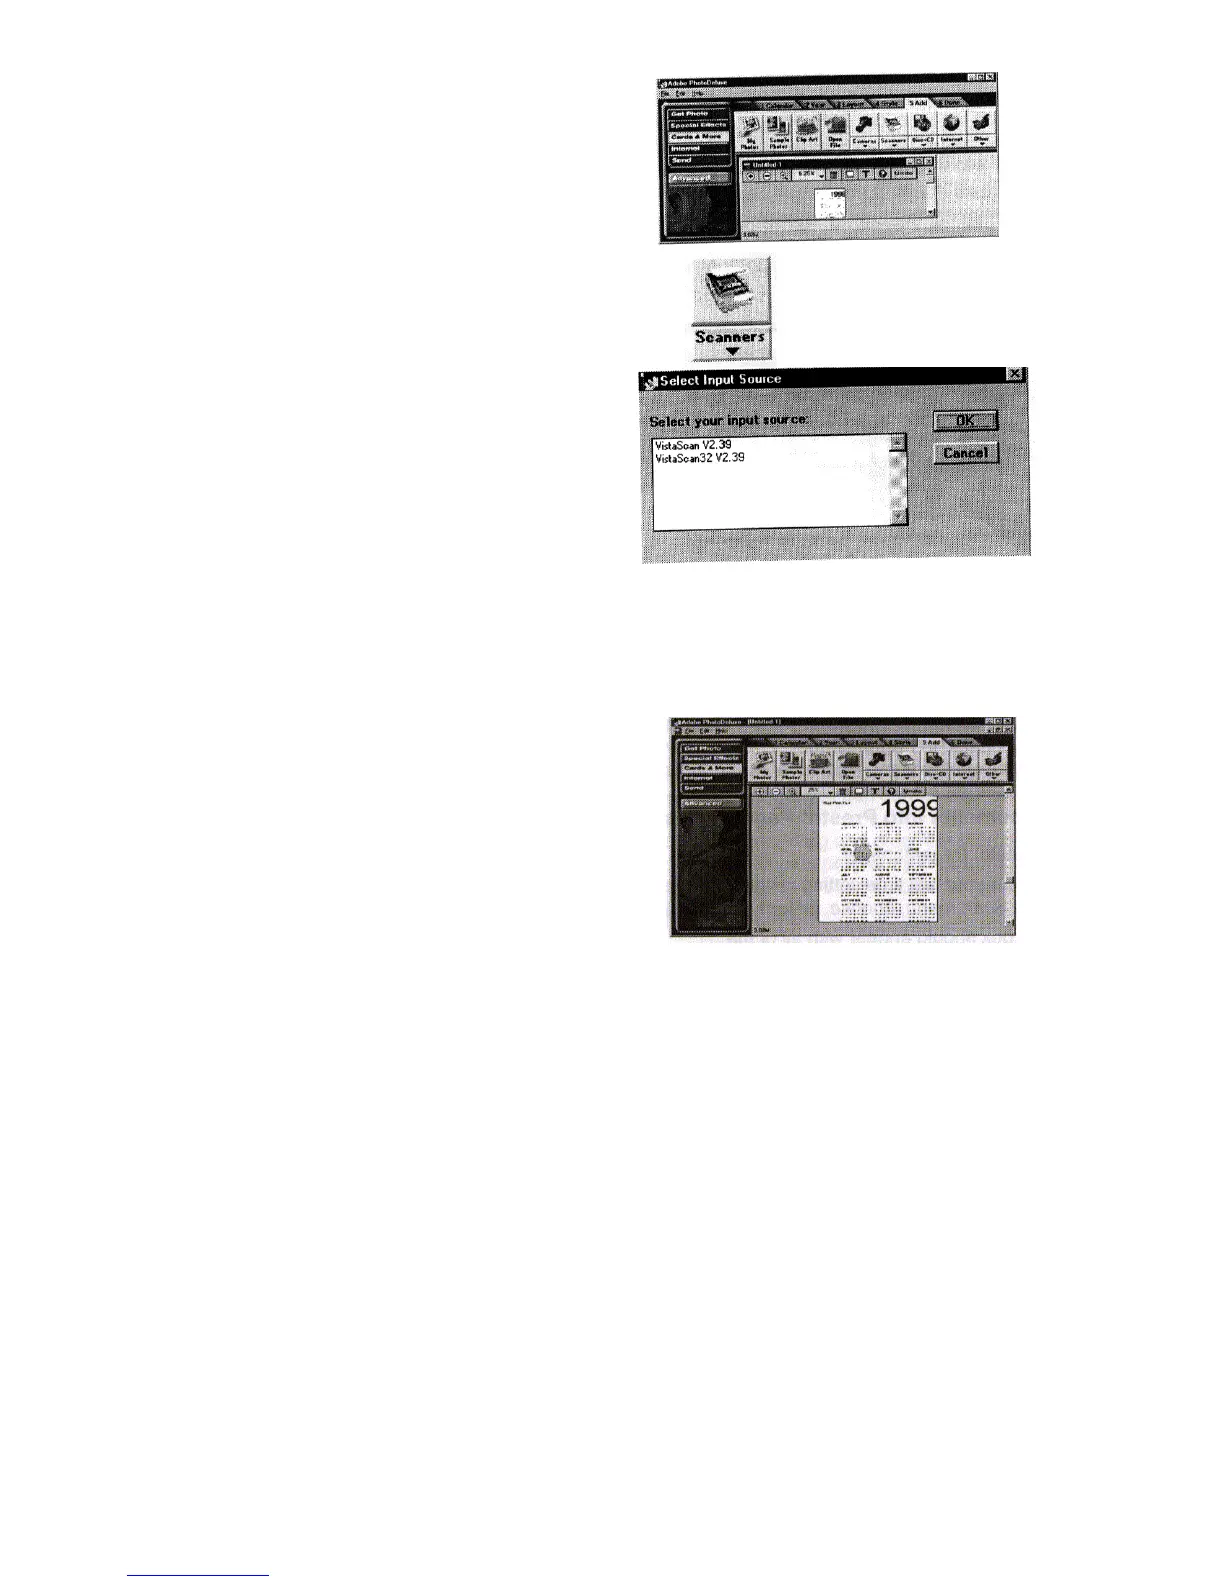
Step 3 – Clicking on the Add tab will display the set of
icons shown to the right.
Step 4 – Next, click the arrow underneath the scanner icon.
Step 5 – Select the appropriate driver from the Select
Input Source dialog box. Choose
VistaScan32 V3.1 (for Windows 95 users).
Click OK to confirm your driver.
Step 6 – Then, click the Scanner icon to acquire the image. The My photos dialog box will display a
thumbnail of the image in the Acquire dialog box. This process will ask you to enter a filename.
Step 7 – Drag the thumbnail from the Acquire section of
the My photos dialog box to the area on the
calendar you wish to place the photograph.
To save a photo into a different format or to use in a different program
Step 1 – With a photo open, complete any activity you may be using, click the Send button and then click
the To Disk Tab.
Step 2 – Click the Export button, and click the 1 Export tab.
Step 3 – Click the button that matched how the photo will be used. If you are unsure which format to save
to consult the following list.
- for World Wide Web – try .gif - for any other file format, click Other Export
- for output to a desktop publishing program – try .eps, .tiff in the Other Export tab
10
 Loading...