8
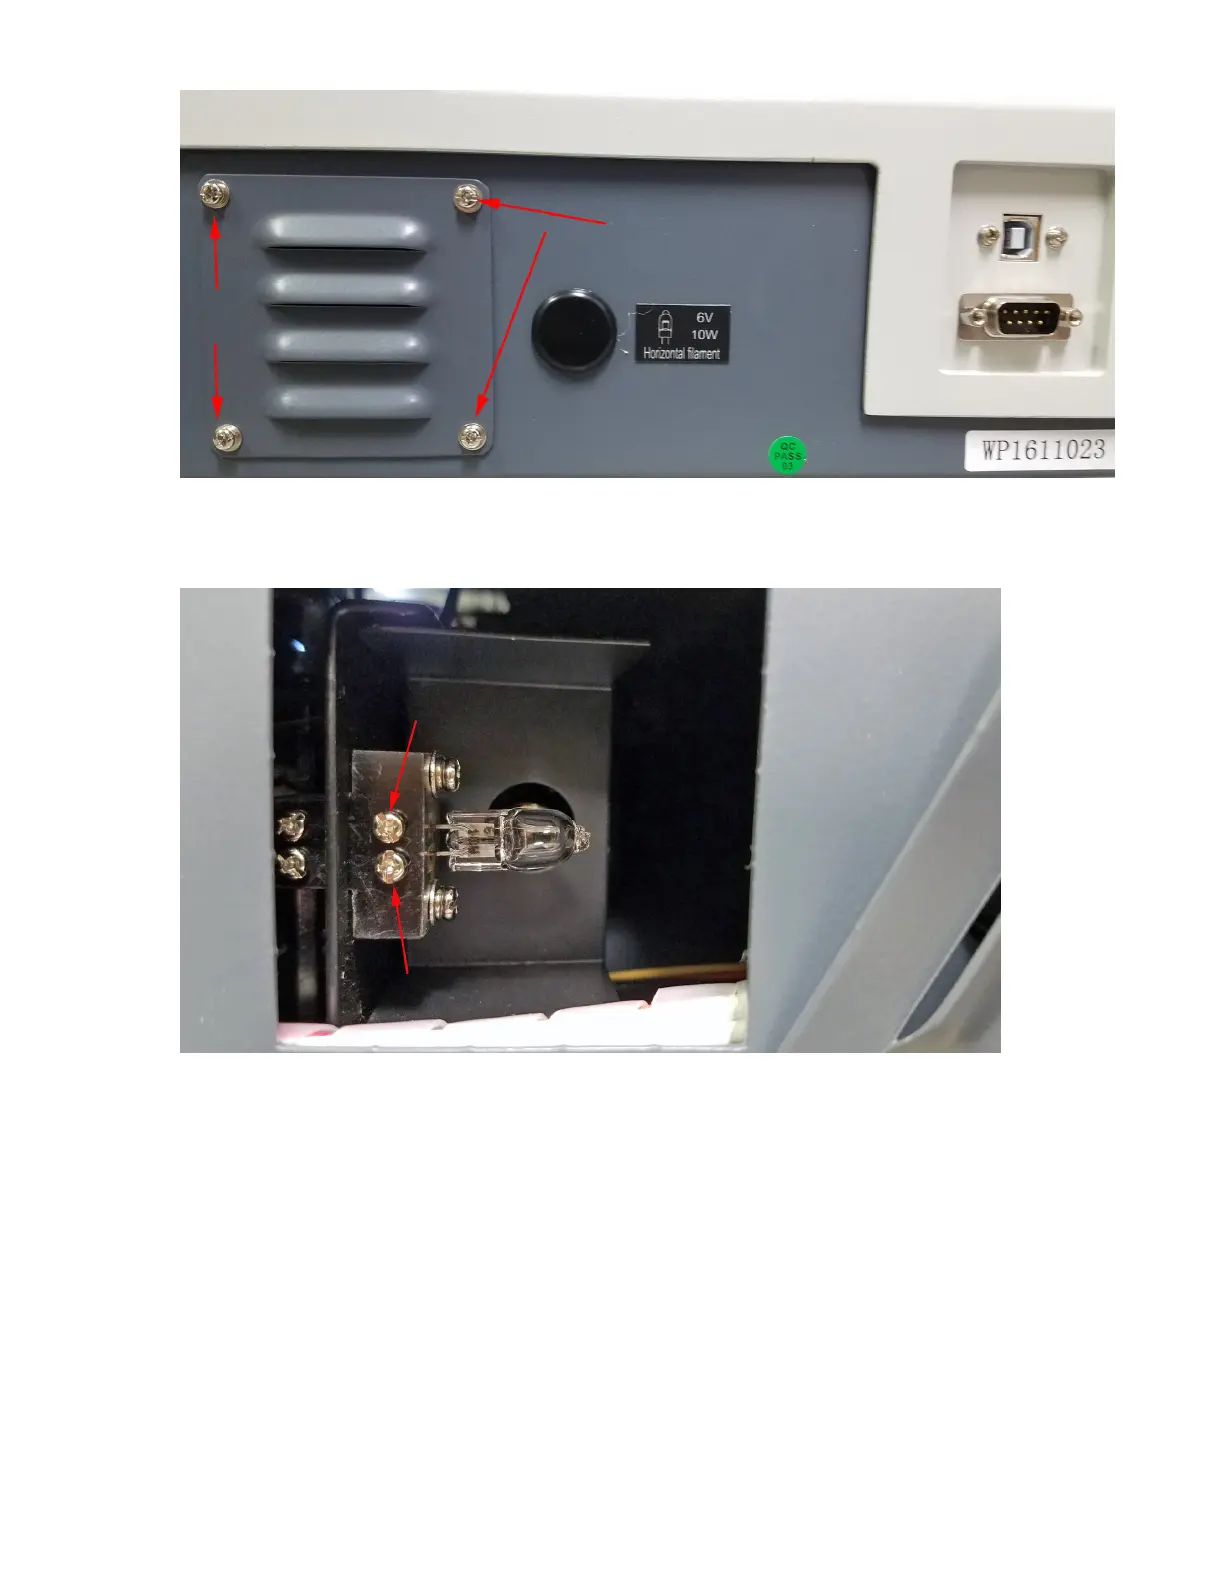
3. Loosen-up 2 lamp holding screws pointed by arrows on the image below. Remove
damaged bulb and insert the new bulb all the way in to the holder. Lightly tighten
the holding screws but not all the way.
4. Plug the power cord back and turn the instrument on. Set the wavelength to 340nm.
Avoid to stair directly on to the bulb. Use the bulb observation window to the right.
Make sure the projection of the light is aligned on the slit as shown by the arrow
below. If necessary – turn the instrument off, allow time for the bulb to cool off and
adjust the bulb by pulling or pushing it.
CAUTION: DO NOT HANDLE THE LAMP WITH BARE FINGERS. USE TISSUE OR
CLOTH WHEN HANDLING LAMP.
 Loading...