EasyManua.ls Logo

Uninet DTF 100 - User Manual

Uninet DTF 100
20 pages
Print Icon
To Next Page IconTo Next Page
Loading...
pg. 1
UNINET DTF 100
USER MANUAL
Date Version Language
12/08/2022 2.0 English
Question and Answer IconNeed help?

Do you have a question about the Uninet DTF 100 and is the answer not in the manual?

Overview

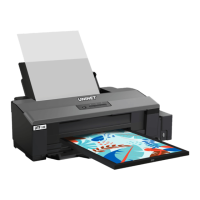
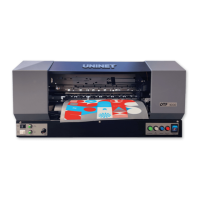
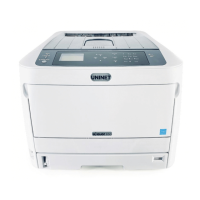
The UNINET™ DTF 100 is an inkjet printer designed for professional use, specializing in printing on PET film for heat transfer applications. It boasts high print speeds and exceptional resolution, capable of producing high-quality photos and vector graphics when used with RIP Software. The printer is specifically engineered for the Direct-to-Film (DTF) process, which involves printing to DTF sheets/film, adding DTF powder, and then curing the print. This process allows for heat transfer of textile ink to various fabrics like cotton and polyester.

Important Technical Specifications:

  • Brand: UNINET™
  • Model: DTF 100
  • Printing Technology: Inkjet, specialized for PET film.
  • Minimum System Requirements:
    • CPU: P4 1.25GHz
    • Hard Drive: 20GB
    • RAM: 256MB
    • USB: 1.1
    • Operating System: 32-bit Windows 7, 8.1
  • Suggested System Requirements:
    • CPU: P5 2GHz (or higher)
    • Hard Drive: 120GB
    • RAM: 2GB
    • USB 3.0
    • Operating System: 64-bit Windows 10
  • Operating Environment:
    • Temperature Range: 60°F to 80°F (15.5°C to 26.7°C)
    • Relative Humidity: 42% to 60% (non-condensing)
    • Location: Air-conditioned, away from direct sunlight, dust, dirt, vibration-free, protected from mechanical impact/shock.
  • Ink Compatibility: Cyan, Magenta, Yellow, Black, and White DTF inks. Only genuine UNINET™ inks are recommended to maintain warranty and optimal performance.
  • Included Accessories: Waste Bottle, Syringes with 14" Gauge Tips, Humidity Sensor, Printing Platform Tray, Epson Driver, RIP Software.

Usage Features:

  • First-Time Setup:
    • Ensure the printer and black metal platform are on a stable, level surface.
    • Connect the USB cable to both the printer and computer.
    • Remove all packing tape, including any under the lid holding the carriage/printhead.
    • Connect the power cable to a known-good outlet.
    • Press the Power Button; wait for the green light.
    • Hold down the Ink Button until the printer makes sound to initiate a dry head cleaning (this can take several minutes). The orange ink light will stop blinking when complete.
    • Install the Epson L1800 driver (downloadable from the provided link). During installation, uncheck "Set as default printer" and "Automatically updates software" to prevent issues with DTF functions.
    • Fill ink tanks (Cyan, Magenta, Yellow, Black, and two for White) using provided syringes and green tips, ensuring no ink contamination. Each tank should be at least 50% full.
    • Set up the waste bottle, ensuring it is placed on the same surface as or lower than the printer to prevent overflow and tube clogs.
    • Use the WIC Reset Utility software to perform an "Ink Charge" (Strong option) to push ink through the lines and printhead to the waste bottle.
  • Printing Platform: The black printing platform is gently inserted into the front of the machine. It does not click or lock, so ensure it is fully inserted, flat, and level with the printer's surface.
  • Film Loading:
    • Extend the black flap on top of the printer (up to three tiers).
    • Ensure the matte side of the film (print side) is facing you. The non-print side is glossy. A scratch test can confirm the matte side (it will leave residue).
    • Place the film all the way to the right-hand side against the stationary guide.
    • Adjust the left-hand guide by pressing its button and sliding it to hold the film straight without squeezing it.
    • Load only one sheet at a time to prevent sticking and printhead damage.
  • Printer Controls (Front Panel):
    • Power Button: Turns the printer on/off (green light indicates power).
    • Paper Button: Illuminates orange for print media issues.
    • Ink Button: Blinks orange for ink-related issues; holding it down initiates head cleanings.
    • Trashcan Button: Cancels and stops the current print job.
  • Stopping a Print Job: It is not recommended to disrupt printing mid-job, especially for small jobs, as it can cause errors. If necessary, power off the printer, delete jobs from the queue, remove any stuck media, and then power the printer back on. For emergency stops, remove the power cable from the right-hand back side of the unit.

Maintenance Features:

  • Daily Maintenance:
    • Power on the machine daily, even if not printing, to keep ink circulating.
    • Perform a head cleaning:
      • Method 1: Hold the Ink Drop button until the printer makes sounds.
      • Method 2: Use the WIC Reset Utility software, select "Head Cleaning" (Medium or Normal option).
    • Perform a nozzle check after head cleaning to ensure the printhead is healthy (minimal breaks/separations/clogs). Repeat cleaning if more than two breaks/separations are present in any channel.
  • Weekly Maintenance:
    • Unlock Printhead Carriage:
      • Power off the printer.
      • Open the blue lid.
      • Power on the printer; as the printhead carriage moves from right to left during initialization, quickly remove the power cable.
      • Gently push the printhead carriage all the way to the left for maximum workspace.
    • Clean Capping Station:
      • Dip a clean foam swab into blue Cleaning Solution.
      • Remove ink/build-up from the outer rubber edges of the capping station.
      • Add 10-15 drops of pink Capping Solution to the sponge in the middle of the capping station using a syringe with a thin tip.
    • Clean Wiper Blade:
      • Flip the wiper blade upward using a flat-head screwdriver (push forward on the white plastic it's attached to).
      • Use a clean foam swab and blue Cleaning Solution to remove ink/build-up from the rubber blade.
      • Pop the wiper blade downward again.
  • Ink Conservation: Maintain the operating environment (64°F – 77°F) at all times, even when the printer is off, once inks are loaded.
  • Ink Removal: Inks should be removed and replaced with cleaning liquid during downtime to preserve printing system functionality and quality. The timing depends on factors like temperature, humidity, air exposure, and heat/sunlight exposure.
  • Troubleshooting: The manual provides solutions for common issues such as blurry prints (ensure level surface), banded/lined prints (perform nozzle check/head cleaning), split/blurry prints on irregular media (disable "High Speed" in driver), and power/ink/paper light issues (check power, reset Waste Pad Counter using WIC Reset Utility key).

General Safety Precautions:

  • Designed for professional use; staff must be 18+ and trained.
  • Read the manual carefully before installation, operation, and maintenance.
  • Wear protective masks when operating DTF equipment and processes.
  • Operate in a well-ventilated room with a filtration system.
  • Avoid placing near flammable solvents, unstable/vibrating locations, humid/dusty areas, direct sunlight, heating sources, thick rugs/carpets, or with its back against a wall.
  • Use included power cables; connect to specified power sources.
  • Never plug/unplug with wet hands.
  • Do not damage, modify, or obstruct power cords.
  • Avoid sharing power sockets with other equipment.
  • Unplug immediately if smoke, unusual smells, or strange noises occur.
  • Periodically clean the plug and power outlet.
  • Disconnect power during thunderstorms.
  • Never put hands/fingers in the machine while printing.
  • Carry with two people at both ends.
  • Do not place objects (especially metal or flammable solvents) on the machine.
  • Prevent foreign objects from entering the machine.
  • If foreign objects fall in, unplug and call for service.
  • Do not transport on a slant, vertically, or upside-down to prevent ink leakage.
  • Keep ink tanks out of reach of children; do not swallow.
  • Wash skin with soap and water if ink contact occurs; seek medical advice if irritation persists.
  • Do not touch electrical contacts on print heads/cartridges after printing (can be hot).
  • Do not throw ink tanks/cartridges into fire.
  • Do not disassemble/modify print head, ink tanks, or cartridges.
  • Unplug before cleaning; use a damp cloth, not flammable solvents.
  • Do not attempt to disassemble or modify the machine; no user-serviceable parts inside.
  • Do not connect non-recommended devices to connectors/ports.
  • Avoid highly flammable sprays near the machine.
  • Consult a doctor if using a cardiac pacemaker and feeling abnormalities due to low-level magnetic flux.

Warranty Information:

  • Period: 180 days from purchase date for manufacturing defects.
  • Coverage: Materials of UNINET™ are warranted against material workmanship defects.
  • Exclusions: Misuse, improper handling, non-genuine UNINET™ inks, transport damage, customer/third-party damage, defects not objected to within 8 days of delivery.
  • Consumables: Warranty excludes print heads, cartridges, ink, wiper, dumpers, pipes, pumps, and caps.
  • Voiding Conditions: Disassembly/modifications, use/maintenance contrary to instructions, unsuitable materials/inks/cleaning fluids, insufficient monitoring of wear/tear parts, damage from voluntary/involuntary maintenance of nearby machinery.
  • Jurisdiction: Los Angeles County, CA, USA.

Uninet DTF 100 Specifications

General IconGeneral
BrandUninet
ModelDTF 100
CategoryPrinter
LanguageEnglish

Related product manuals