ULA
PLANNING AND
ASSEMBLY
INSTALLATION MANUAL
INSTALLATION GUIDE
PAGE
12
Standard Series Clamps: Remaining Modules
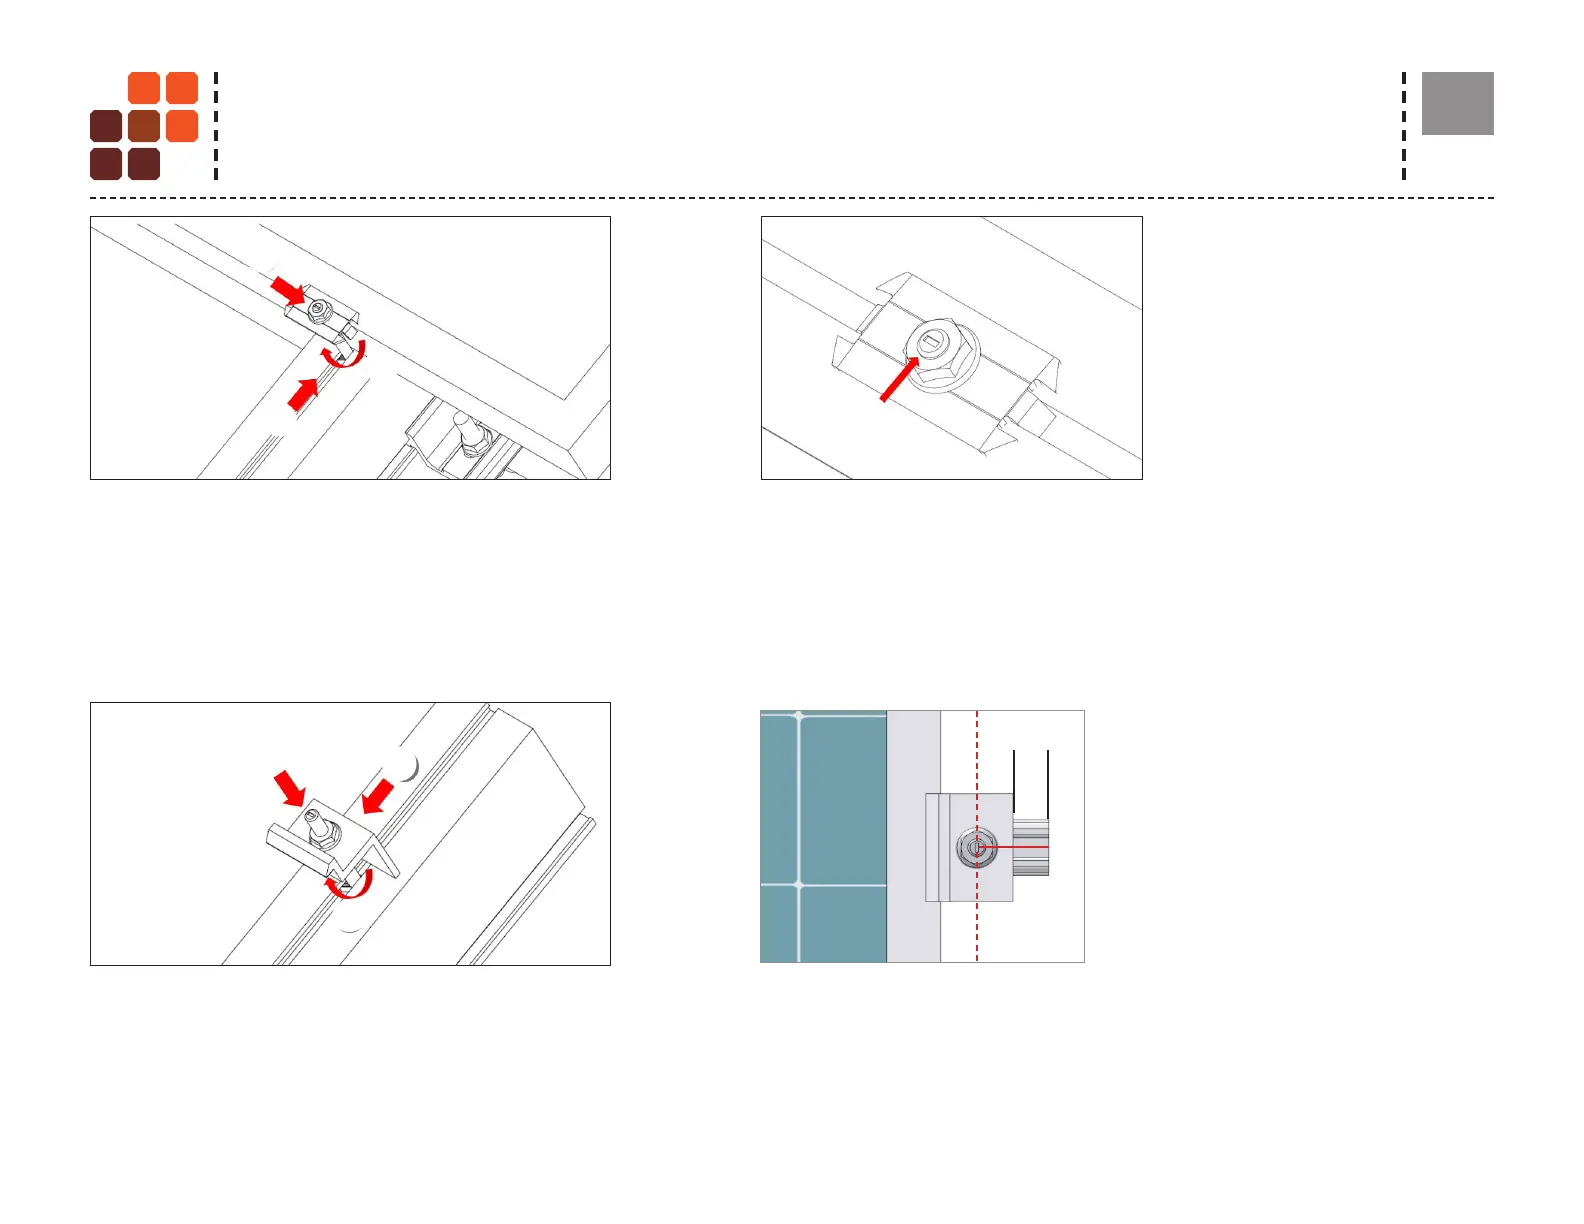
POSITION T-BOLT ALIGNMENT MARKS & CUT RAIL:
Verify that the position indicator(s) & T-bolt shaft(s)
are angled in the correct position. Trim off any
excess rail, being careful not to cut into the roof.
Allow ½” between the Endclamp and the end of the
rail.
INSTALL ENDCLAMPS:
Apply Anti-Seize and install nal Endclamps in same manner
as rst Endclamps. Slide clamps against module.
TORQUE VALUE
1/4” nuts to 10 ft-lbs. w/Anti Seize
1/2"
MIN.
INSTALL REMAINING MID-CLAMPS:
Proceed with module installation. Engage each module with
previously positioned Midclamp assemblies.
NOTE: Apply Anti-Seize to each Mid Clamp prior to
installation.
POSITION T-BOLT ALIGNMENT MARKS:
Verify that the position indicator(s) & T-bolt
shaft(s) are angled in the correct position.
TORQUE VALUE
1/4” nuts to 10 ft-lbs. w/Anti Seize
Trim installation Instructions