WASH SELECT II TO WASHPAY
Document Number: WS21046 6
3.6 Upgrade POS4000 EPROM
Depending upon the version of software that is currently in the POS4000 console, this
procedure may delete ALL configuration information, including all codes, fleet accounts,
and accounting information. All setup configurations will be reset to factory defaults. To
properly facilitate reprogramming this information, you should print the following reports
BEFORE proceeding.
• System configuration
• Pricing report
• Fleet accounts
• Accounting reports (those that are used)
• Message configuration
Perform the following steps to change console software (EPROM):
1. Disconnect all cables to the POS4000 console
2. Remove the plastic housing. To do this you must remove 2 screws from the
rear and 2 screws from the bottom of the unit.
3. The upper chassis must be partially removed. Remove the middle and front
screws along the side of the metal chassis. Loosen the rear two screws on
each side of the chassis. This will allow the top piece to open up revealing
the main circuit board.
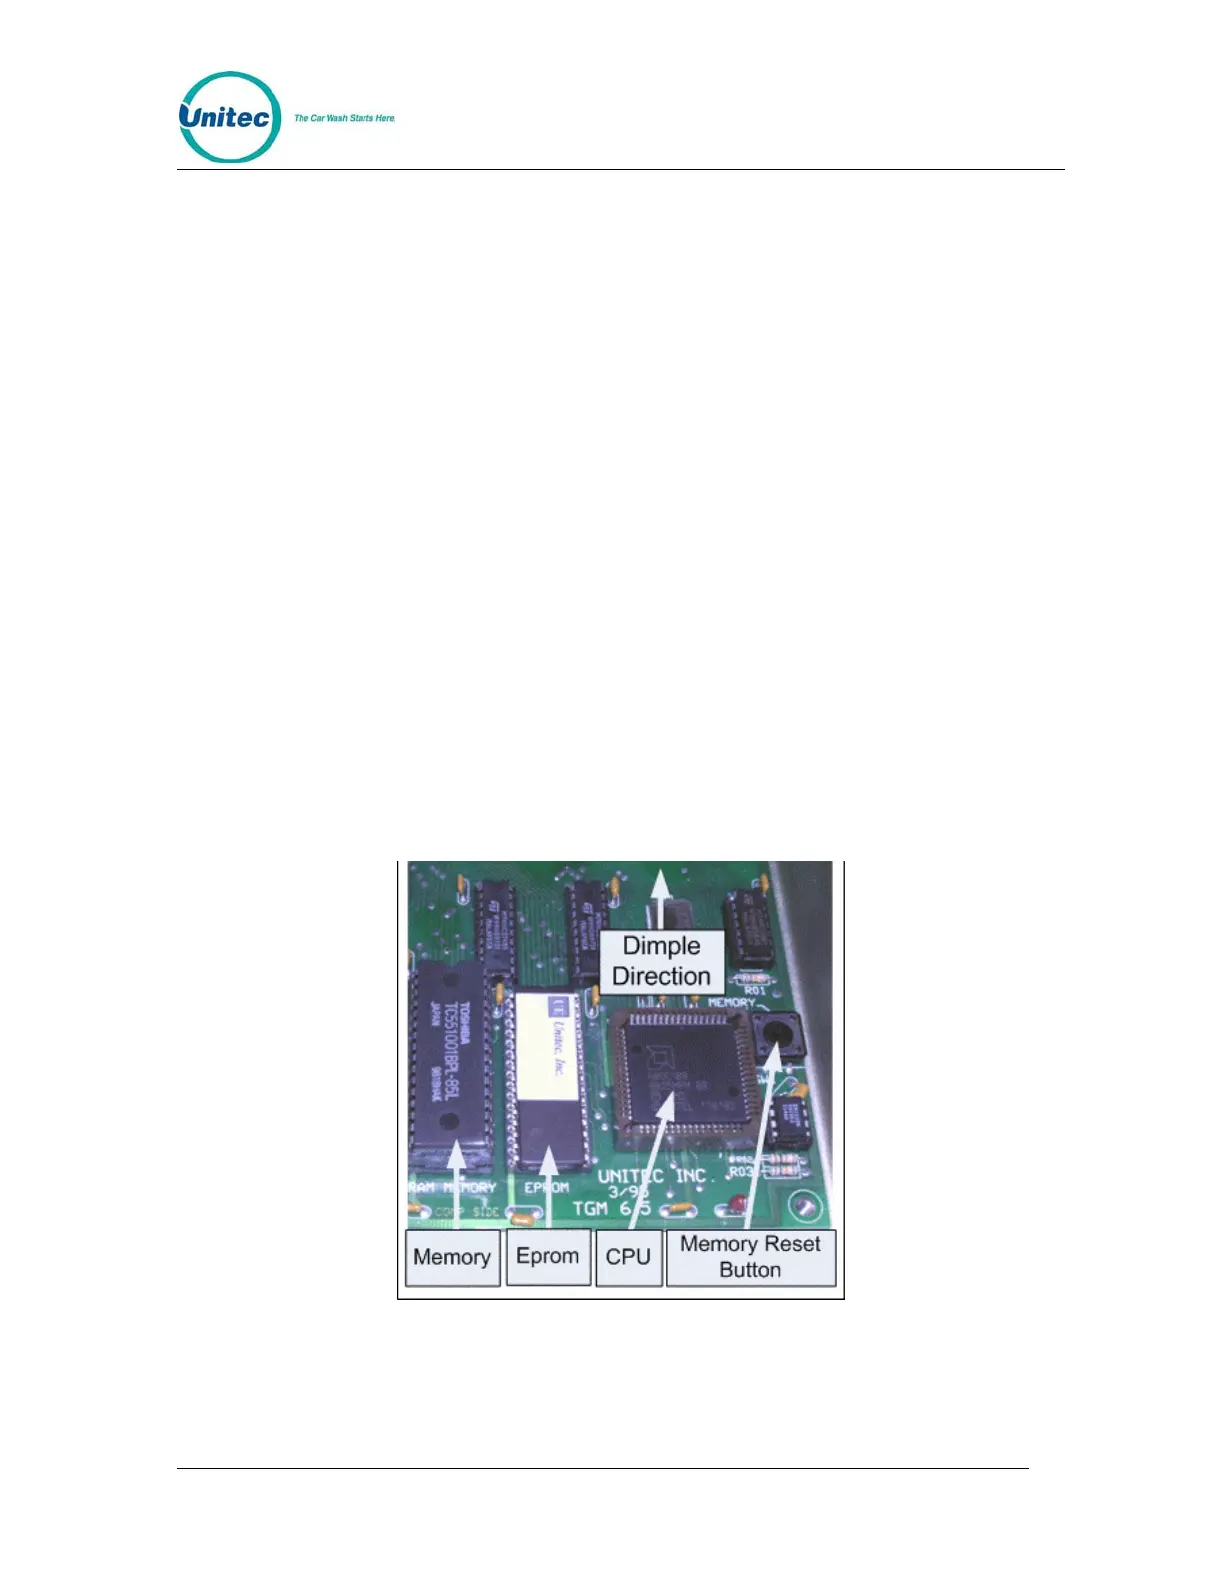
4. Find the EPROM chip, as indicated below:
Figure 4. POS EPROM Location
The EPROM chip has a small window on the top surface that may or may not
be covered with an adhesive label.
Document Name: WSII to WashPayIntegration Field Retrofit Installation Guide
 Loading...