EasyManua.ls Logo

Uplift Desk V2-Commercial - User Manual

Default Icon
20 pages
Print Icon
To Next Page IconTo Next Page
Loading...
For assembly assistance,
visit upliftdesk.com/4leg-com or call 800-349-3839
or email support@upliftdesk.com
355 lb
two person
assembly
Patent Pending, ©2022 UPLIFT Desk®. All Rights Reserved
V2-Commercial 4-Leg
Standing Desk Frame
®
Question and Answer IconNeed help?

Do you have a question about the Uplift Desk V2-Commercial and is the answer not in the manual?

Summary

Safety and Warnings

General Safety Precautions

General safety guidelines for operating the desk, including clearance, power, and environmental conditions.

Pinch and Crush Hazard Warnings

Warnings about pinch/crush hazards, maintaining clearance, and user capabilities for safe operation.

Regular Inspection and Maintenance

Instructions to regularly inspect the desk for damage and use authorized replacement parts.

Package Contents

Components List

Detailed list of all desk frame components included in the package, with part identifiers.

Hardware List

Comprehensive list of all hardware, including screws, washers, and tools provided for assembly.

Component Diagram

Assembly Visualization

Visual guide illustrating the assembly of major desk frame components and their interconnections.

Desk Assembly Instructions

Inventory of Parts

Guidance on preparing for assembly, checking parts, and setting up the workspace for the desk.

Crossbar End Attachment

Step-by-step guide for connecting the crossbar ends to the desk legs using screws.

Adhesive Pad Application

Instructions for applying adhesive pads to the side brackets, ensuring proper placement.

Drill Side Bracket Holes

Procedure for drilling pilot holes for side bracket attachment if the desktop does not have pre-drilled holes.

Side Bracket Attachment

Steps to secure the side brackets to the desktop, ensuring correct orientation and screw type.

Leg Attachment

Instructions for attaching the leg assemblies to the side brackets using machine screws.

Crossbar Rail Installation

Guide to inserting crossbar rails into the crossbar ends and attaching remaining leg assemblies.

Side Bracket Attachment (Second Side)

Attaching the second side bracket to the desktop and connecting the remaining leg assemblies.

Drill Crossbar End Holes

Procedure for pre-drilling holes for crossbar end attachment if the desktop does not have them.

Crossbar End Attachment

Securing the crossbar ends to the desktop using wood screws and washers.

Crossbar Rail Positioning

Positioning and tightening the crossbar rails within the crossbar ends using set screws.

Crossbar Attachment

Joining the crossbar halves and attaching them to the leg assemblies using flat head screws and set screws.

Foot Attachment

Securing the desk feet to the leg assemblies using machine screws for stability.

Caster Installation (optional)

Optional steps for installing casters onto the desk feet, replacing the standard leveling glides.

Keypad Attachment

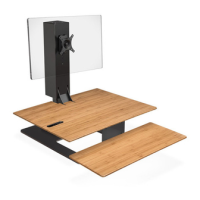
Instructions for attaching the keypad to the desktop using wood screws, considering placement.

Control Box Attachment

Mounting the control box to the underside of the desktop using wood screws.

Cable Connections

Guide for connecting leg extension cables and the keypad cable to the control box.

Accessory Installation

Guidance on installing accessories such as cable mounts to organize wires under the desktop.

Wire Management Tray (optional)

Optional steps to attach the wire management tray to the desktop for cable organization.

Hole Plugs (optional)

Optional use of hole plugs to cover unused holes on the upper frame section.

Desk Placement

Instructions for safely flipping and positioning the assembled desk in its final location.

Desk Reset Procedure

Critical procedure to reset the desk's control box before initial use or after power loss.

Programming Advanced Keypads

Height Calibration

Process to ensure the desk's height display accurately reflects the physical height.

Keypad Lock and Unlock

Steps to lock the keypad to prevent unauthorized use and to unlock it.

Memory Settings

How to save and retrieve up to four frequently used desk height presets.

Touch Mode Settings

Option to switch desk operation between single-touch preset recall and continuous touch control.

Programming Continued

Display Units Setting

How to change the desk height display from inches to centimeters or vice versa.

Height Limit Adjustment

Procedure to set custom minimum and maximum height boundaries for the desk.

Reset Height Limits

Steps to remove previously set custom maximum and minimum height limits.

Troubleshooting

Desk Reset Procedure

Detailed instructions for performing a factory reset on the desk's control box.

Error Code Explanations

Descriptions and solutions for common error codes displayed on the keypad, such as overheating or connectivity issues.

Operation Interruption

Solutions for desk operation issues where the desk repeatedly starts and stops.

Overview

This document outlines the assembly, usage, and maintenance of the UPLIFT Desk V2-Commercial 4-Leg Standing Desk Frame. It is designed to provide a height-adjustable workstation, promoting a healthier and more dynamic work environment. The desk frame is intended for indoor use in dry environments and requires a two-person assembly for safety and ease.

Function Description:

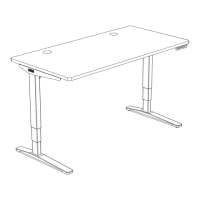
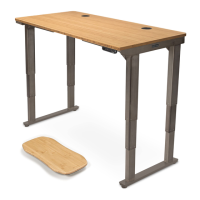
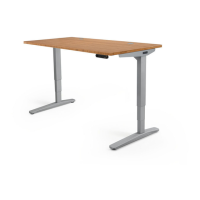
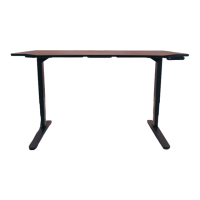
The UPLIFT Desk V2-Commercial 4-Leg Standing Desk Frame is a motorized, height-adjustable desk system. Its primary function is to allow users to easily switch between sitting and standing positions throughout their workday, which can contribute to improved health and productivity. The desk frame consists of four legs, crossbar ends, crossbar rails, side brackets, a control box, a keypad, and various hardware components. The motorized legs enable smooth and quiet height adjustments, controlled via an intuitive keypad. The four-leg design provides enhanced stability for larger desktops and heavier loads. The system includes a control box that manages the motor functions and keypad inputs, and leg extension cables to connect the legs to the control box. The desk is designed to be paired with a desktop (not included in the frame package) to create a complete standing desk.

Usage Features:

The UPLIFT Desk offers several features to enhance its usability and safety:

  • Height Adjustment: The core feature is its ability to adjust height. Users can raise or lower the desk to their preferred sitting or standing height using the keypad.
  • Keypad Control: The desk comes with a keypad (either standard or advanced) for controlling height adjustments. Advanced keypads offer additional programming options.
  • Memory Settings (Advanced Keypads): Users can save up to four commonly used desk heights for quick recall. This allows for personalized settings and effortless transitions between preferred positions.
  • One-Touch and Constant-Touch Modes (Advanced Keypads): The keypad can be configured for either one-touch operation (a single press moves the desk to a preset height) or constant-touch operation (the button must be held down for the desk to move). One-touch is the default setting.
  • Height Calibration (Advanced Keypads): This feature allows users to calibrate the numeric display on the keypad to match the actual height of the desktop, especially useful if casters are added.
  • Display Units (Advanced Keypads): The keypad display can be toggled between inches and centimeters for height readings.
  • Keypad Lock (Advanced Keypads): For safety, especially in environments with children, the keypad can be locked to prevent accidental activation or unauthorized changes to settings.
  • Minimum & Maximum Height Settings: Users can set custom minimum and maximum height limits to prevent collisions with objects above or below the desk. This is particularly useful for desks placed under shelves or cabinets.
  • Caster Installation (Optional): If casters are purchased, they can be installed to make the desk mobile, allowing for easy repositioning.
  • Wire Management Tray (Optional): The frame supports the attachment of a wire management tray to keep cables organized and out of sight, contributing to a cleaner workspace.
  • Cable Mounts: Adhesive-backed cable mounts are provided to help organize and secure power and accessory cables, preventing snagging and maintaining a tidy appearance.
  • Two-Person Assembly: The manual emphasizes that assembly should be performed by two people for safety and ease, particularly when handling heavy components and flipping the desk upright.

Maintenance Features:

To ensure the longevity and safe operation of the UPLIFT Desk, several maintenance and safety guidelines are provided:

  • Regular Inspection: Users are advised to regularly inspect the desk for any damaged or loose parts. If any issues are found, usage should cease immediately, and only authorized UPLIFT Desk parts and instructions should be used for replacement.
  • Cable Management: Proper cable management using the provided cable mounts is crucial to prevent cables from snagging or becoming damaged as the desk moves.
  • Clearance Awareness: Before raising or lowering the desk, users must ensure there are no obstructions (at least 1 inch vertical and horizontal gap) that could be damaged or cause damage to the desk. This includes checking for objects above the desk (shelves, cabinets) and below it (footrests, desk mats, other furniture).
  • Spill Management: In case of liquid spills on any desk component, the desk must be immediately disconnected from the power outlet, cleaned with a dry cloth, and then reconnected. This prevents electric shock and desk failure.
  • Power Cord Integrity: Never use the desk if the power cord or plug is damaged. A damaged cord poses a risk of fire and electric shock, and a replacement should be obtained from UPLIFT Desk.
  • Proper Power Connection: The desk must only be plugged into a properly grounded 120V power outlet. Using a voltage converter is considered improper use and can damage the desk.
  • Reset Procedure: If the desk does not respond or displays error messages (E01-E012), a reset procedure is outlined. This involves unplugging the power cord, holding the DOWN button, and then re-plugging and performing a sequence of button presses to reset the control box. This procedure can also address uneven leg issues.
  • Tightening Screws: During assembly and periodically thereafter, all frame screws should be thoroughly tightened using the provided Allen wrench. Loctite is pre-applied to the screws to help maintain tightness over time, contributing to the desk's stability.
  • Overheating Protection: The desk motor has a 10% duty cycle (e.g., 2 minutes of activation in a 20-minute period) to prevent overheating. If an H01 code appears, it indicates the motor is overheated and needs to rest.
  • Child Safety: Children should be kept away from the desk unless supervised. If supervision is not possible, the keypad's safety lock feature should be used, or the power cord removed to prevent operation.
  • Proper Lifting: When moving the desk, it should be lifted by the frame's side brackets, not just the desktop, to avoid undue stress on the attachment screws.

Uplift Desk V2-Commercial Specifications

General IconGeneral
Desk TypeStanding Desk
Frame MaterialSteel
Height AdjustmentElectric
Weight Capacity355 lbs
Adjustment Speed1.5" per second
Warranty15 years
Motor TypeDual Motor
Noise Level< 50 dB
Desktop MaterialLaminate, Solid Wood
Frame ColorsBlack, White, Grey
CertificationsBIFMA

Related product manuals