As Power User, you can view the battery status of
each individual lock C using the app. A lock C also
warns you via a flashing signal when the batteries are
nearly empty and need to be replaced. This flashing
signal appears after an action (i.e. opening or clos-
ing). After the first warning signal, only a few more
actions can be performed.
Flashing signal: 3 × orange
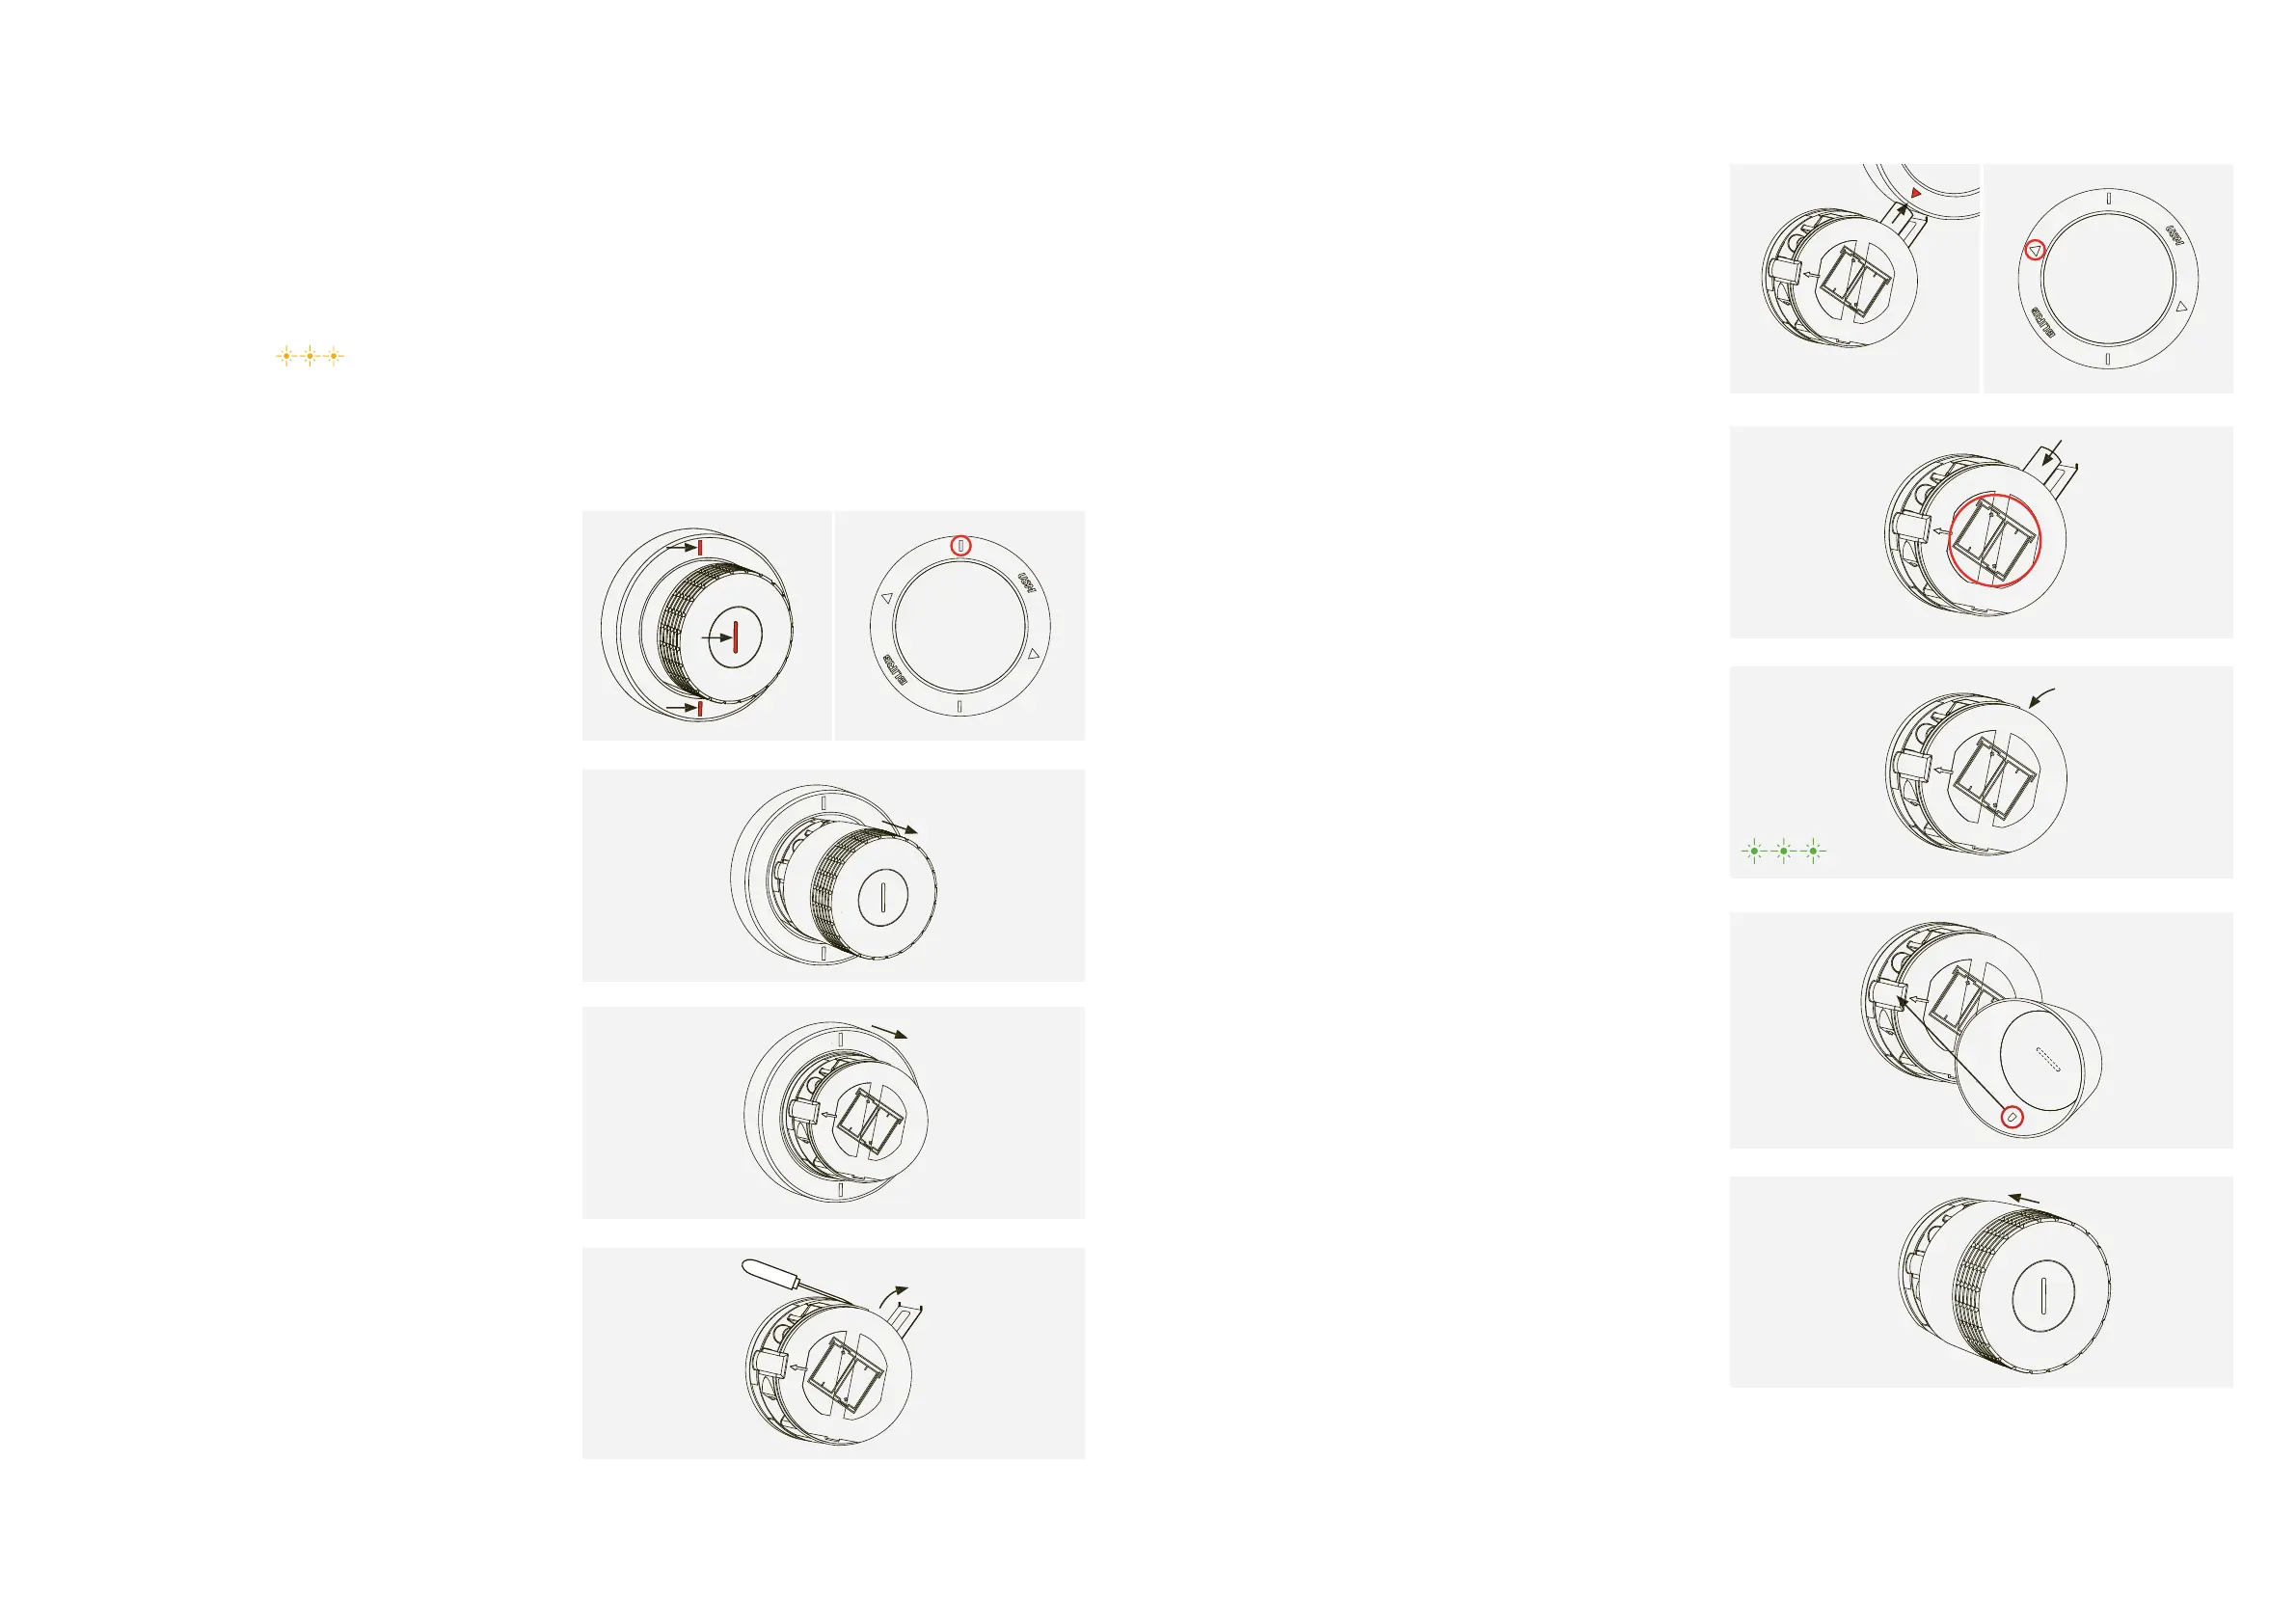
1. Place the service tool over the lock C
making sure that the markers are aligned vertically. Once the
tool is correctly positioned, the safety mechanism of the end
2. Remove the cap by gently pulling it towards you.
3. Then remove the disassembly tool.
4. The battery compartment is at the top right.
Open the battery cover by lifting up the left side with
a tool then flipping the cover outwards to the right.
5. Hold the triangle symbol of the service tool towards the
The battery will be removed from the lock magnetically.
Repeat this step for the second battery.
The inscription on the front shows the right direction for
7. Close the battery cover.
Flashing signal: 3 × green
8. Align the small clasp on the inside of the end cap with the
opening on the left of the lock.
9. Put the end cap back onto the lock making sure that
the front slot is completely vertical. The end cap will
automatically click into place.