2. General information
Water soeners with automatic controller are dedicated to improve water quality, especially to lower its hardness.
Water considered „hard” contains large amount of minerals (calcium and magnesium compounds). They can
precipitate creating scale. It can narrow pipes diameter, limiting or in some cases even blocking the flow. Scale deposits
on the heating elements increase the energy consumption for water heating. Hard water can also lead to water supply
installation and household appliances damages, which removal can be expensive. Moreover, hard water increases
detergent consumption and creates stains on fixtures.
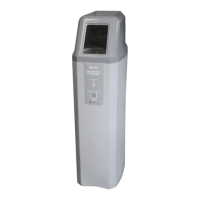
A water soener from UST-M will protect installation and household appliances against all threats related to hard
water. This device is excellent for houses, restaurants, car washes, everywhere, where so water is required.
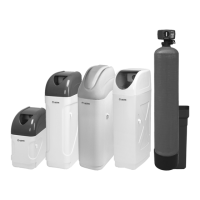
Water soeners by UST-M are very effective for water soening thanks to the use of a high quality ion exchange resin.
They are equipped with a by-pass valve which allows easy assembly and disassembly. Competitive pricing and low
exploitation costs makes them a perfect choice.
2.1. Power suppy. The soeners require 230 V power supply. In case of power failure the settings are stored for about
48 hrs.
2.2. Feed water quality. The soener is dedicated to treat water free from iron, manganese and ammonia compounds.
In order to ensure proper operation of the device, extend its service life and enhance the quality of water it is not
allowed to treat water which physicochemical parameters exceed applicable standards (excluding hardness).
Water soener should not be used to treat water from private well. Before treatment water should be tested for
iron, manganese and ammonia presence.
11
EN
2.3. Hydraulic installation. The hydraulic system to which the soener is connected must be free from deposits.
In case of large scale and iron deposits we recomend to replace the pipes with new ones. If this is not possible we
recommend to set the output hardness at 5 dH.
2.4. Copper installation. In case of copper installation, water must not be completely soened, otherwose it will
become corrosive. In this case the output hardness should be set at 5 dH.
2.5. Pre-filter. The soener is installed on the main water supply pipe. We recommend to install a sediment filter before
the device (PP spun or PP yarn cartridge with a micron rating at least 20μm). The pre-filter will protect the soener
from mechanical contaminants, which may damage the soener.
2.6. Location of the soener and drainage. The soener in most cases is located in the boiler room, utility room,
garage or bathroom near the sewage system. Do not put any objects on the device. Do not cover it. All connections
must be made according to applicabe standards and regulations.
2.7. Protection from flooding. The soener has double anti-flooding protection. Brine float valve and overflow elbow
on a casing. The float valve is located in a well (plastic tube inside the casing). When the tank overflows, the valve
cuts o ffthe water supply. The overflow elbow should be connected to the sewage with a hose. Stabilize the
connection with a clamp. The hose should be installed so that the flowing water must not move back from the
drain.
ATTENTION! Each output must be equipped with a separate hose. Do not connect drain hose and overflow
hose together.
2.8. Media regeneration. Ion exchange resin regeneration will start automatically aer treating specified amount of
water. Regeneration time was factory pre-set at 2 a.m. During the regeneration it is possible to use water, but it will
not be treated. During the „BRINING” water can be salty.
2.9. Salt level. During the exploitation of the soener keep in mind to check a salt level. It is essential for proper device
functioning. The salt level should not be lower than ¼ and not higher than ½ heigth of the tank. When adding salt
care must be taken to avoid dirt gets to the tank. Aer checking the salt close the brine tank cover.
ATTENTION! Salt level must be always lower than the water level in the brine tank.
 Loading...