Section 7 COPIER MANAGEMENT FUNCTIONS
7-14
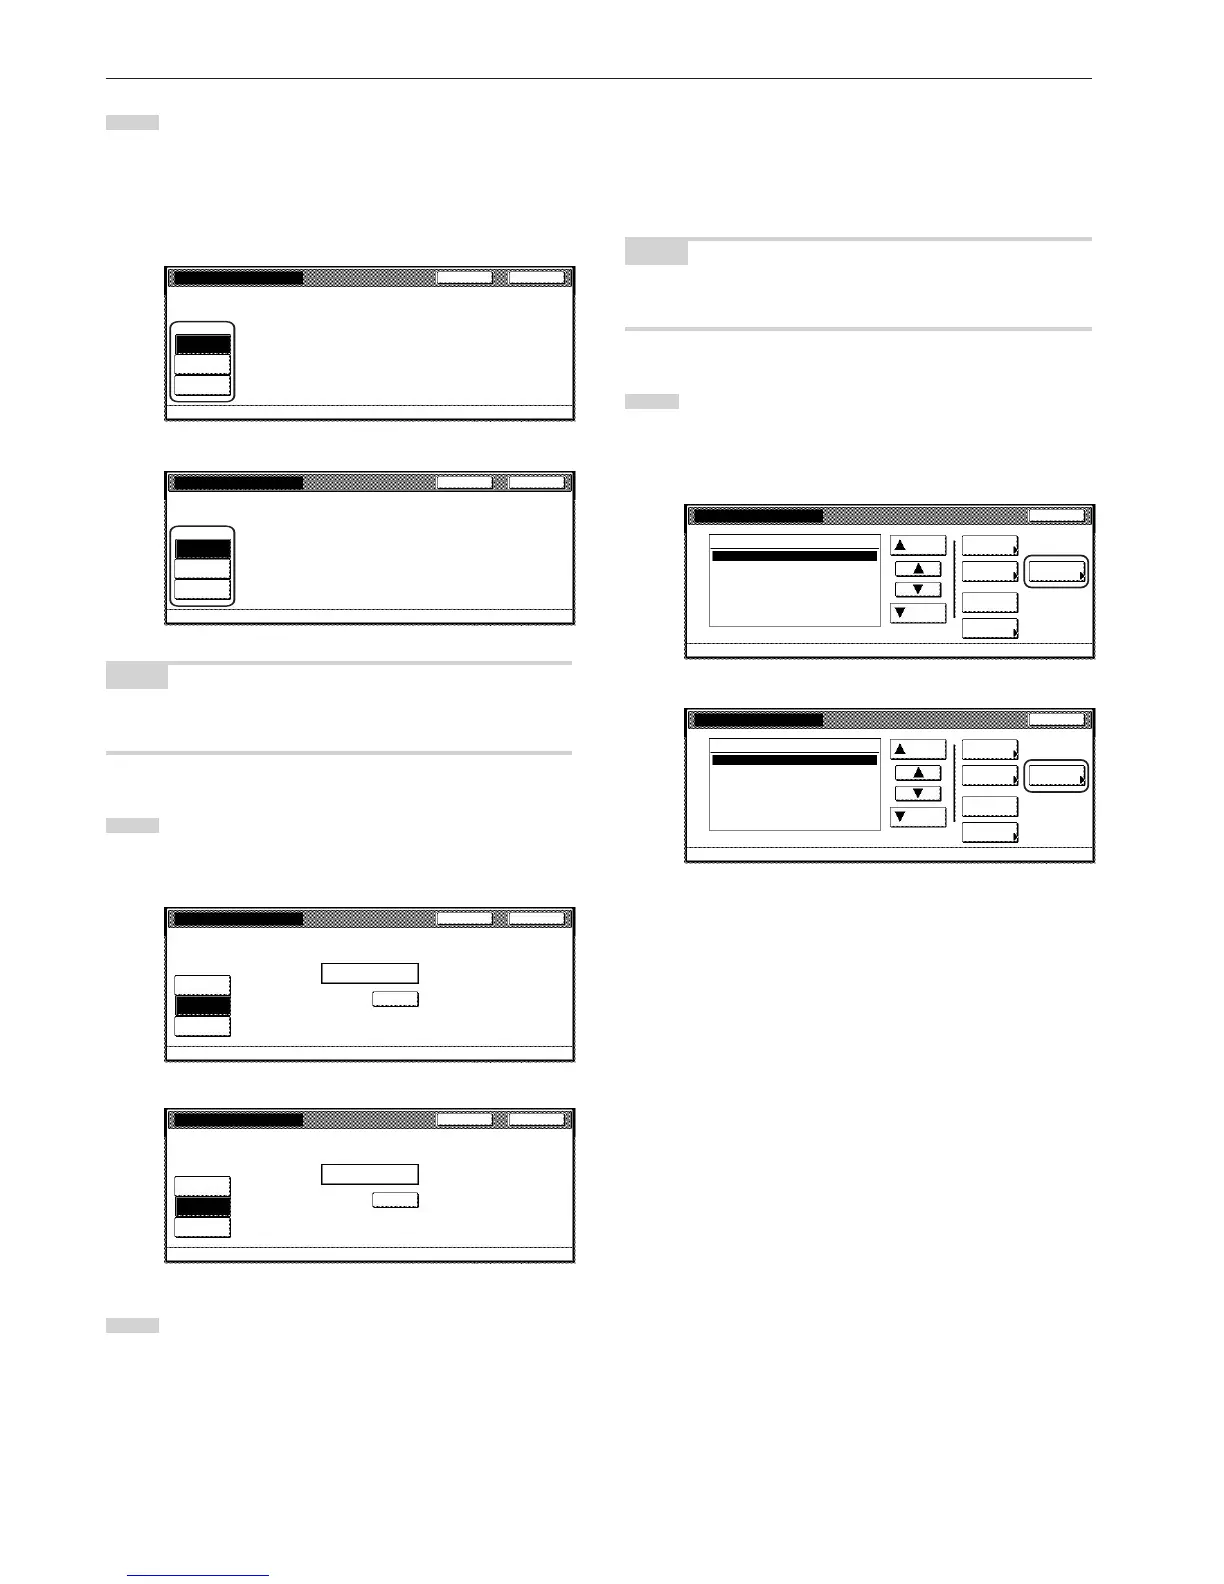
3
To set the maximum number of copies that can be made
under this ID-code, touch the “Counter limit” key and proceed
to the next step.
To allow unlimited copies, touch the “No limit” key, and to
cancel copying privileges completely, touch the “Is not
permitted” key and proceed to step 5.
Inch specifications
CloseBack
Management code menu - Management edit - New register
Copy limitation (All)
No limit
Counter
limit
Is not
permitted
Metric specifications
CloseBack
Management code menu - Management edit - New register
Copy limitation (All)
No limit
Counter
limit
Is not
permited
NOTE
If you want to quit the displayed setting without changing it, touch the
“Back” key. The touch panel will return to the screen in step 2.
4
Use the numeric keys on the keypad to enter the maximum
number of copies that can be made under this ID-code. The
copy limit can be set to any 1-page increment up to 999,999.
Inch specifications
CloseBack
Management code menu - Management edit - New register
Copy limitation (All)
No limit
Counter
limit
Is not
permitted
Clear
999,999
(1~999,999)
Limited value
Metric specifications
CloseBack
Management code menu - Management edit - New register
Copy limitation (All)
No limit
Counter
limit
Is not
permited
Clear
999,999
(1~999,999)
Limited value
5
Touch the “Close” key.
The touch panel will return to the screen in step 2.
Printing restrictions (All)
Perform the following procedure when the optional Printer Kit or
Printer/Scanner Kit is installed in your copier and you want to set the
maximum number of printouts that can be made under the
corresponding department ID-code.
NOTE
This setting will only be available when “On” is selected as the “Printer
function management ON/OFF” setting.
1
Access the screen that contains the copy restriction setting
items.
(See “Register new department ID-codes” on page 7-4 or
“Change restrictions for use” on page 7-20.)
Inch specifications