Do you have a question about the V-TEK DF7 and is the answer not in the manual?
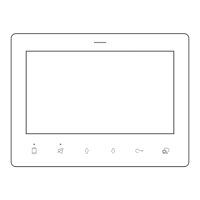
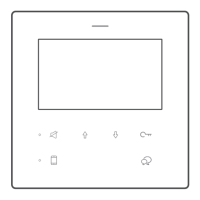
Details the various components of the DF7 monitor including the display, indicators, buttons, and speaker.
Procedure for setting the monitor's address within the system using the monitor menu.
Steps to activate the system for incoming calls, either via the monitor or door station.
Instructions for configuring the system in a master/slave arrangement.
Guide to adjusting the ringtone volume to two selectable levels.
Managing system status like 'Do Not Disturb' and accepting incoming calls.
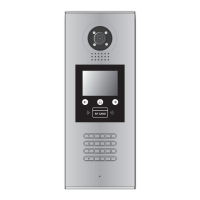
Procedure to view the camera feed from a door station.
Instructions for initiating internal or intercom calls between units.
Steps to reset the DF7 monitor to its original factory default settings.
Important safety and handling guidelines for the DF7 monitor.
The DF7 is a 2-wire intercom system featuring a 7-inch TFT monitor, available in models DF7-WS and DF7-BS. This system is designed for communication with a door station and includes various user-friendly features for setup, operation, and personalization.
The DF7 monitor serves as the indoor unit for a 2-wire intercom system. Its primary functions include:
To restore to factory default settings:
| Brand | V-TEK |
|---|---|
| Model | DF7 |
| Category | Intercom System |
| Language | English |