8
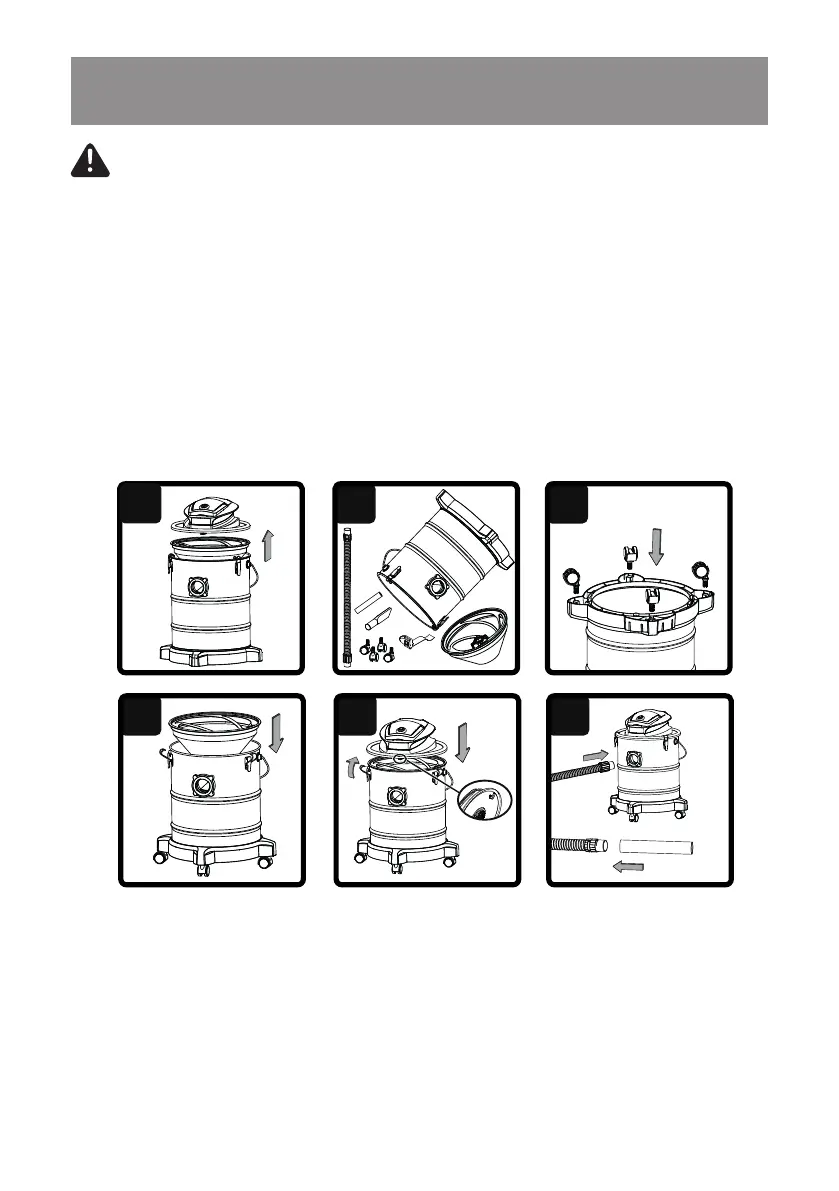
GENERAL ASSEMBLY INSTRUCTIONS
1. Remove the Ash Vacuum from the package.
2. Undo the latches and remove the power head lid (Fig. 1).
3. Remove the contents from inside the collection tank; make sure you have all the parts listed on
page 7 (Fig. 2).
4. Turn the collection tank upside down, and insert the casters on to the four feet of the collection
tank base. Ensure that they are mounted correctly and "snap" into place (Fig. 3).
5. Place the lter onto the rim of the collection tank. Make sure the edge of the lter ts snugly
along the edge of the collection tank (Fig. 4).
6. With the lter installed, place the power head onto the collection tank and secure it with the
latches (Fig. 5).
7. Insert the hose into the vacuum port and connect the metal intake nozzle into the other end of
the hose (Fig. 6).
WARNING
: DO NOT PLUG POWER CORD INTO POWER OUTLET. MAKE SURE
PLUG IS DISCONNECTED BEFORE ASSEMBLING THE ASH VACUUM. TO REDUCE
THE RISK OF ELECTRIC SHOCK, DO NOT EXPOSE TO RAIN.
3
6
2
1
4
5