13
GB
For Dry Vacuuming:
WARNING!
BEFORE INSTALLING, REMOVING OR CLEANING THE VACUUM
CLEANER FILTER, ENSURE THAT THE POWER CORD IS UNPLUGGED AND
SWITCHED OFF.
1) To prepare your vacuum cleaner for dry vacuuming, install the cartridge lter over the lter cage
with the at end of the lter towards the vacuum power head. Carefully push lter until it sits
ush forming a tight seal.
2) Place the lter retainer cap on top of cartridge lter over the raised lip and tighten the retainer
lock clockwise to secure against the internal lter cage (Fig. 17).
3) Optionally, fully t the dust bag ange onto the inlet stub. The vacuum cleaner can be used with
or without dust bags (Fig. 18).
IMPORTANT: Check the lter regularly for optimal performance. An old or blocked lter will reduce
suction performance.
For Wet Vacuuming:
1) To prepare your vacuum cleaner for wet vacuuming, remove the dry use cartridge lter.
2) Carefully install the supplied foam lter over the internal lter cage, making sure the whole cage
is covered (Fig. 19).
WARNING:
DO NOT USE THE CARTRIDGE FILTER OR DUST BAG FOR WET
VACUUMING.
IMPORTANT! When vacuuming large quantities of liquids, do not immerse the nozzle completely;
leave a gap at the tip of the nozzle to allow air inow. The machine is tted with a oat valve that
stops the suction action when the container reaches its maximum capacity. You will notice an
increase in motor noise. When this happens, turn off the machine, disconnect from power supply,
and drain the liquid. To continue vacuuming, replace the drainage cap. After wet vacuuming, empty
the container, clean and dry inside before storage.
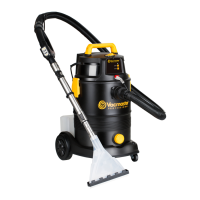
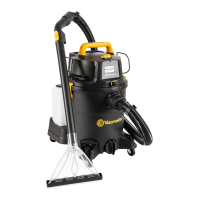
4. Carpet/Upholstery Cleaning Operation
WARNING!
ENSURE YOU READ, UNDERSTAND AND APPLY SECTION
ENTITLED ‘SAFETY INFORMATION’.
Water, mixed with a suitable carpet detergent solution, is pumped deep into the bres of the carpet
via the detergent application nozzle. The dirty liquid is then sucked back into the container along
with the dirt and grime dislodged by the cleaning solution.
1)
To prepare your vacuum cleaner for carpet/upholstery cleaning, remove the dry use cartridge lter
and dust bag if installed.
2) Carefully install the supplied foam lter over the internal lter cage, making sure the whole cage is
covered.
3) Remove the detergent tank from the vacuum base. Open the detergent tank cap and pour the
detergent solution into the tank. Ensure the detergent solution is mixed correctly with the proper