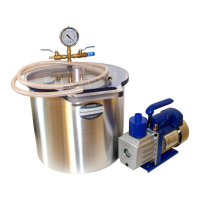
19
The vacuum chamber must be kept clean and the pneumatic components must be taken care of so that the extraneous
objects don’t get into them and as a result block and damage the chamber.
The chamber tank can be cleaned with water and a light detergent like the liquid dishwashing detergent. The polycarbonate
lid of the chamber should be cleaned only by using a soft cloth moistened with warm water. Detergents may cause
polycarbonate lid to become milky or scratched. Glass lid may be cleaned with any detergents unless they cause it to be
scratched. Do not clean the vacuum system with flammable liquids, solvents or by spraying it with a stream of water.
A. Tank gasket replacement.
The silicone gasket on the tank is a consumable item and its wearing out is a natural process. Excessive use of the gasket or
its damage may cause leakage of the chamber. If there are visible signs of wear, damage, dirt or leakage of the chamber, gasket
must be replaced. The gasket may lose its elasticity or harden as a result of contact with the materials used by the customer. In
that case, it should be replaced.
For replacement, the old gasket must be removed. Take it with hand and pull it off the tank wall. The gasket should be
completely removed, and no contamination should be left in the place of its installation.
Picture 2: Gasket - sectional view.
The new gasket should be placed on the tank in place of the old one. Installation should begin by positioning a short section
of the gasket on the edge of the tank. It is necessary to open the gasket gap locally (Picture 2) so that it can be easily placed on
the wall. When the first section of the gasket is on the tank edge, hold it with hand and slide the rest of the gasket on. The
application should continue along the gasket. Finally, press the gasket with a hand down to the tank along its entire length. Do
not apply too much pressure or hit the gasket with hard objects. Hitting the gasket can damage it, which can cause leakage in
the vacuum set.
B. Oil change.
This section is for changing the oil in the rotary oil vacuum pump available in VacuumChambers.eu offer. In case of using
another vacuum pump, follow the pump supplier’s operating instructions.
Oil in rotary vacuum pumps should be changed every 20 operating hours and at least once a year. Also, failure to reach the
maximum vacuum value, oil turbidity or a change in its colour to dark is an indication of the need to change the oil. Used oil
must be completely drained from the pump and replaced with new oil.
Oil change should only be performed when the pump is warm. Be especially careful when working with hot oil. Before
changing the oil, prepare a sufficiently large container for the old oil and a sufficient quantity of the new oil. The oil capacity of
rotary vacuum pumps ranges from 180 to 600 ml depending on the model. To change the oil:
1) Place the pump on a flat, level surface.
2) Place the old oil container below the vacuum pump so that the pump oil can drain freely into it.
Place the old oil container below the vacuum pump, below the oil drain (the drain is located under the visor and is closed
with a hexagonal socket head screw), in such a way that the oil flows freely into the container.
3) Unscrew and remove the entire oil mist filter (blue cylindrical part) or the red oil filler cap.
4) Open the oil drain.
Unscrew the oil drain screw carefully with an Allen key. Be careful not to lose the O-ring, which is located on the screw
being unscrewed.
gasket gap
20
5) Allow the oil to drain freely into the container.
To remove oil thoroughly from the pump, the pump can be started for a few seconds while the oil is being drained. When
doing this, the pump's air inlet should be open, at the same time the air outlet should be partially covered with a cloth. Do
not run the pump as described for more than 20 seconds.
6) When the oil stops draining, the pump can be gently tilted with the oil drain downwards to facilitate drainage of the old oil
into the container.
7) After draining the old oil, secure the oil drain
The drain securing screw with the O-ring on should be screwed back in the oil drain and tightened. The screw must not be
tightened too much to avoid O-ring damage. The entire O-ring should be seated completely in the recess of the pump's
aluminium housing. O-ring protruding outside the housing causes oil leakage.
8) Fill the pump with new oil following point 5. B. “Preparation of the vacuum pump.” of this manual.
9) Make sure the oil drain is tightly closed.
Oil drainage screw may leak out if it is tightened too little. In that case, gently tighten the screw and make sure that the O-
ring is positioned correctly. Tightening the screw too much can damage the O-ring.
Dispose of used oil in accordance with local regulations.
VacuumChambers.eu guarantees that the vacuum set will be operational and free of defects for 12 months from the date of
purchase. In the case of a breakdown during this period, VacuumChambers.eu will repair or replace any damaged system
element on the terms described in the warranty card included in the set.
This limited warranty does not cover damage to the system caused by improper use, maintenance or use not following this
manual. Any use of the device which not follow the intended purpose given above is forbidden and will void the warranty and
the manufacturer's liability for any damage resulting therefrom. Any modifications of the device made by the user release the
manufacturer from liability for damage and harm caused to the user and the environment. Proper use of the device also applies
to maintenance, storage, transport and repair.
VacuumChambers.eu is not liable for damages, nor does it cover them under the warranty, for any kind of losses resulting
from the breakdown of this product. In the case of a claim, VacuumChambers.eu's sole responsibility is to accept a return or
exchange of the product itself.
 Loading...