9
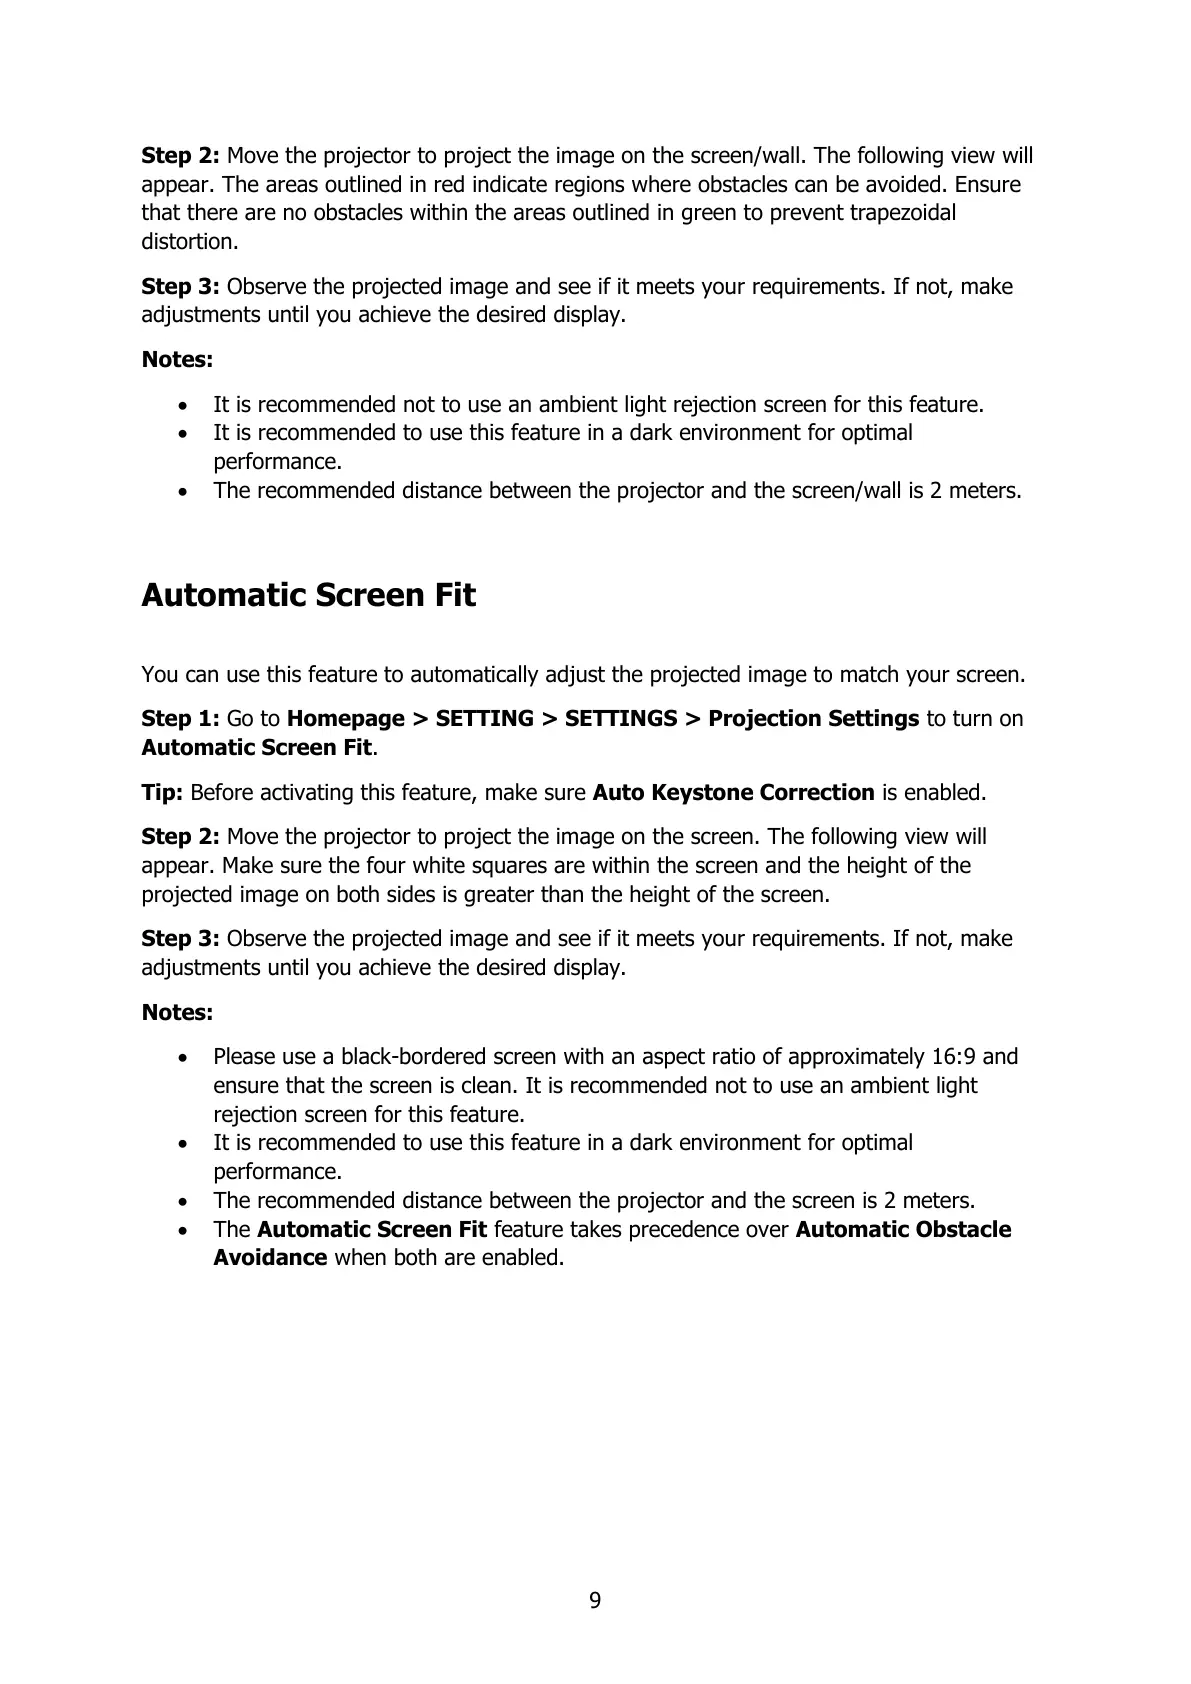
Step 2: Move the projector to project the image on the screen/wall. The following view will
appear. The areas outlined in red indicate regions where obstacles can be avoided. Ensure
that there are no obstacles within the areas outlined in green to prevent trapezoidal
distortion.
Step 3: Observe the projected image and see if it meets your requirements. If not, make
adjustments until you achieve the desired display.
Notes:
It is recommended not to use an ambient light rejection screen for this feature.
It is recommended to use this feature in a dark environment for optimal
performance.
The recommended distance between the projector and the screen/wall is 2 meters.
Automatic Screen Fit
You can use this feature to automatically adjust the projected image to match your screen.
Step 1: Go to Homepage > SETTING > SETTINGS > Projection Settings to turn on
Automatic Screen Fit.
Tip: Before activating this feature, make sure Auto Keystone Correction is enabled.
Step 2: Move the projector to project the image on the screen. The following view will
appear. Make sure the four white squares are within the screen and the height of the
projected image on both sides is greater than the height of the screen.
Step 3: Observe the projected image and see if it meets your requirements. If not, make
adjustments until you achieve the desired display.
Notes:
Please use a black-bordered screen with an aspect ratio of approximately 16:9 and
ensure that the screen is clean. It is recommended not to use an ambient light
rejection screen for this feature.
It is recommended to use this feature in a dark environment for optimal
performance.
The recommended distance between the projector and the screen is 2 meters.
The Automatic Screen Fit feature takes precedence over Automatic Obstacle
Avoidance when both are enabled.