Page 7 of 12
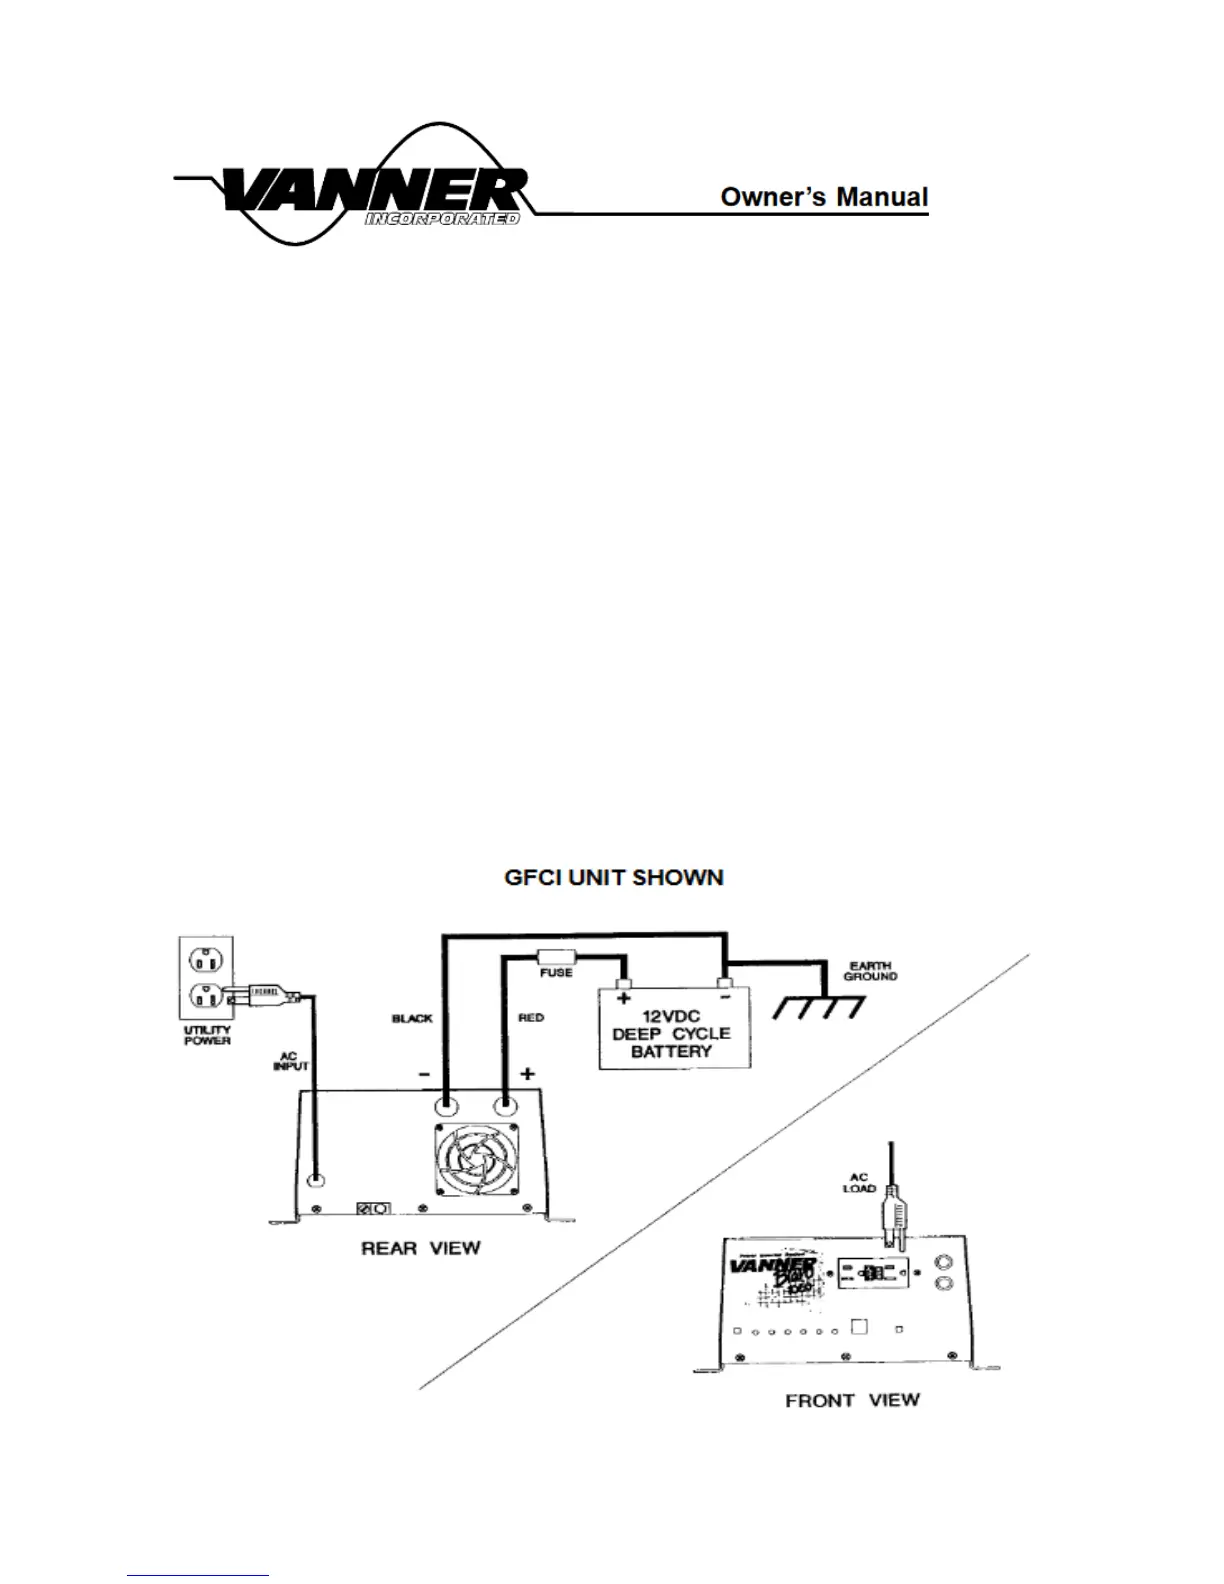
INSTALLATION: GFCI RECEPTACLE UNITS
CAUTION! Battery input cables must be connected to the battery with proper polarity
as instructed or damage to the inverter may occur.
1. The unit should be OFF before installation begins. Make sure the ON-OFF/RESET Inverter Switch is in
the OFF-RESET position (button NOT pushed in).
2. Select a location for the unit that is: a) close to the battery–within 6 ft. using #2 gauge wire, b) protected
from the weather, and c) well ventilated.
3. Route the negative and positive DC input cables from the inverter/charger to the battery. If required,
protect cables where they come into contact with hard or sharp edges.
4. Install an inline fuse (Bussman ANN 125 for 12 volt applications or ANN 80 for 24 volt applications) in
the positive (RED) DC input cable between the battery and inverter (within 18 ” of the battery).
5. Connect the negative (BLACK) DC input cable to the battery negative (-) terminal. Connect the positive
(RED) DC input cable to the battery positive (+) terminal.
6. Select the proper battery type (GEL or flooded lead acid), load demand option, and charge rate using
recessed switch on front panel.
7. Verify all connections are tight and secure for maximum performance. Installation is now complete.