Installation of the unit:
Attach the 4 hooks to the 4 corners of the unit. Using 4 screws attach the 4 chains to the ceiling
joists. Put the springs on the chains. The spring stop the vibrations from the unit being transmitted
to the structure of your house. Suspend the unit using the chains and hooks. It is very important
that the unit be level.
Install the white ring
in the unit’s fresh air intake port. This ring controls the flow of fresh air.
Remove the ring only if you make frequent use of a wood-burning stove.
Connect all the fle
xible ducts to the unit as shown in the drawing which you have previous-
ly encircled. (If your unit is installed upside down, correct the drawing accordingly.) Respect the duct
lengths supplied with the different kits. Stretch the ducts and keep them as straight as possible.
(Exceptionally, you can shorten the ducts but do not try to add extra length to them.)
Electrical Installation:
Make a hole in the wall at the chosen location for the wall control.
Run either the AWG 14/2 or the AWG 14/3 wire in the walls.
Connect the wires according to the opposite drawing.
Screw the wall control onto the wall Warning! All electrical connections must comply with local
regulations.
Verify the operation of your unit:
Connect the unit to a power source. By adjusting the wall control as described in sections 3.2b and
3.2c, verify that the unit works properly. If the unit does not work properly, refer to section 1 on the
second page of this manual.
9
8
7
6
5
7. INSTALLATION OF THE SYSTEM (continued)
10
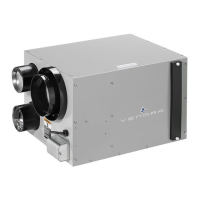
EA 20200
PRO 100
PRO 200
Installation de l’appareil :
Fixez les 4 crochets aux 4 coins de l’appareil. Fixez les 4 chaînes aux solives du plafond à l’aide
des 4 vis. Mettez les ressorts sur les chaînes. Les ressorts empêcheront la transmission des vibra-
tions à la structure de votre maison. Suspendez l’appareil à l’aide des chaînes et des crochets. Il
est important que l’appareil soit au niveau.
Installez l’anneau blanc dans la bouche d’aspiration d’air frais de l’appareil. Cet anneau
limite le débit d’air frais. Enlevez-le seulement si vous utilisez un poêle à bois fréquemment.
Raccordez tous les conduits flexibles d’après le dessin que vous avez encerclé précédem-
ment (Si votre appareil est installé à l’envers, corrigez le dessin en conséquence.) Respectez les
longueurs fournies dans les kits. (Exceptionnellement, vous pouvez réduire les longueurs fournies
mais pas l’inverse.) Bien étirez les conduits. Placez les conduits le plus possible en lignes droites.
Installation électrique :
Percez un trou dans le mur à l’emplacement choisi pour le contrôle mural. Passez le fil AWG 14/2
ou AWG 14/3 dans le mur. Raccordez les fils selon le dessin ci-contre. Fixez le contrôle au mur
avec 2 vis. Attention! Tout raccordement électrique doit être conforme au code électrique régional.
V
érifiez le fonctionnement de l’appareil :
Branchez l’appareil. En ajustant les sélecteurs tel que décrit en sections 3,2b et 3.2c, vérifiez le bon
fonctionnement de l’appareil. Dans le cas où l’appareil ne fonctionne pas, voir les conseils à la sec-
tion 1 au début de ce manuel.
9
8
7
6
5
7. INSTALLATION DU SYSTÈME (suite)
10
EA 20200
PRO 100
PRO 200
 Loading...