12
7.1 INSTRUCTIONS REGARDING WALL CONTROL
(FAE115M, UFAE115M AND VFAE115M ONLY)
7.2 WIRING DIAGRAM
• Major renovation work • Sanding of gypsum joints
• House building • Varnishing
During very heavy snow storm, the unit should also be turned off to avoid
problems caused by snow entering the unit, if it is not equipped with an anti-gust
intake hood.
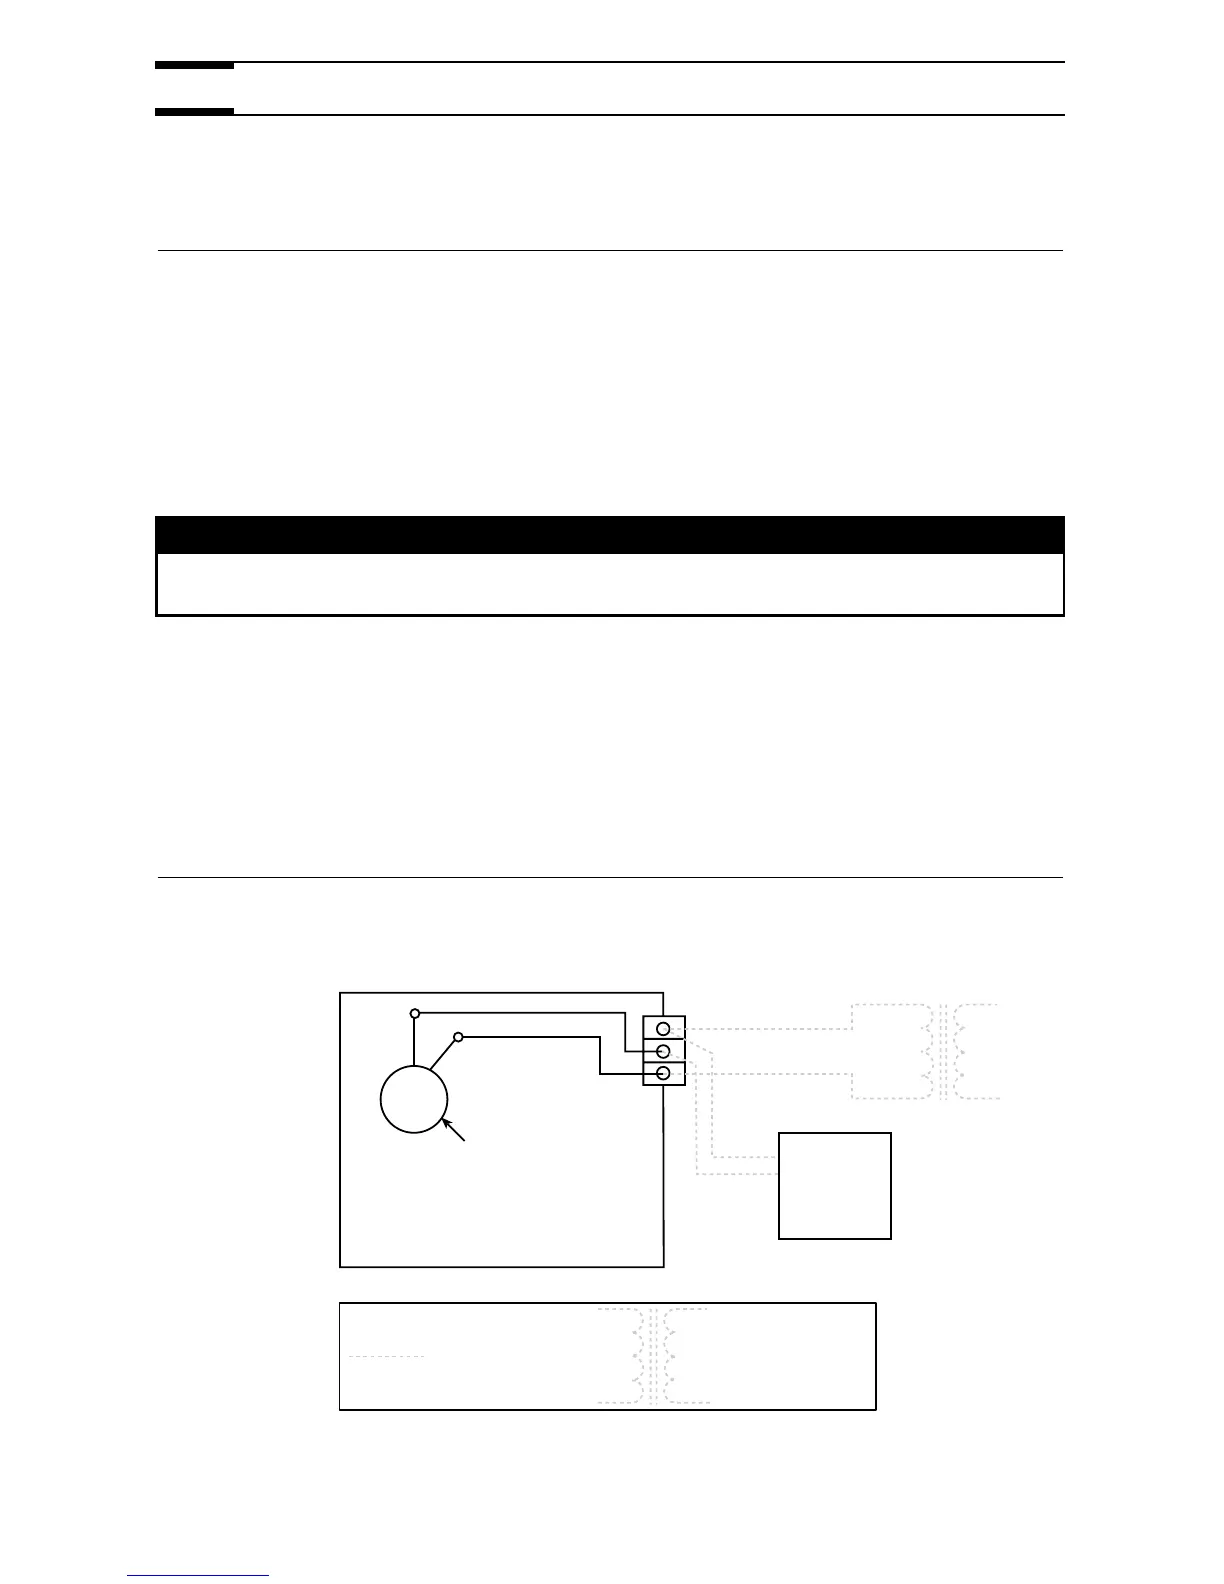
Connect transformer wires to unit terminals 1 and 3 and connect wall control
wires to unit terminals 1 and 2, as shown below.
7.0
HOW TO OPERATE THE UNIT
CAUTION
Some activities create dust or vapors wich may damage your unit.
You must turn off your unit and unplug it in the following situation:
If you owns a FAE115,a uFAE115 or a vFAE115 model, this Section doesn’t
concern your unit. Please refer to the next Sections.
This wall control works with a dehumidistat that allows you to select the
desired humidity level according to your needs. If the selector is set above the
click, the unit will close its damper and stop air exchange with outside. If the
selector is set below the click, the unit will open its dampers and allow air
exchange with the outside until the desired humidity level has been reached.
Venmar part number: #11297, vänEE part number: #200694.
VE0014A
BLACK
BLACK
BLUE
BLUE
Damper
Actuator
Class 2 Transformer
Not supplied
24 Vac
Class 2
120 Vac
Field wiring
not supplied
1
2
3
Wall
Control