Page 46
Installation and Operation Manual - HE250R
ENGLISH
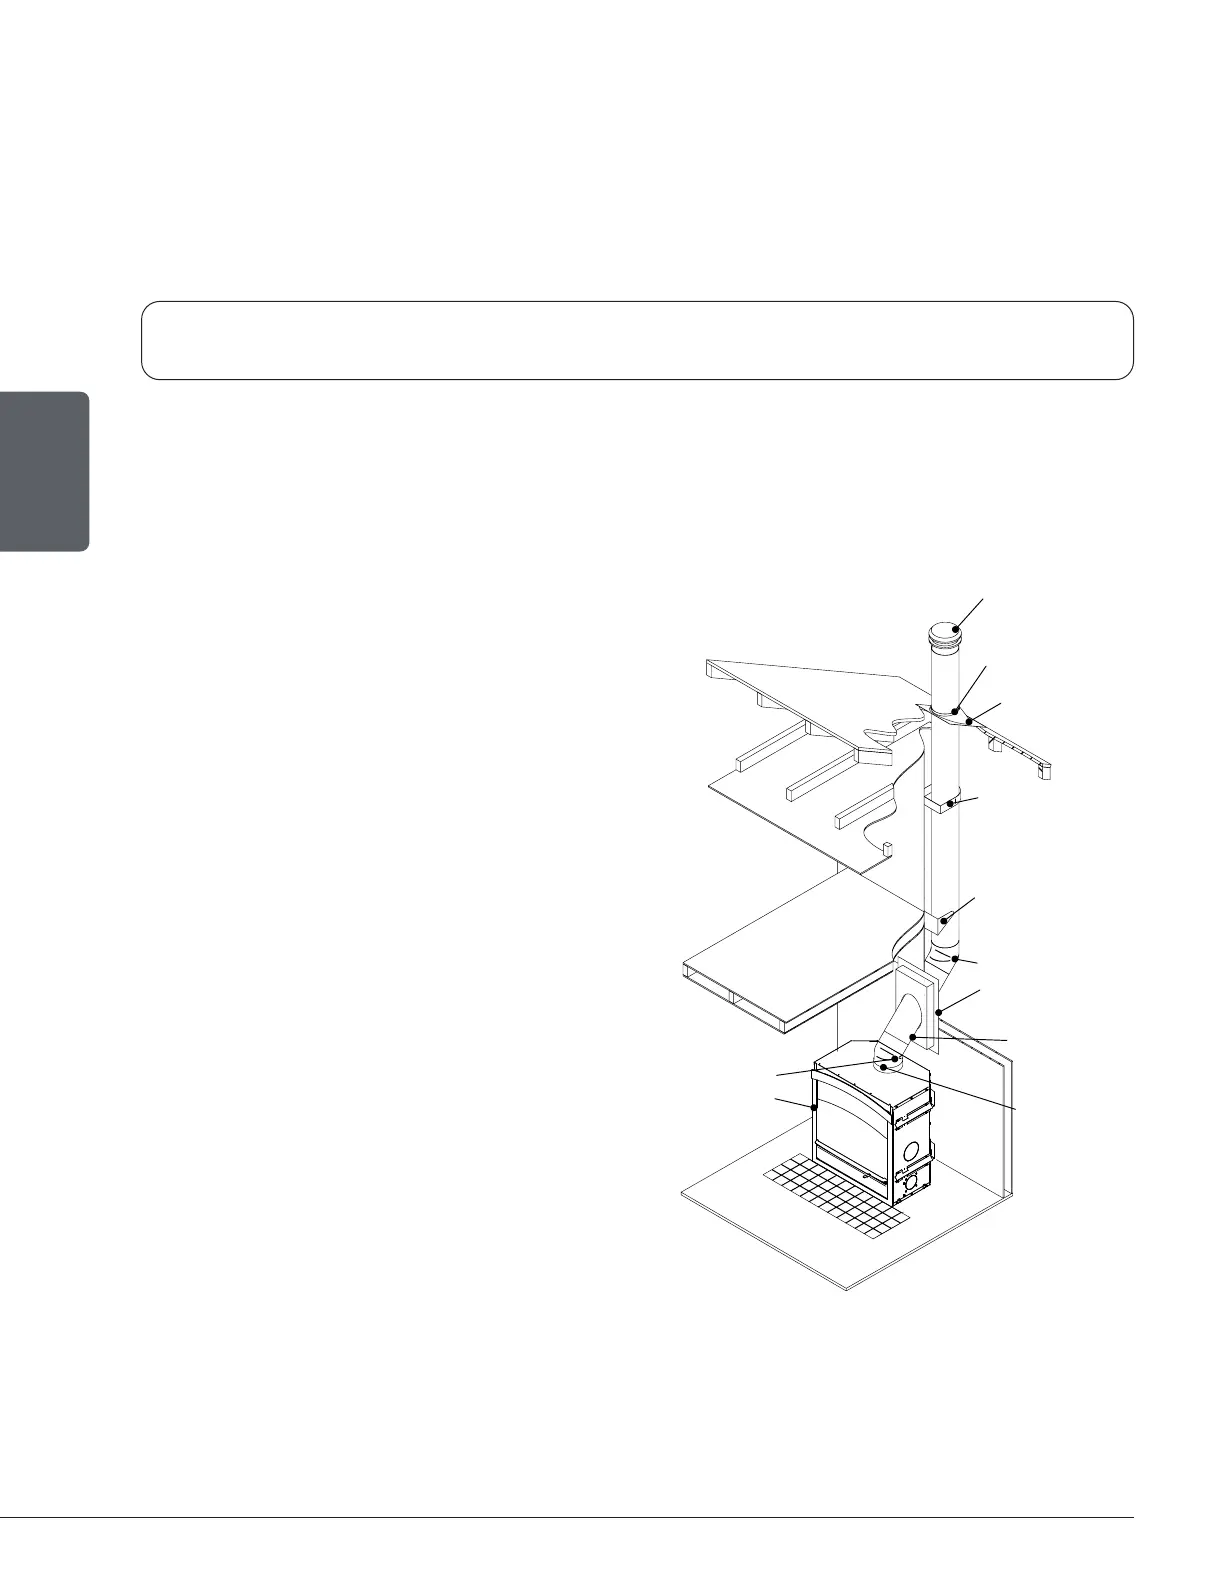
3. Install an anchor plate (A) and a first chimney section on the fireplace. Install the number of
chimney sections needed, making sure to lock each section in place.
4. When the desired height of the chimney is reached, install a roof support (not shown).
5. Put the roof flashing (E) in place and seal the joint between the roof and the flashing with roof
sealant. For sloping roofs, place the flashing under the upper shingles and on top of the lower
shingles. Nail the flashing to the roof, using roofing nails.
When a ventilated roof flashing is installed, precautions are to be taken not to caulk or seal the
ventilating openings.
6. Place the storm collar (F) on the roof flashing and tighten it with the bolt. Seal the joint between
the storm collar and the chimney, using silicone sealant.
7. Install the chimney cap (G).
• Offset Installation
1. Follow the instructions for a ceiling supported
installation until the first elbow.
2. Install and turn the elbow in the right direction.
Attach to the chimney using three ½" (12 mm)
metal screws.
3. Install the appropriate number of chimney
sections to obtain the necessary deviation.
Secure the chimney sections together with
three ½" (12 mm) screws. If the offset section
has two or more chimney sections, a bracket
must be installed. If the chimney go through a
wall, install a wall thimble.
4. Install another elbow to bring the chimney back
in a vertical position.
5. Continue the installation following the
instructions of the ceiling supported installation.
FIREPLACE
ELBOW
INSULATED WALL
RADIATION SHIELD
ELBOW
CHIMNEY SECTION
OFFSET SUPPORT
WALL BAND
STORM COLLAR
FLASHING
RAIN CAP
CHIMNEY ADAPTOR
1ST FLOOR
BASEMENT
ATTIC
 Loading...