Page 45
Installation and Operation Manual - HE250R
ENGLISH
• Cut and frame square holes in all floors, ceilings,
and roof that the chimney will go through to
provide a 2" (50 mm) minimum clearance between
the chimney and any combustible materials. Do
not fill this 2" space with insulation or any other
combustible material.
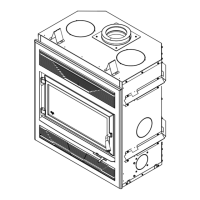
• In all cases, the chimney must start with a 6"
diameter anchor plate attached to the fireplace.
• If the male anchor plate nozzle exceeds 2" (50
mm) in length (A), it must be cut above the lifting
hooks welded inside the flue outlet so that it is
sitting perfectly on the top of the fireplace.
• Ceiling Supported Installation
D
E
B
F
C
A
G
A : Anchor plate
B: Ceiling support
C: Framing opening
D: Attic insulation shield
E: Roof flashing
F: Storm collar
G: Chimney cap
1. Cut and frame square openings (C) in the ceiling, floor and roof where the chimney will pass. A 2"
clearance must be maintained between the chimney and any combustible materials. The 2" space
must remain empty, without insulation or any other combustible material. The size of the floor and
ceiling holes must be in accordance with the chimney manufacturer’s instructions.
2. From underneath the ceiling, install a ceiling support (B) in each floor where the chimney will pass.
In the attic, install an attic radiation shield from above (D).
 Loading...