Page 47
Installation and Operation Manual - HE250R
ENGLISH
Table 3 : Minimum system height when using elbows
Chimney model See Table 4
Vertical Installation 15 ft (4,6 m)
Two (2) elbows 15 ft(4,6 m)
Four (4) elbows 17 ft (5,2 m)
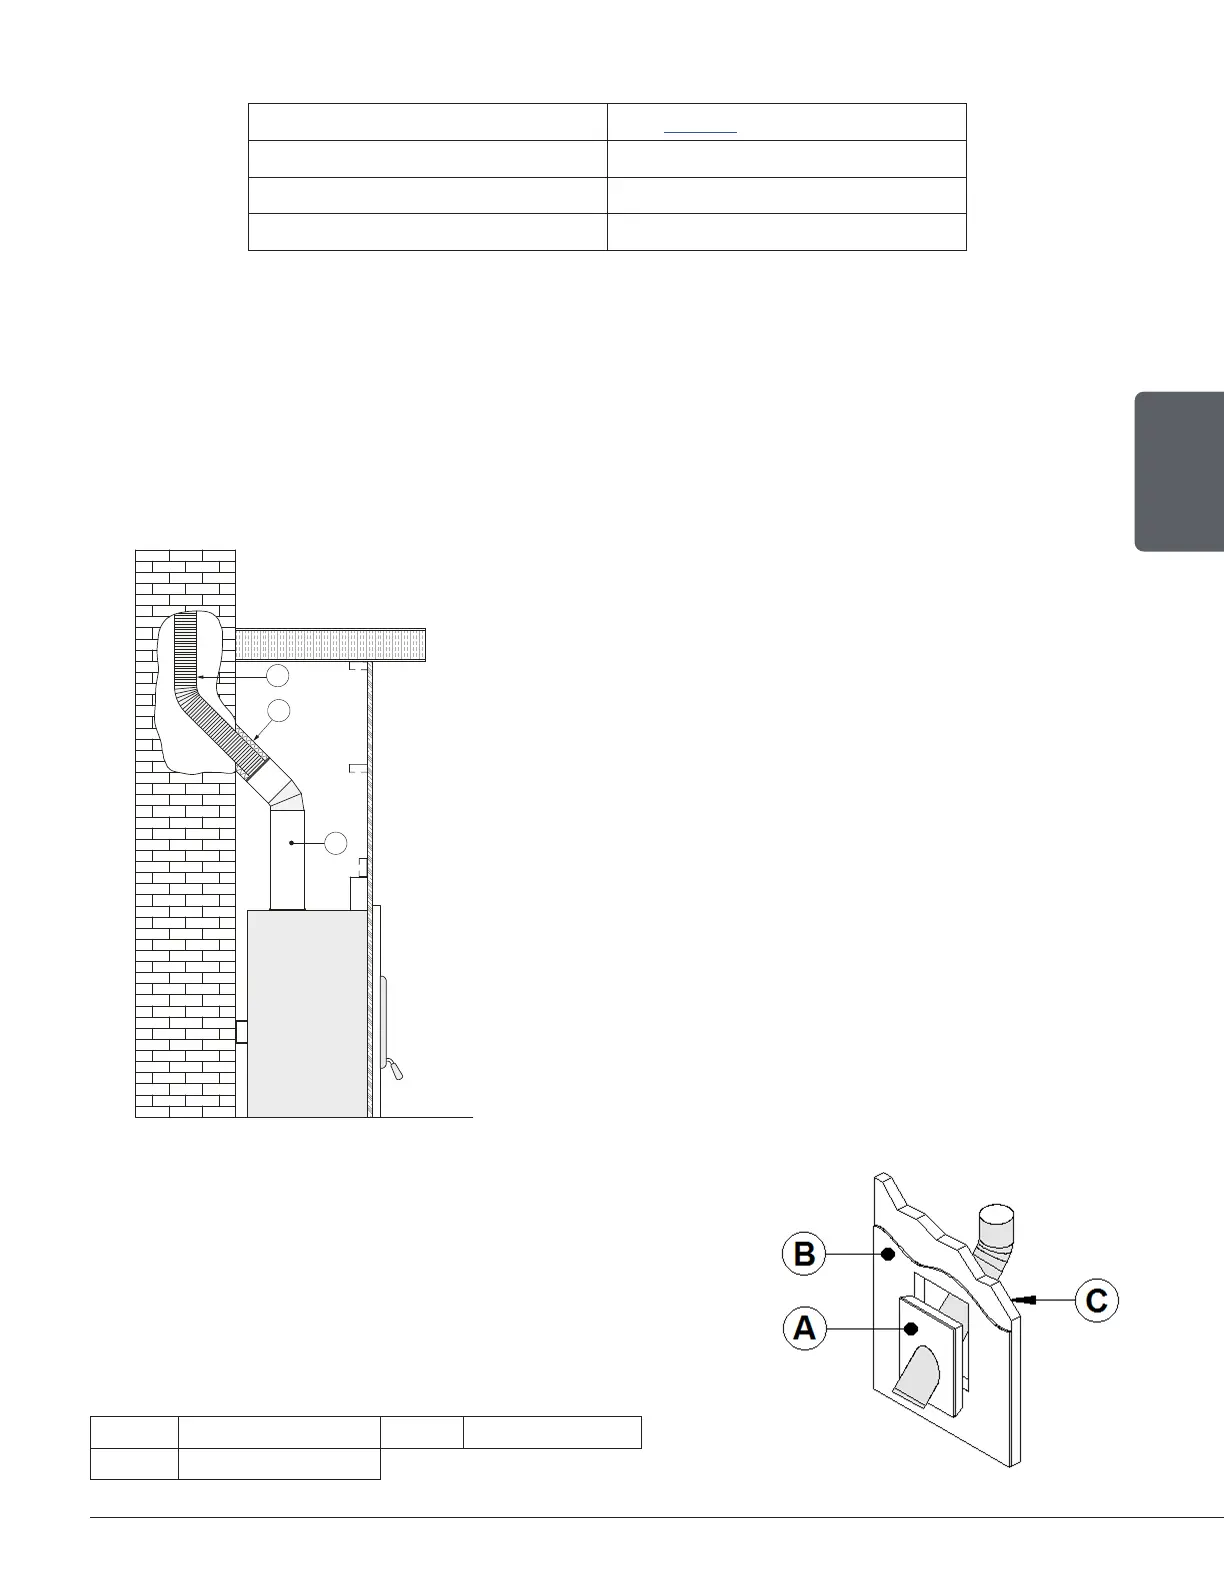
9.3.2 Masonry Chimney Installation
The masonry chimney must meet the minimum requirements of the local building code or
equivalent for a safe installation. Contact a building inspector to learn about the requirements
in the area.
Before starting the installation, the masonry chimney should be inspected for cracks, crumbling
mortar, creosote layers, obstructions or other signs of deterioration. If signs of deterioration are
noted, the chimney should be repaired and cleaned before installation.
A
B
C
1. Position the replace in its location. Temporarily install the
elbow or chimney section (A) on the top of the fireplace
and, using a level, mark with an oval the location where
the flue liner will enter the masonry chimney.
2. Mark where the flue will pass through the masonry
chimney. Drill a hole in the masonry chimney to insert
an insulated liner adapter (B).
3. Lower the liner (C) into the chimney to the level of the hole.
4. Slide an insulated 45° or 30° liner adapter and connect
it to the liner.
5. Seal the opening around the liner with high temperature
refractory cement.
6. Then, follow the chimney manufacturer’s instructions
to connect the extended liner section to the special
chimney connector.
The liner must extend at least 12" (30 cm) above the
masonry chimney.
9.4 Angled Wall Pass-Thru Installation
When passing through a combustible wall with the chimney
at a 30° or 45° angle (Canada only), an angled wall pass-
thru must be installed. Follow the chimney manufacturer’s
installation instructions.
In cold climate locations, it is recommended to use the insulated
wall pass-thru to maintain the home’s thermal barrier.
A Wall pass-thru C Exterior wall
B Interior wall
 Loading...