SERVICE
Service - 46
9. Install the new air lter element(s).
10. Install the lter cap and fasten both latches.
Filling The Fuel Tank
1.
DANGER
Fuel is ammable and/or explosive. Follow all
safety instructions in the Fuel Safety section of
this manual and in the engine operator’s manual.
CAUTION
Avoid damage to your engine!
Only use fuel that meets the specications required
for your engine. Refer to the engine operator’s
manual for the proper grade and specications of
fuel for your engine.
WARNING
Long term exposure to fuel vapors can cause
serious injury or illness. Avoid prolonged
breathing of fuel vapors.
If fuel is spilled on skin or clothing, change clothing
and wash affected skin immediately.
Park the power unit on a level surface.
2. Engage the parking brake and shut off the engine.
3. Remove the key from the ignition switch and
allow the engine to cool.
4. The fuel tank cap is located on top of the left
rear fender. Wipe any dust and dirt off the fuel
cap to prevent dirt from falling into the fuel tank,
and remove the fuel cap.
5. Add fuel to the tank until the fuel level reaches
the bottom of the fuel neck*. Do not overll by
lling the fuel neck, as this may cause engine
ooding. Keep the fuel nozzle in contact with the
rim of the fuel neck until fueling is completed.
6. Replace the fuel cap and tighten.
7. Wipe up any fuels spills and allow fuel vapors to
dissipate before starting the engine.
Changing The In-line Fuel Filter
1. Park the power unit on a level surface.
2. Engage the parking brake and shut off the engine.
3. Remove the key from the ignition switch.
4. Turn the fuel shut-off valve to the Off position.
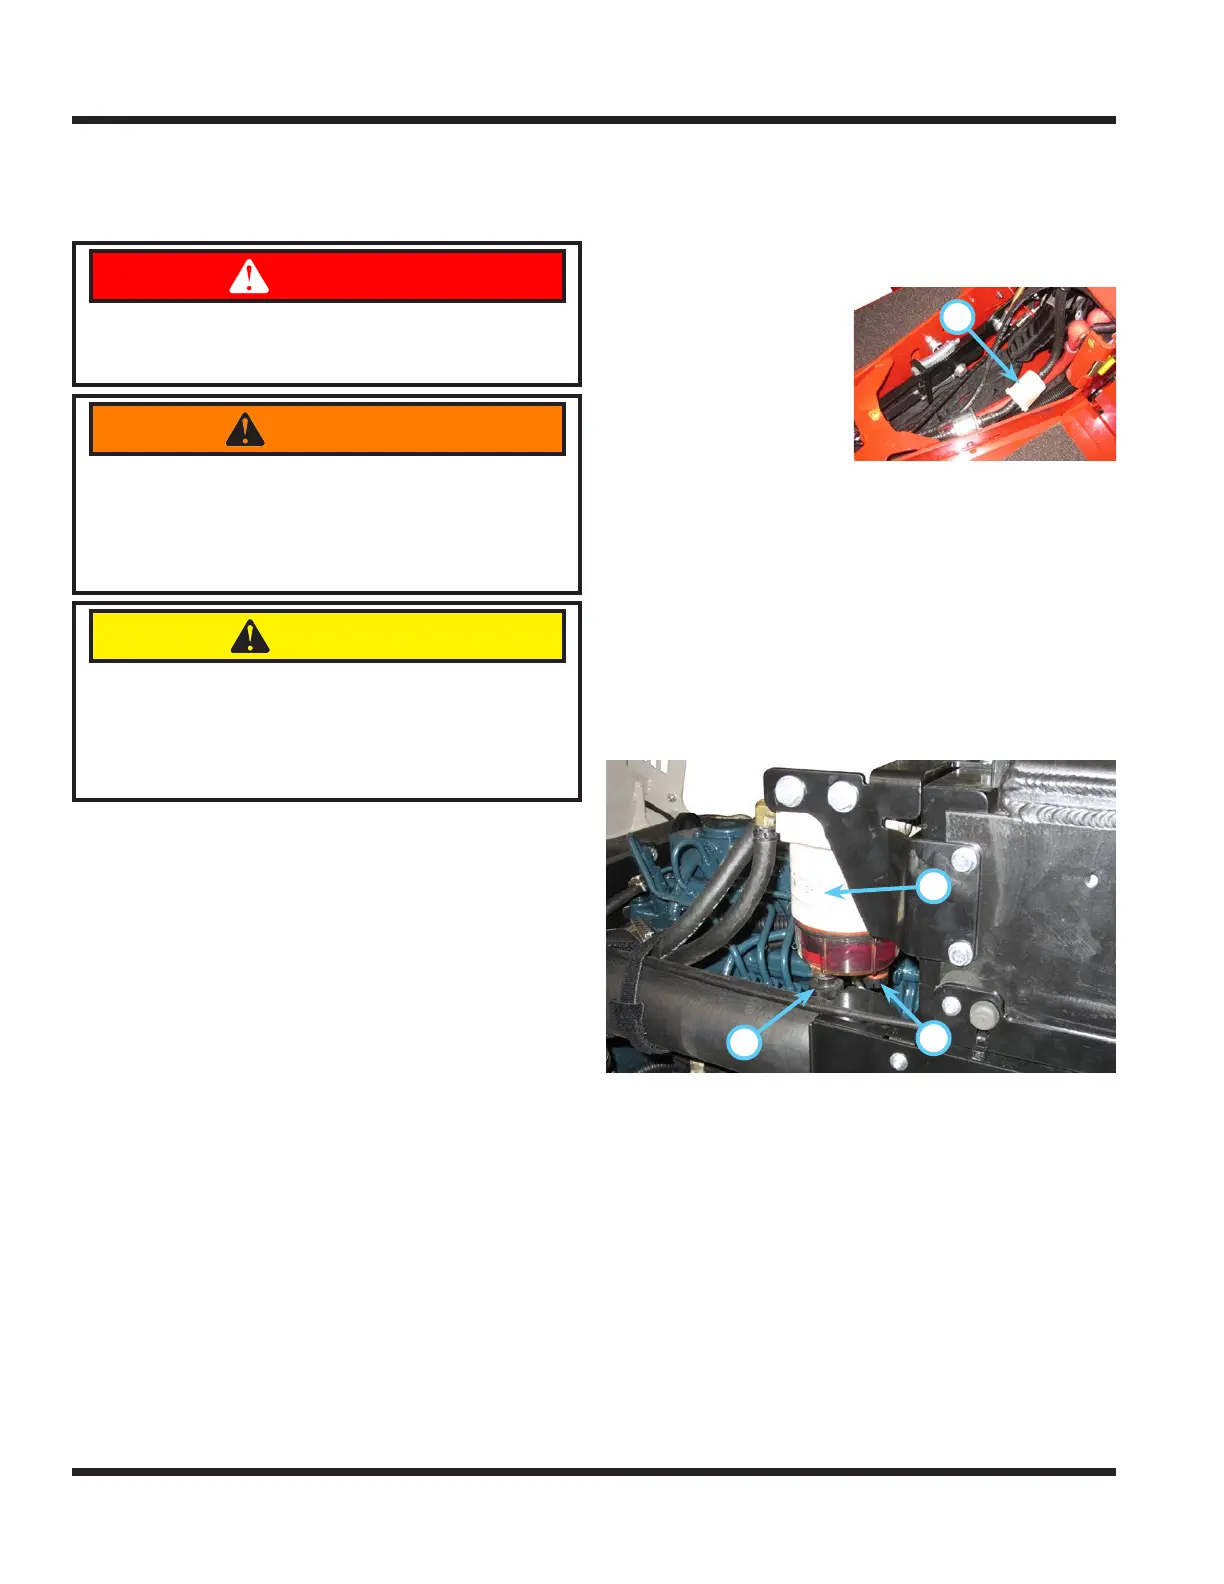
A
5. Remove the lower
rear frame cover.
6. Loosen the hose
clamps and remove
the fuel lter (A).
7. Install the new fuel
lter with the ow
arrow pointing toward the engine and fasten
securely with the hose clamps.
8. Turn the fuel shut-off valve to the On position.
9. Inspect fuel lter hose connections for leaks.
10. Reinstall the lower rear frame cover.
Fuel Filter / Water Separator
Water and sediment can be observed through the
glass bowl on the bottom of the lter.
1. Drain water through the valve (A).
2. Remove sediments through the plug opening (B).
A
B
C
Changing the lter:
1. Turn the fuel shut-off valve to the Off position.
2. Remove the fuel lter canister (C).
3. Replace the fuel lter and reinstall the fuel lter
canister.
4. Turn the fuel shut-off valve to the On position.
5. Prime the fuel system, if necessary.
Priming The Fuel System
1. Turn the ignition key to the On position for about
30 seconds. The operator should hear the fuel
pump operating.
2. Start the power unit. Repeat step 1 if necessary.
*If power unit will not be used after lling fuel tank, only ll the tank to within
1” (25 mm) of the bottom of the fuel neck to allow room for fuel expansion
from temperature changes. Failure to do so may cause engine ooding.


 To Next Page