EasyManua.ls Logo

Veria Control ET45 - User Manual

Veria Control ET45
16 pages
Print Icon
To Next Page IconTo Next Page
Loading...
Veria Control T45
Installation guide
EN
Question and Answer IconNeed help?

Do you have a question about the Veria Control ET45 and is the answer not in the manual?

Overview

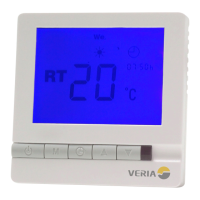
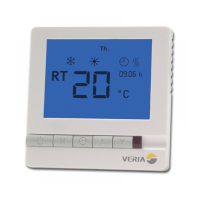
The Veria Control T45 is an advanced digital timer thermostat designed to manage your floor heating system. It offers flexible control options, allowing you to regulate heating based on floor temperature, room temperature, or a combination of both. This ensures optimal comfort and energy efficiency for various floor constructions.

Function Description:

The thermostat provides comprehensive control over your heating system with several operational modes:

  • Floor Temperature Control (Program Mode 2): In this mode, the heating element switches on and off to maintain a set floor temperature. The display shows the actual floor temperature. This mode is suitable for all floor types and has a total effect range of 0W-2990W. The maximum floor temperature is fixed at 35°C and cannot be changed in this mode.

  • Room Temperature Control (Program Modes 1 & 4): Here, the heating element operates to maintain a set room temperature. The display shows the actual room temperature.

    • Program Mode 1 is recommended for wooden floors (parquet, laminate, massive wood, carpet, linoleum) with a total effect range of 0W-1840W.
    • Program Mode 4 is suitable for tiled floors (tiles, concrete, marble) with a total effect range of 1840W-2990W.
  • Combined Floor and Room Temperature Control (Program Modes 3 & 5): This mode prioritizes floor temperature while maintaining a set room temperature. The heating element turns on/off based on the room temperature setpoint, with a requested maximum floor temperature.

    • Program Mode 3 is recommended for tiled floors with a total effect range of 1840W-2990W.
    • Program Mode 5 is suitable for wooden floors with a total effect range of 0W-1840W. In these combined modes, the maximum floor temperature can be adjusted between 20°C and 45°C (default 35°C).

Usage Features:

  • Power On/Off: Simply press the power button to turn the thermostat on or off.
  • Mode Selection: With the thermostat turned off, press and hold the power button and the "Up" arrow for 6 seconds to enter mode selection. You can then choose from modes 1 to 5.
  • Clock Setting: When the thermostat is on, press the clock button once to set the hour, then use the Up/Down keys. Press the clock button again to set the minute, then use the Up/Down keys. Press the clock button again until the weekday flashes, then use the Up/Down keys to select the day.
  • Setting Maximum Floor Temperature (Modes 3 & 5): With the thermostat off, hold the "M" button for 10 seconds until "A" appears, then release "M" and "SET" will display. You can then enter the desired maximum floor temperature (20°C-45°C).
  • Reading Floor Temperature (Modes 3 & 5): When the thermostat is on, press "M" once. "FT" will flash, and the display will show the floor temperature. In mode 2, the display always shows the current floor temperature. In modes 1 and 4, it shows the current room temperature.
  • Frost Protection Mode: To enable, turn the thermostat off, then press "M" for 3 seconds. Select "01" (00 disables it). When active and the thermostat is off, heating will activate if the room/floor temperature drops below 5°C and stop if it rises above 7°C. The display will show a snowflake icon when enabled.
  • Timer Functionality:
    • Activation: With the thermostat on, hold the "M" button for 3 seconds. Select "01" for programmable timer (00 disables it). The display will show a clock icon.
    • Programming: The thermostat supports 4 heating periods for weekdays and 4 for weekends. Programming should be done in one continuous process. For weekends, you can program 2 periods and make the others very short or an extension.
    • Programming Steps: Hold the clock button for 3 seconds. "1" and "Mo Tu We Th Fr" will display. Use Up/Down to set the start time, press clock to accept. Use Up/Down to set the temperature, press clock to accept. Repeat for periods 2-4. After weekdays, "Sa Su" will display for weekend programming.
    • Override: At any time, you can change the preset timer temperature by pressing the Up/Down key. This manual override lasts until the start of the next timer cycle, after which the programmed settings resume. To disable the timer completely, select "Override" (Mode 01) in the timer activation menu.

Important Technical Specifications:

  • External Sensor: NTC 10 kOhm at 25°C
  • Sensor Values:
    • 15°C: 14.8 kOhm
    • 18°C: 13.1 kOhm
    • 20°C: 12.1 kOhm
    • 22°C: 11.2 kOhm
  • Display: LCD
  • Power Consumption: <2W
  • Set-point Range:
    • Room: 5°C to 35°C
    • Floor: 20°C to 35/45°C
  • Accuracy: ±1°C
  • Buttons: Touch pad
  • Switch Current Rating: <13A (resistive load)
  • Mains Voltage: 85-240V~
  • Dimensions: 86 x 86 x 13 mm (WxHxD)
  • Fixing Screw Width: 60mm
  • Housing: ABS + PC Flame Retardant
  • Operating Rating: 0~30°C, 5~95% RH (non-condensing)

Installation and Maintenance:

  • Installation: The thermostat must be installed by an authorized electrician. To mount, gently push the tabs at the bottom to open the thermostat. Screw it into the wall socket/box. Connect cables according to the wiring diagram provided (L, N, Load, S1, S2 for remote sensor). Once connected, mount the front panel back onto the back part.
  • Warranty: The Veria warranty requires an authorized electrician/installer to fill out the warranty certificate with details such as name, address, installation date, thermostat name, and article number.

Veria Control ET45 Specifications

General IconGeneral
BrandVeria
ModelControl ET45
CategoryThermostat
LanguageEnglish

Related product manuals