Ruby2 Hardware Installation Guide
October 01, 2013 9
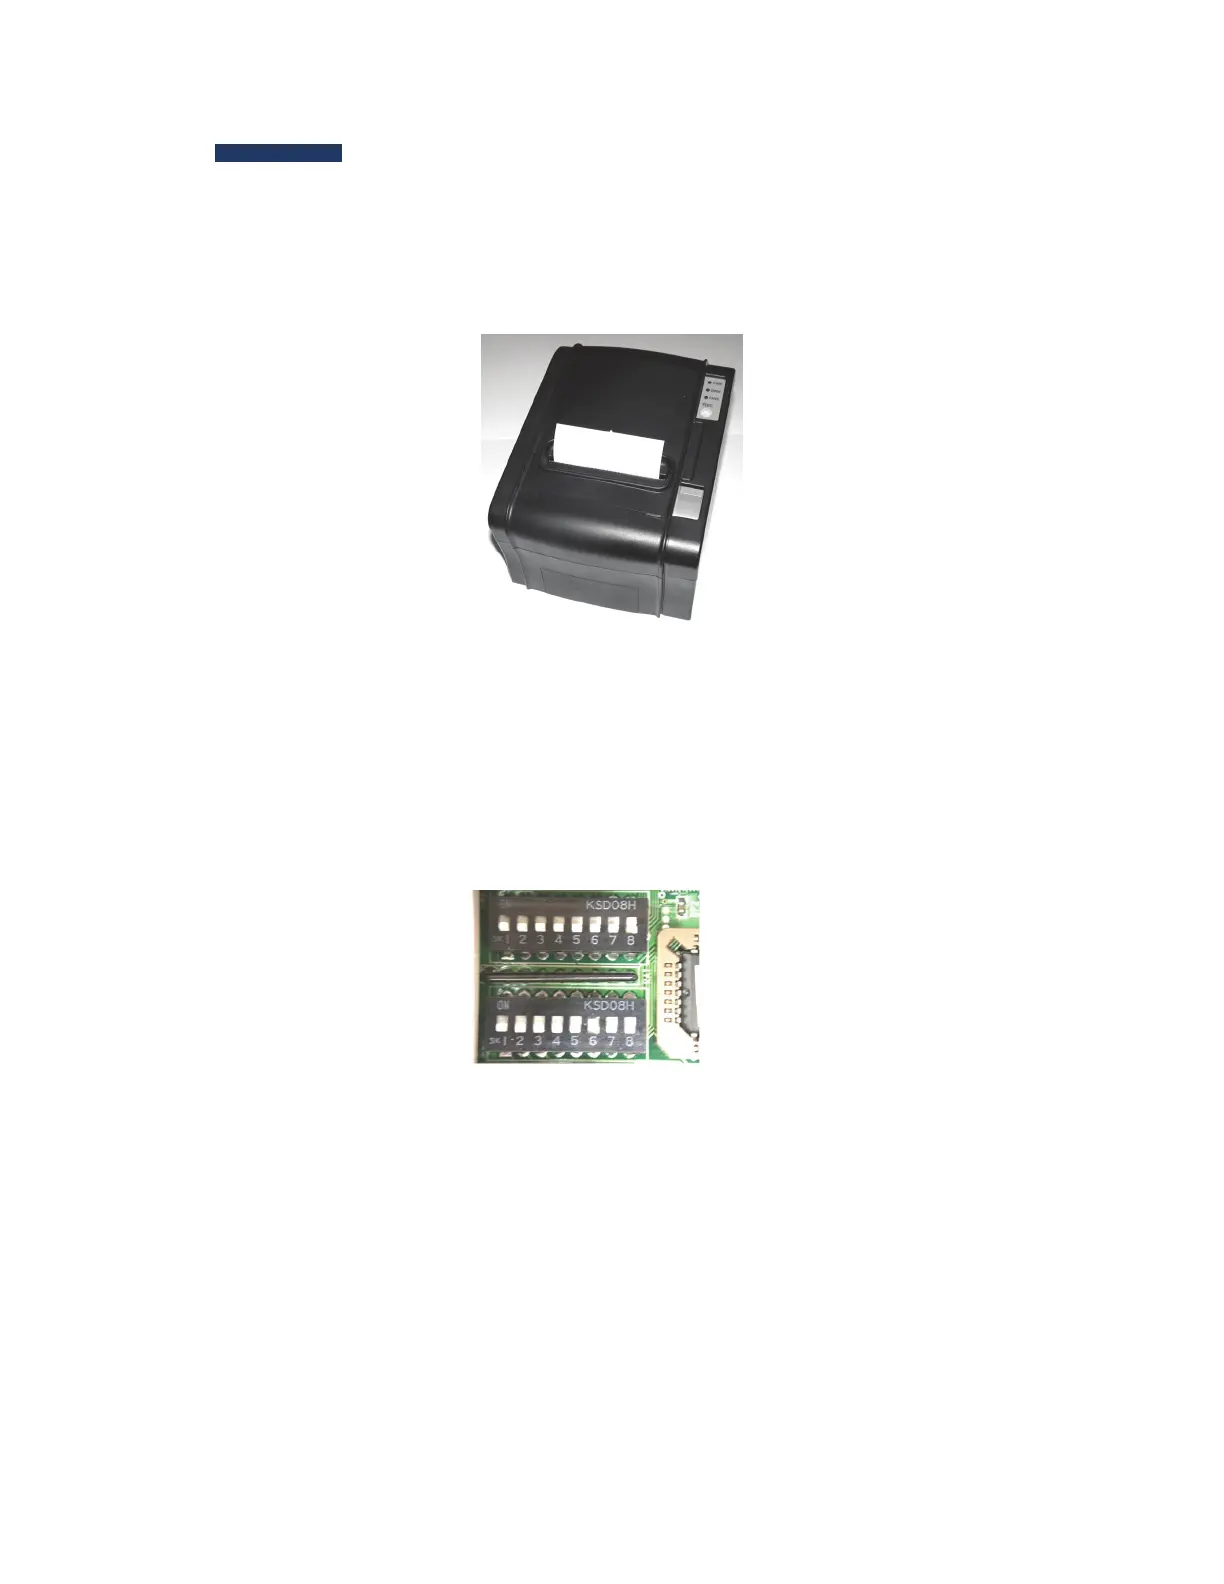
Thermal Receipt Printer Configuration
There are two switch banks (SW1 and SW2), each with eight switches,
located on the bottom of the Thermal Receipt Printer.
1. Locate the Switch Bank cover on the bottom of the printer and
remove the screw holding the cover in place. Lift the cover up and
remove it.
2. For use with Ruby2, SW1 switches should all be in the OFF position.
3. SW2 switches should be in the OFF position, with the exception of
switch 6, which should be in the ON position.
Note: If necessary, use a paper clip to change switch positions.
4. Replace the cover plate. The printer is ready to be installed.