3
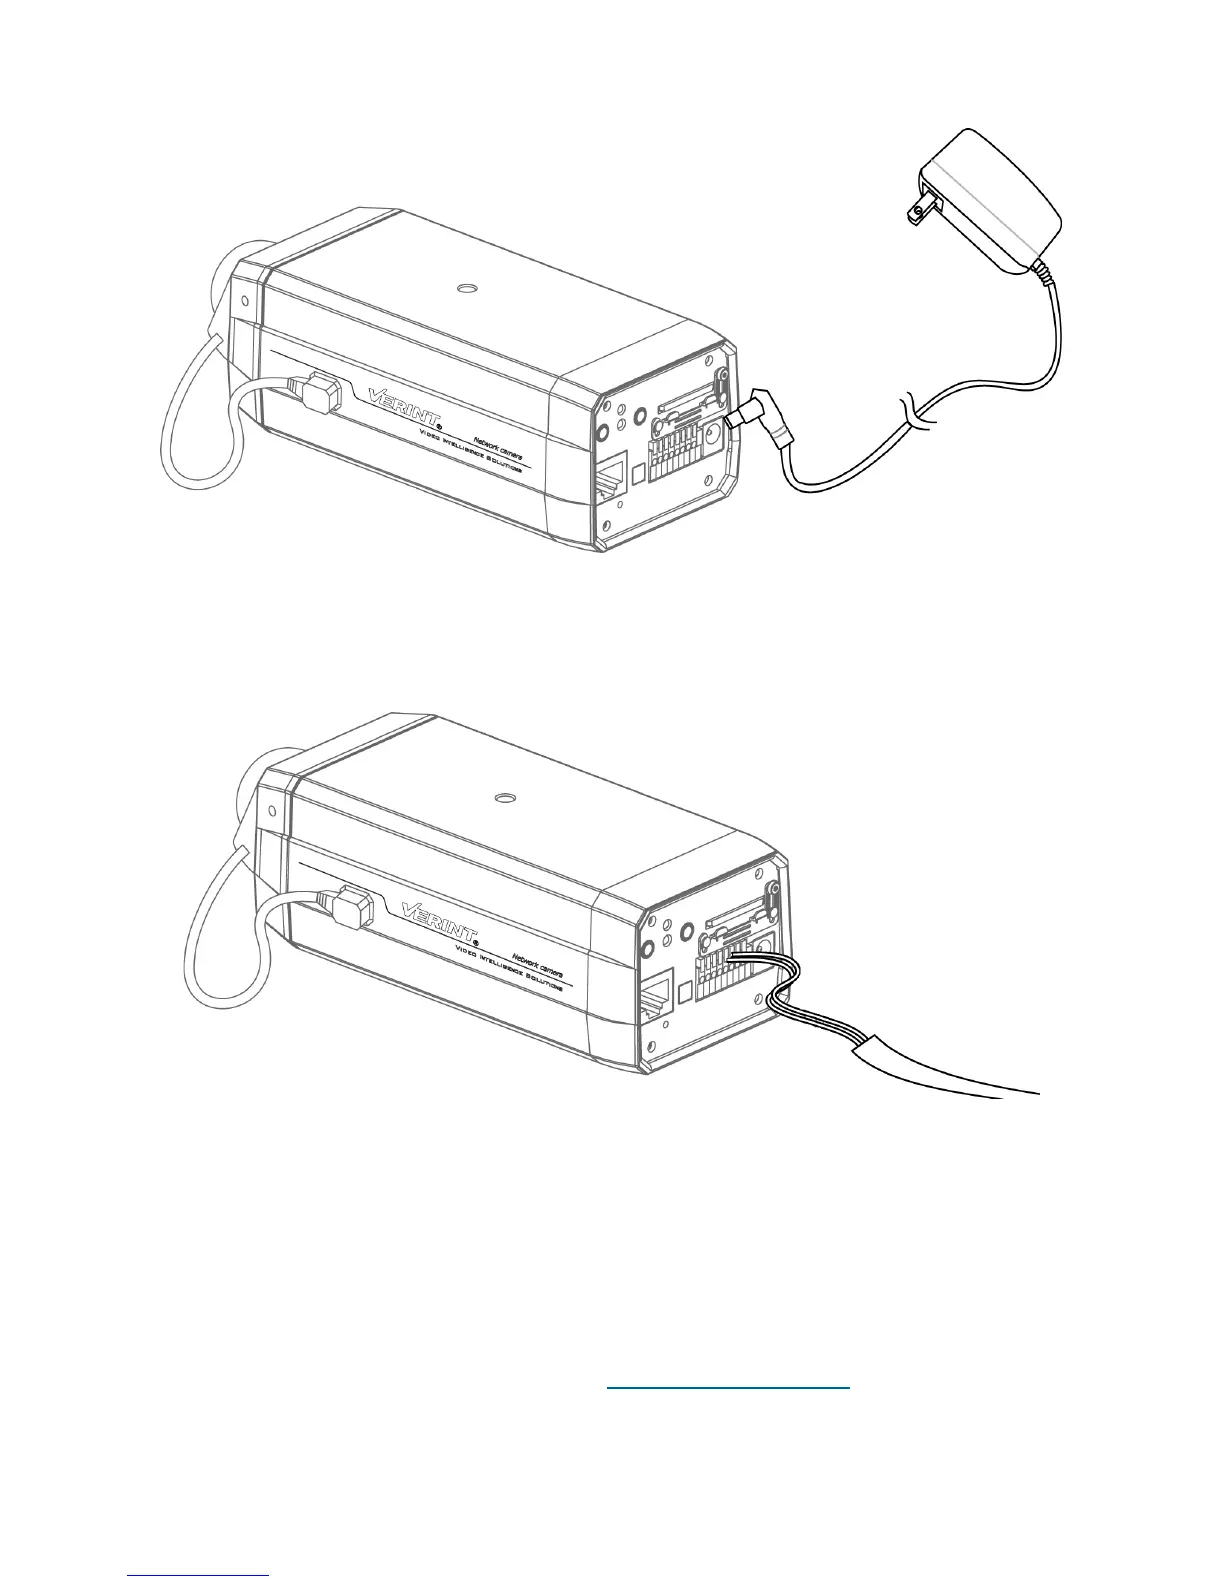
To power the Nextiva S5000BX models using a 12V DC power supply:
1. Connect the power supply cable to the camera.
2. Plug an ethernet cable into the RJ-45 connector on the back of the IP camera.
3. Plug the power supply cable to the power outlet.
To power the Nextiva S5000BX models using a 24V AC power supply:
1. Connect the wires from the power supply cable to the 24V AC connector.
2. Plug an ethernet cable into the RJ-45 connector on the back of the IP camera.
3. Plug the power supply cable to the power outlet.
Setting the IP Address
By default, all Nextiva S5000 series IP cameras are DHCP (Dynamic Host Configuration Protocol) enabled.
If you have a DHCP server, the IP camera will automatically obtain a valid IP configuration. If the DHCP
configuration fails, the IP camera assigns itself a temporary IP address based on the APIPA (Automatic
Private IP Addressing) addressing format.
To set the IP address of the Nextiva S5000 series IP cameras:
1. Download the latest version of SConfigurator from:www.verint.com/manuals.
2. Extract the executable file (SConfigurator.exe) to the desktop of the computer.
3. Double-click SConfigurator.exe to start SConfigurator.
4. In the General tab, click Program Options.
 Loading...