To access advanced settings and manage the Jetpack, sign in to the Jetpack Admin website using the
following steps:
1. Connect your Wi-Fi–capable device to the Jetpack using the steps outlined in the Connecting to
the Internet section.
2. Open a Web browser on your connected device and enter
http://my.jetpack or http://192.168.1.1.
Some computers will only accept the IP address to connect to the Jetpack Admin website.
3. Sign in with the Jetpack Admin password.
1. Verify the Jetpack is powered on.
2. Open the Jetpack Admin website option in the Help menu to view the Admin password.
Important: The default Admin password is the same as the default Wi-Fi password. To change either
password, sign in to the Jetpack Admin website (see Accessing Advanced Settings).
Managing Wi-Fi Networks and Connections
When connected to the 4G LTE network, the default settings allow 15 Wi-Fi–capable devices to connect
wirelessly to the primary network, one Wi-Fi–capable device to connect wirelessly to the guest
network, and one additional tethered device via USB. The guest network is turned off on initial start-
up. To use the guest network, you must turn it on in the Wi-Fi option of the Settings menu.
To change the number of devices that can connect to either network, follow the steps below:
1. Sign in to the Jetpack Admin website and select Jetpack Settings > Wi-Fi .
2. Choose a Wi-Fi profile and then expand the Options.
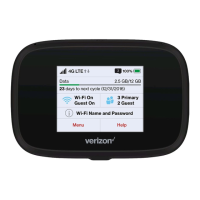
Monitoring Data Usage
You can monitor your Jetpack data usage and set up usage alerts through your My Verizon account.
You can also see current usage details on your Jetpack Home screen or by scrolling to the Data Usage
icon and opening the menu item.
User Guide
To download a User Guide go to verizonwireless.com/support and find your device.
To access the User Guide from the Jetpack Admin website, select My Jetpack Home and select the
Device Support Page & User Guide link under Help & Support.
Get Help Using Your Jetpack
View Help content right from your Jetpack.
Customer Service
 Loading...