EasyManua.ls Logo

Viavi Smart Class 4800 User Manual

Viavi Smart Class 4800
7 pages
To Next Page IconTo Next Page
Page #1 background imageLoading...
Page #1 background image
Smart Class 4800/4800P Quick Start Guide
July 2017 22122291, Rev. 000 Page 1
Smart Class 4800/4800P Quick Start
Guide
Thank you for purchasing a Smart Class 4800 or 4800P. This guide provides informa-
tion on how to get started testing with the instrument.
Unpacking and inspecting the components
Before using the instrument for the first time, please inspect the unit and components
to verify that no damage occurred during shipping.
When unpacking the components, verify that all the items you ordered are included in
the package. Accessories may be shipped in a separate box. After you unpack the
components, examine the connectors, ports, LEDs, and screen for damage. Be sure to
check the top, bottom, and front panels. If you find damage, contact Viavi Customer
Care at 1-844-GO-VIAVI (+1-844-468-4284) or at www.viavisolutions.com
. If you don’t
find any damage, consider saving the box and packing materials.
About the Smart Class 4800 and 4800P
The Smart Class 4800 and 4800P instruments are designed to be rugged, portable,
battery-operated test solutions that facilitate the quick turn-up and troubleshooting of
multiple services and network elements in the Metro and Core network.
Figure 1 Smart Class 4800
Question and Answer IconNeed help?

Do you have a question about the Viavi Smart Class 4800 and is the answer not in the manual?
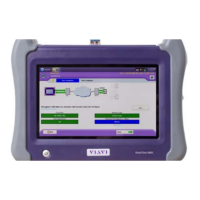
Viavi Smart Class 4800 Specifications

General IconGeneral
BrandViavi
ModelSmart Class 4800
CategoryTest Equipment
LanguageEnglish

Summary

Unpacking and Inspecting Components

About the Smart Class 4800 and 4800P

Instrument Operation

Turning the Instrument On or Off

Instructions for powering the instrument on and off, including shutdown procedures.

Charging the Battery

Details on how the instrument's battery is charged via the AC adapter.

Exploring Hardware and Connectors

Navigating the User Interface

System and Test Icons

Explains the purpose of System and Test icons for settings and applications.

Menu Bar

Outlines the icons available in the menu bar for navigation and functions.

User Interface Components and Settings

Quick Config Settings

Describes quick configuration settings for test applications.

Test Tabs and Status

Explains the test tabs and how test status is displayed.

Application Buttons and Message Bar

Details the function of application buttons and the message bar.

User Interface Panels and Results

LED Panel

Explains the function of LEDs for indicating signal status and events.

Actions Panel

Describes the Actions Panel and its context-dependent buttons.

Results Buttons and Windows

Details how to select and view test results using buttons and windows.

Additional Documentation

Related product manuals