About the Smart Class 4800 and 4800P
Smart Class 4800/4800P Quick Start Guide
July 2017 22122291, Rev. 000 Page 4
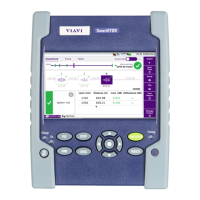
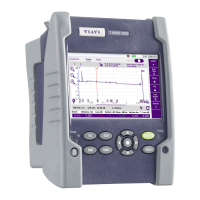
Test Tabs
The test tabs appear near the top of the Main screen.
Test Status
The test status of the currently selected test is displayed in the upper left. Icons similar
to a DVD or audio player indicate the status: the “Play” icon indicates a test is running;
“Pause” appears when running a delayed-start timed test, and “Stop” appears when the
test is stopped.
Application Buttons
The buttons located on the right side of the graphical user interface allow access to the
setup screens, restart tests, and perform other functions specific to your test applica-
tion.
The top button (Setup/Results) is used to toggle between the Setup screens and the
Main (Result) screen. When the Main screen is displayed, the Setup button appears;
when the setup screens are displayed, the Results button appears.
A Restart button is also provided which allows you to restart a test (and clear results).
Additional buttons appear when appropriate for the test application you select. For
example, if you select a Layer 4 Multiple Streams Ethernet application, a Toolkit button
is provided which allows you to run a variety of scripts designed to simplify testing.
For descriptions of setup parameters, refer to the testing manual.
Message Bar
The message bar displays the current test application selected on the unit.
If your instrument is configured with two ports for a particular rate, the currently selected
port also appears at the beginning of the message.
Various other messages may appear briefly, for example, to alert you that loop ups are
successful. You can display a log of messages by selecting the message area.
Quick Config Settings
After you select a test application (using the Test menu), Quick Config tabs appear
under the Test Tabs, with key settings required to configure your test. For example, if
you selected the 1GE -> Layer 2 -> Traffic -> Term application, quick configuration
settings appear that allow you to easily select Auto Negotiate, Test Mode, and Frame
Size.
 Loading...