EasyManua.ls Logo

Victron energy Quattro 3000VA User Manual

Victron energy Quattro 3000VA
1 page
Page #1 background imageLoading...
Page #1 background image
10
5
87
43
6
1
2
9
Included
Ref.240709
www.electrosun.fr
Quick Installation Guide
Quattro 12V 24V 48V 3000VA 230Vac
C
I
J
>
5
0
m
m
>
5
0
m
m
>
5
0
m
m
B
A
M
A
I
N
T
R
I
C
K
L
E
D
I
G
I
T
A
L
M
U
L
T
I
C
O
N
T
R
O
L
N
For fuse values:
refer to the user manual
Fuse (not included)
E
(
T
-
s
e
n
s
e
)
M
A
I
N
NL
GND
AC-IN 2 AC-IN 1
L N
GND
NL
GND
L N
GND
AC-OUT 1 AC-OUT 2
G (TR-charge)
E (T-sense)
H (V-sense)
F (GND-relay)
M
L
H
(
v
-
s
e
n
s
e
)
A
24V 48V
B
a
t
t
e
r
y
B
a
t
t
e
r
y
C
a
b
l
e
-
B
a
t
t
e
r
y
L
i
n
k
1
x
(
2
x
1
2
V
)
B
a
t
t
e
r
y
L
i
n
k
3
x
(
4
x
1
2
V
)
B
a
t
t
e
r
y
C
a
b
l
e
+
T
R
-
C
h
a
r
g
e
V
-
s
e
n
s
e
A
C
-
I
N
A
C
-
O
U
T
U
T
P
-
C
a
b
l
e
R
e
m
o
t
e
c
o
n
t
r
o
l
B
I
M N
G
O P
D
K
H
G
N
D
-
r
e
l
a
y
F
L
J
Not included
G
K
P
P
O
D
(
7
x
)
E
(
T
-
s
e
n
s
e
)
C
H
F
G
G
E
H
F
E
D
3
1
1
2
Question and Answer IconNeed help?

Do you have a question about the Victron energy Quattro 3000VA and is the answer not in the manual?

Victron energy Quattro 3000VA Specifications

General IconGeneral
ModelQuattro 3000VA
Continuous Output Power at 25°C2400W
Peak Power6000W
Output Voltage230V AC
Output Frequency50Hz or 60Hz
Input Voltage Range187-265V AC
AC Input Voltage230V AC
AC Input Frequency45-65Hz
Max. Efficiency94%
Protection CategoryIP21
DC Input Voltage48V
Battery Charger Current35A
Transfer Time20ms

Summary

Product Components

Included Components

Lists and illustrates the parts provided with the Victron Energy unit.

Not Included Components

Lists and illustrates the parts that are not included and need to be sourced separately.

Installation Steps

Step 1: Unit Placement and Initial Setup

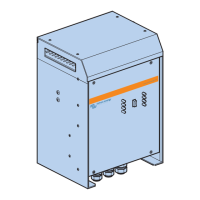
Illustrates correct unit placement and initial battery connection procedures.

Step 2: Internal Access and Connections

Details on opening the unit and making internal wire connections.

Step 3: Battery and Main Power Wiring

Guides on connecting batteries and the main power supply to the unit.

Step 4: Control and AC Wiring

Shows how to connect the remote control and AC input/output ports.

Step 5: Grounding and Final Assembly

Illustrates grounding connections and final assembly steps.

Related product manuals