Do you have a question about the Victure HC500 and is the answer not in the manual?
Details on necessary accessories and pre-use checks.
Instructions for correctly inserting batteries into the camera.
Guidance on inserting and formatting the SD card for the camera.
Instructions to remove protective films from the lens and sensor.
Steps to reset the camera to defaults and format the SD card.
Overview of the camera's menu options and their functions, covering settings like Mode, Resolution, and PIR Interval.
Methods for attaching the camera using a web belt or tripod socket.
Instructions for powering on the camera and entering working mode.
How to navigate and view photos/videos directly on the camera.
Steps to transfer and view camera files using a computer and card reader or USB.
Connecting the camera to a phone/tablet via WiFi to view and manage files.
Information on accessing Victure's YouTube channel for guides and reviews.
How to find and follow Victure's official Facebook page.
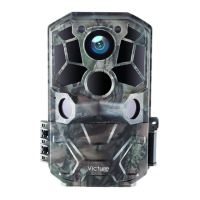
This document provides instructions for the Victure HC500 trail camera, covering its setup, operation, and maintenance.
The HC500 is designed to capture photos and videos of wildlife or other outdoor activities. It offers various modes of operation, including Photo, Video, and Photo+Video, allowing users to choose the best setting for their specific needs. The camera's default setting is Photo mode. For optimal image quality, users can adjust the image size, with a maximum resolution of 30MP. Higher resolutions produce clearer images but consume more SD card space. Similarly, video resolution can be set up to 1296P, with 1080P as the default, impacting video quality and file size. The video length can be adjusted, with a maximum of 3 minutes and a default of 10 seconds. To conserve battery, especially at night, it's recommended to set a shorter video length. The camera also supports audio recording, which can be enabled or disabled as needed.
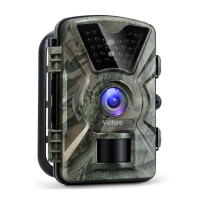
A key feature of the HC500 is its Passive Infrared (PIR) sensor, which detects motion. Users can adjust the PIR Interval, with a default of 30 seconds, to control how frequently the sensor detects motion. A shorter interval means more frequent detection but also higher power consumption, impacting battery life. The PIR Sensitivity can also be adjusted (default is Medium) to capture very small movements or to focus on larger animals, depending on the user's requirements. The camera also includes a Time Lapse function, which allows it to take photos at set intervals, regardless of motion detection. This is useful for observing long-term activities like plant growth or animal behavior over an extended period. The distinction between Interval mode (PIR sensor active) and Time Lapse mode (timer-triggered) is important for effective usage.
For night vision, the HC500 utilizes IR LED lights. Users can set the IR LED brightness to Auto, Economy, or Off. There's also a "Low Bat Night Shot" feature, which, when battery power is low (below 30%), allows users to choose whether to continue night shooting without IR LEDs or stop it entirely. This helps manage battery life. The camera can also be configured to operate during a specific Monitoring Period, allowing it to be active only during predetermined hours and standby during others, further optimizing battery usage.
The HC500 offers several user-friendly features for setup and configuration. The camera's settings can be accessed by sliding the switch button to the "SETUP" position, which activates the test mode and lights up the screen. From this interface, users can navigate through various menu options using the UP and DOWN arrows and confirm selections with the OK button. The camera can also be reset to its default settings, which is useful for new users or if the camera is not functioning as expected. Formatting the SD card is also an option within the settings, which deletes all files on the card.
To ensure accurate capture of animals, proper camera placement is crucial. The HC500 has a 120° fan-shaped detection area, with an optimal imaging distance of 3-10 meters. It's recommended to mount the camera at a height appropriate for the target animal, ensuring the lens is level or slightly tilted downwards, and avoiding reflective objects in the shooting range. A "shooting range" test can be performed in SETUP mode (with "Auto Power Off" disabled) by walking horizontally in front of the PIR sensor. A flashing indicator light confirms successful detection, helping users identify the effective detection area.
Power management is an important aspect of the HC500. The camera requires eight high-quality rechargeable batteries (Energizer® or Duracell® are recommended) for optimal performance. It also supports an external 6V/2A power supply. The camera has an "Auto Power Off" feature (default 3 minutes) in TEST mode, which automatically shuts down the camera after a period of inactivity to save power. The "Backlight" setting (default 1 minute) turns off the screen light after inactivity, also contributing to power saving.
Reviewing captured photos and videos can be done directly on the camera by switching to the "SETUP" position and entering the Replay interface. Users can navigate through files, delete them, and play/pause videos using the camera's buttons. For a more comprehensive review, files can be accessed on a computer using a card reader or by connecting the camera directly via a USB cable. When connecting via USB, the camera should be turned off, and batteries removed, which will display "MSDC" on the screen, indicating a successful connection.
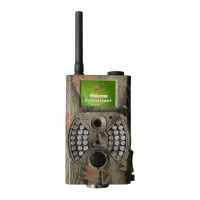
The HC500 also offers modern connectivity options. It supports WiFi connectivity, allowing users to review photos and videos, and adjust camera settings directly from their phone or iPad using the 'Hunting Camera Pro' APP. This is particularly convenient when the camera is mounted in an inconvenient location. The camera's WiFi hotspot name (WIFI SSID) and password (default "12345678") can be customized. An "Auto WIFI Off" feature (default 1 minute) automatically disconnects WiFi after a period of inactivity to conserve power. Bluetooth connectivity is also available, primarily for turning on the camera's WiFi via Bluetooth.
Additional features include "Beep Sound" for button clicks and on/off prompts, a "Camera Name" setting to identify different cameras when multiple are used, and a "Password Setting" to secure camera access. The camera's software version can be checked, and there's a "Mcu FW Update" option for developers, which users can ignore.
Maintenance involves ensuring the SD card is properly formatted (FAT32) on a computer and then again on the camera before use. The camera supports class 6 or faster SD cards ranging from 4GB to 128GB, with Sandisk® or Kingston® branded cards recommended. It's important to turn off the read-write protection on the SD card for the camera to recognize it. Before initial use, protective films on the camera's lens and sensor should be removed.
The Victure Trail Camera Team provides customer support for any questions or suggestions regarding the product. The camera comes with a 12-MONTH warranty, which can be extended to 36 MONTHS by sending an order screenshot to hc.support@govicture.com. Users can also contact support via WhatsApp at +86 13827808023. The manual also directs users to Victure's social media channels, including YouTube (search "Victure TC") and Facebook (search "@enjoywildlifecamera"), for additional resources and community engagement.
| Resolution | 20 MP |
|---|---|
| Video Resolution | 1080P |
| Night Vision | Yes |
| Waterproof | IP66 |
| Trigger Speed | 0.2 seconds |
| Detection Range | 20m |
| Storage | Up to 32GB |
| Power Supply | 8 AA batteries |
| IR Flash Range | 20m |