Do you have a question about the Viessmann Vitodens 100-W B1HA 26 and is the answer not in the manual?
Ensures compliance with instructions for safe installation, property protection, and warranty validity.
Details installation compliance with local and national codes for gas appliances and electrical wiring.
Describes methods for simulating and testing the boiler's fixed high limit safety function.
Details safety precautions and procedures for working on the boiler, including power and gas disconnection.
Explains symbols used in the manual to denote warnings, cautions, and important information.
Specifies the models and serial number requirements for the Vitodens 100-W boiler.
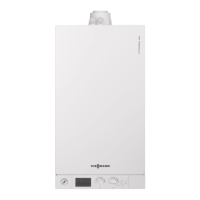
Describes the Vitodens 100-W B1HA/B1KA models, their features, and integrated components.
Specifies requirements for ambient temperature, ventilation, and protection from contaminants in the mechanical room.
Lists common areas and products that contain contaminants harmful to the boiler.
Details the required minimum service clearances around the boiler and clearances to combustibles.
Provides a visual overview of the boiler's dimensions and connection points.
Lists and labels the various connection ports on the boiler for heating and DHW systems.
Illustrates and labels the specific piping connections for both B1HA and B1KA boiler models.
Outlines the different surfaces on which the Vitodens 100-W boiler can be wall-mounted.
Provides step-by-step instructions for installing the mounting bracket on brick/concrete walls.
Details the procedure for installing the boiler mounting bracket onto wood studs.
Details the procedure for installing the boiler mounting bracket onto metal studs.
Instucts on how to mount the boiler onto the installed wall bracket, ensuring it is level.
Provides dimensions for the boiler stand used for free-standing installation.
Describes attaching the wall bracket to the boiler mounting frame and securing the frame.
Explains how to connect the vent pipe, including routing and angle requirements.
Advises on supporting piping and avoiding stress on the boiler connections.
Details the codes and steps for making the gas connection and piping.
Further instructions on gas piping, including union, drip leg, shutoff valve, and pressure testing.
Outlines the procedure and requirements for performing a gas piping pressure leak test.
Provides instructions for flushing the heating system and connecting the boiler's water lines.
Explains how to connect the condensate drain, including requirements for tubing and pumps.
Instructs on filling the condensate siphon with water before initial startup to prevent flue gas escape.
Details the assembly and installation of the pressure relief valve and its discharge pipe.
Mentions the requirement for low water cut-off based on local codes and its installation.
Describes how boiler water temperature and system pressure are displayed and monitored.
States that schematics are guidelines and specific layouts may require discussion with Viessmann.
Specifies minimum clearances for hot water pipes to combustible construction.
Provides pressure drop data for primary circuits, useful for sizing circulation systems.
Explains waterside flow requirements and recommends low-loss headers for specific flow rates.
Presents performance curves and specifications for the Grundfos UPS15-78 built-in pump.
Illustrates a typical installation setup for a B1HA boiler with a single heating circuit.
Shows a configuration with a DHW tank, low-loss header, and one heating circuit for B1HA boilers.
Diagrams a B1HA installation including a DHW storage tank and one heating circuit.
Illustrates a B1KA boiler setup with a single heating circuit, including DHW connections.
Shows a B1KA installation configuration featuring a low-loss header and one heating circuit.
Depicts a B1KA boiler installation with one heating circuit, omitting a low-loss header.
Describes the setup for using the boiler in a heating and cooling system configuration.
Illustrates the wiring for a boiler with an externally mounted low water cut-off device.
Provides a caution regarding flue products and recommends referencing the venting system installation instructions.
Details sizes, benefits, and applications for the low-loss header accessory.
Provides steps for removing the front cover and accessing the boiler's control unit and terminal blocks.
Specifies the boiler's power supply requirements and connection diagram.
Shows the location of terminal blocks and how temperature sensors connect to the boiler.
Details the connection of the DHW tank temperature sensor for B1HA models.
Explains how to connect an external tank temperature controller to the B1HA boiler.
Illustrates how to connect a dry contact room thermostat to the boiler's terminal block.
Details the connection of a 24VAC room thermostat, requiring a switching relay.
Shows how to connect the outdoor temperature sensor for weather-compensated operation.
Explains how to connect an OpenTherm device for boiler communication and control.
Provides instructions for reconnecting accessories, securing cables, and closing the control unit.
Details the process of setting and tightening the front panel back onto the boiler.
Lists essential tools and testing equipment required for boiler startup and maintenance.
Explains the boiler's control panel, display elements, and their functions.
Details the functions, setting options, and default values available in the boiler's setup menu.
Provides step-by-step instructions for filling the heating system with water and bleeding air.
Continues instructions for filling the system, checking expansion tank, and flushing the heat exchanger.
Lists the acceptable gas types and their characteristics for the Vitodens 100-W boiler.
Explains the use of the supplied kit for converting the boiler's gas type from Natural Gas to LPG.
Details how to measure static and running gas pressures and corrective actions.
Explains how to measure CO2 content at different burner outputs and perform relay tests.
Guides on adjusting the boiler's output for high altitude installations.
Describes how to adjust the maximum heating output percentage based on system needs.
Details how to configure the boiler to accept DHW tank sensor or aquastat inputs.
Explains how to set the preferred temperature unit (°C or °F) for display.
Guides on enabling the DHW comfort function for faster hot water delivery.
Describes how to clock the natural gas meter to verify the boiler's input rate.
Instructs to check heating and DHW connections for leaks and pressure tightness.
Highlights the importance of combustion analysis and recording values in the maintenance record.
Explains a simplified leak test for coaxial vent systems by measuring CO2 in the air gap.
Details how to safely remove the boiler's front panel for service access.
Provides steps for safely removing the boiler's burner assembly, including disconnecting cables.
Guides on reinstalling the burner assembly, including torque specifications and gas leak testing.
Details how to inspect the burner gasket and cylinder assembly for wear or damage and replace if necessary.
Explains how to check, clean, adjust, and replace ignition and ionization electrodes.
Instructs on checking and cleaning the condensate drain and siphon for proper drainage.
Details how to check the pH of condensate and maintain the neutralization unit.
Provides instructions for cleaning the combustion chamber and stainless steel heat exchanger surfaces.
Guides on checking the expansion tank pressure and overall system pressure when cold.
Ensures proper operation of low water cut-offs, pressure relief valve, and other safety components.
Emphasizes leak testing gas supply piping before boiler operation and warns against open flames.
Outlines the general process for diagnosing and correcting system faults.
Explains how to adjust room temperature via the thermostat or boiler water temperature.
Presents a sequence of operations and potential faults during the boiler's start-up cycle.
Lists fault codes displayed on the control unit, their causes, and corrective measures.
Continues the diagnostics table, detailing additional fault codes, causes, and corrective actions.
Explains how to reset the burner control unit after a fault has been cleared.
Guides on how to access and scroll through the boiler's fault history logs.
Instructs on checking the boiler temperature sensor by measuring its resistance.
Details the procedure for removing the boiler's front panel for access.
Explains how to check the boiler temperature sensor's resistance against a curve.
Guides on checking the outdoor temperature sensor's resistance against its characteristic curve.
Explains the automatic frost protection feature and its activation conditions.
Illustrates heating curves and explains how to set the slope and set point for heating control.
Provides steps for adjusting the heating curve slope and set point via the control panel.
Shows how to adjust the increase set point temperature range for heating.
Illustrates how to adjust the reduced set point temperature range for heating.
Details how to check the continuity of the fixed high limit and replace it if faulty.
Explains how to check the flue gas temperature sensor's resistance against a curve.
Instructs on how to check the control unit fuse (F4 T 2.5A) and replace it if necessary.
Guides on checking the DHW outlet temperature sensor's resistance for B1KA models.
Explains how to check the DHW tank temperature sensor's resistance for B1HA models.
Details the steps for replacing the flow limiter on B1KA models.
Provides instructions for checking, cleaning, or replacing the plate-type heat exchanger on B1KA models.
Illustrates accessory connections to the boiler's terminal strip, including OTS and OpenTherm.
Presents technical specifications for the boiler, including gas supply, dimensions, and water connections.
Details the priority levels for different operating controls like freeze protection and OpenTherm.
Lists technical data related to the B1KA model's on-demand domestic hot water production.
Details the sequence of operations for the boiler's burner, including phases and timings.
Explains each phase of the burner program, from stand-by to post-purge and closure tests.
Provides the wiring diagram for B1HA models, illustrating electrical connections.
Provides the wiring diagram for B1KA models, illustrating electrical connections.
Lists model numbers, serial numbers, and general assemblies for ordering parts.
Continues the parts list, detailing assemblies for the main enclosure, boiler, controls, and hydraulics.
Lists parts for the main enclosure assembly, including cover panels, gaskets, and mounting brackets.
Details parts for the boiler assembly, such as gaskets, vent adaptors, sensors, and heat exchangers.
Lists parts specific to the burner assembly, including gaskets, tubes, fans, and valves.
Details parts for the hydraulic assembly, such as pipes, clips, sensors, and valves.
Lists parts for the hydraulic assembly, including O-rings, hoses, and flow switches.
Details parts for the pumping block assembly, including pumps, O-rings, and fittings.
Lists parts for the combi block assembly, including sensors, valves, and heat exchangers.
Details parts for the control assembly, including consoles, harnesses, and sensors.
Lists touch-up paint and lubricant as other available parts.
Lists various installation fittings, such as pressure relief valves, adaptors, and gas valves.
Provides a log for recording static pressure, running pressure, CO2, O2, and CO measurements.
Contains safety warnings and step-by-step instructions for lighting and operating the appliance.
| Model | Vitodens 100-W B1HA 26 |
|---|---|
| Category | Boiler |
| Modulation Ratio | 1:5 |
| Heat Exchanger Material | Stainless steel |
| Water Pressure | Max. 3 bar |
| Type | Wall-mounted condensing boiler |
| Efficiency | Up to 98% |
| Heating Capacity | 5.8 to 26 kW |
| Fuel Type | Natural gas or LPG |
| Max. Heat Input | 91, 000 BTU/hr |
| Application | Residential |