2
5698 072 - 02
Heat Exchanger Assembly Installation
Accessing the Heat Exchanger
1. With the electrical power and fuel supply off, open
the control cover and switch the ON/OFF
boiler
control switch to OFF.
2. Remove the front enclosure panel.
3. Close the boiler isolation valve or drain the system.
4. Remove the burner assembly.
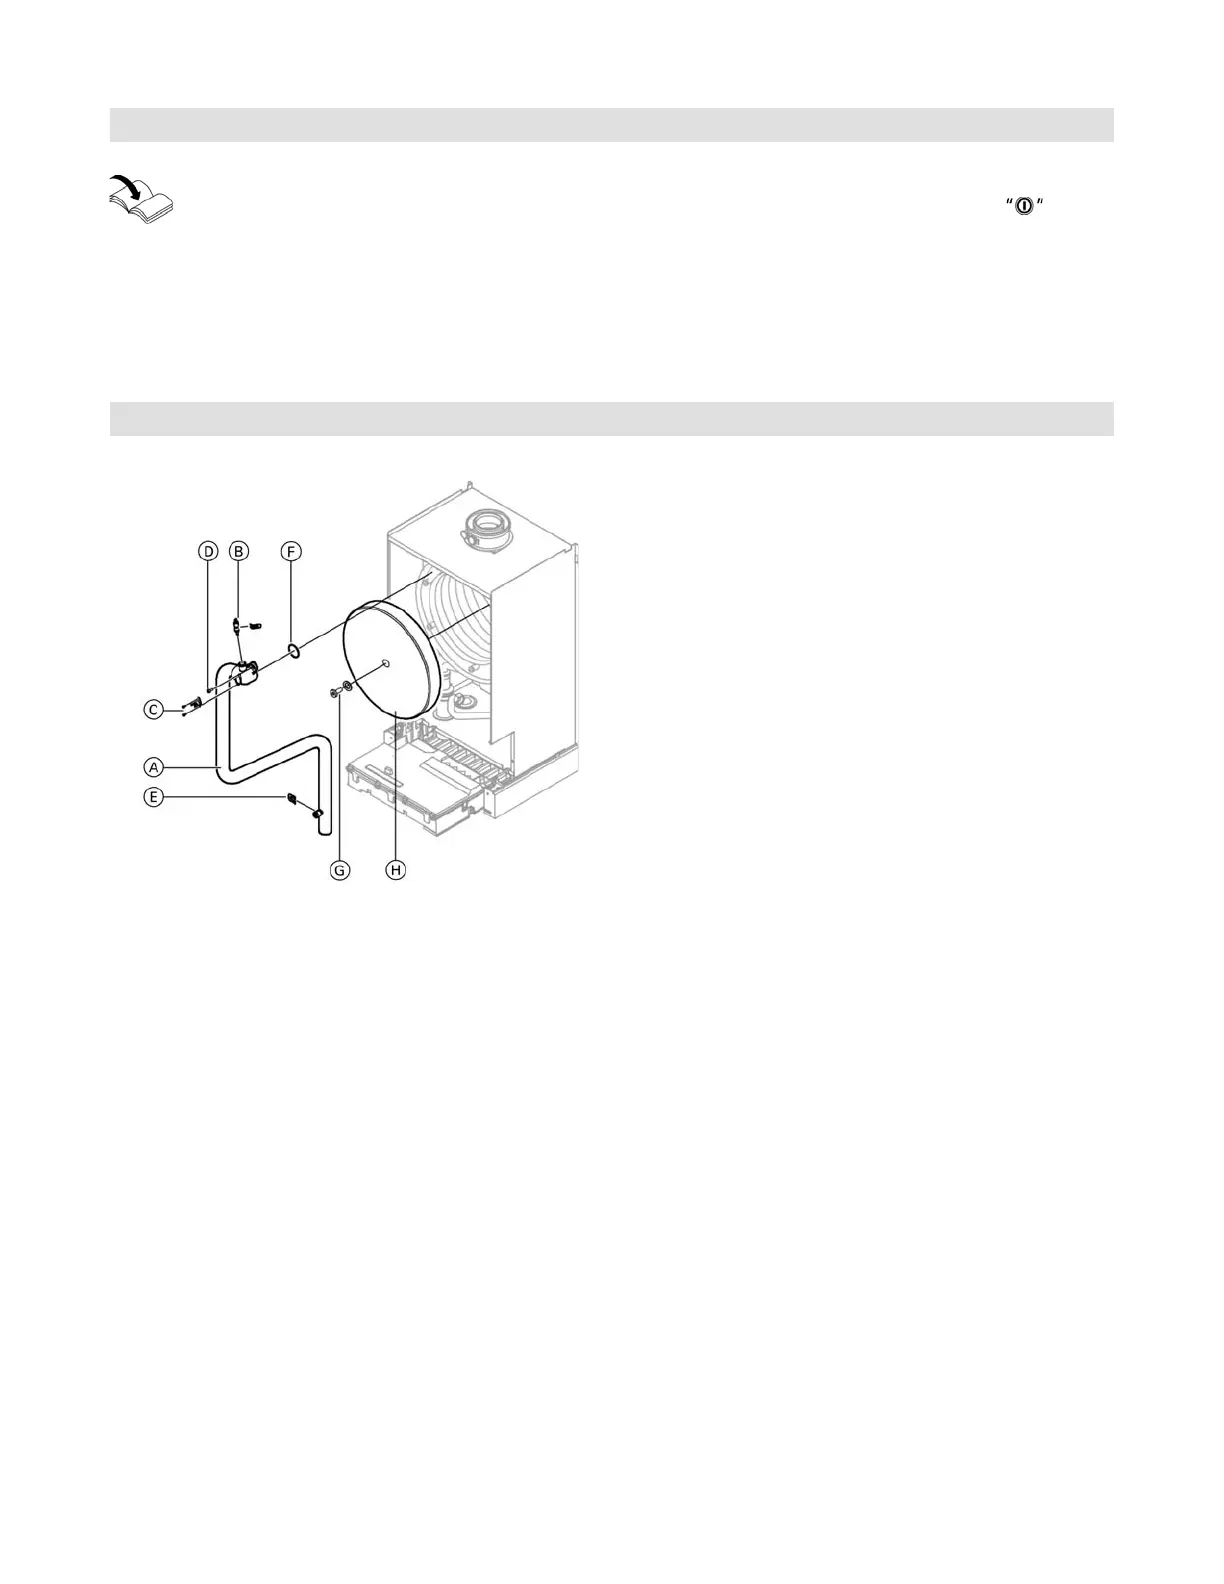
Replacing Supply Pipe/Sensors/Refractory
For more details refer to the Installation and
Service Instructions applicable to this boiler.
1. Remove the Torx screw G (T-25) with the washer
and pull the refractory H straight out.
2. Disconnect electrical connectors from the heating
supply pipe A.
3. To replace the following:
- Remove connecting clip for boiler temperature sensor B.
- Remove 2 Phillips screws for high limit sensor C.
4. Pull off the connecting clip E to disconnect the
pressure gauge hose from the heating supply pipe A.
5. Remove the two Torx screws (T-40) D at the top
and loosen the compression fitting at the bottom on
the heating supply pipe A and remove pipe with top
O-ring F.
6. Replace parts as required and reassemble as per steps
5 through 1 respectively and torque fasteners per
legend.
Legend
Tighten the following fasteners on assembly:
C 8.9 lb.in. (1 Nm)
D 70.8 lb.in. (8 Nm)
G 35 lb.in. (4 Nm)