5
Setup Internet connection for the frame
The ViewClix Smart Frame is shipped with built-in connectivity:
Standard model: connects to Wi-Fi networks
Broadband mobile data model: for situations where there's no Wi-Fi. It includes a
mobile data connection (just like the mobile data connections within smart phones)
Wi-Fi model Broadband Mobile Data model
When the ViewClix frame starts up, it dis-
plays a “welcome” screen with a prompt to
start Wi-Fi conguration. The list of availa-
ble Wi-Fi networks is then shown.
After choosing a network or entering a
network name, you’ll be prompted to
enter the network’s password/key.
NOTE: If you don’t see the Wi-Fi network
listed, it may be because the network is
congured to be “hidden”. In this case,
you can select “Add Network” to enter the
Network name (SSID) and password/key.
If your ViewClix frame is the Broadband
Model, there is no need to congure a
network connection.
Each time the frame starts up, the mobile
data connection will be veried automati-
cally.
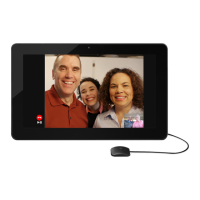
Preview Camera
After connectivity is conrmed, a preview of the camera is shown. This assists you
in positioning the frame in the best location for a Video Call.
If the preview appears dark or not positioned properly, see the sections "Frame
Placement & Room Lights" and "Camera Placement & Lighting" on page 19 of
this guide.
When you’re OK with the camera preview, the SlideShow begins automatically.
That’s it — the installation is complete.
When the ViewClix Smart Frame is shipped, there are a few sample images in the
SlideShow. To share pictures and make video calls, you and family members may
use the ViewClix Mobile App or a web browser on a PC or Mac.