Installation
ViewSonic VPC190 12
Connecting Audio Components
Connecting the Headset
Plug the stereo headphone cable into the Head-
phone jack (light green) of your All-in-One PC.
Connecting a Microphone
Plug the microphone cable into the Microphone
jack (pink) of your All-in-One PC.
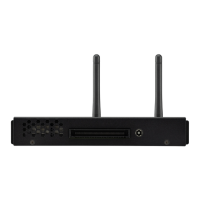
Connecting to a Network
Connect to a local area network (LAN) using the RJ-
45 LAN jack of your All-in-One PC.
1. Plug one end of the network cable to the RJ-45
LAN jack at the rear of your All-in-One PC.
2. Connect the other end to a network hub or a wall
socket.
To ensure proper connection, check the LAN jack’s
LED indicators.
LED Color LED Status Condition
Activity/Link
LED
Green
Off LAN link is not established.
On (Steady) LAN link is established.
On (Flashing)
The All-in-One PC is communicating
with other computers on the network.
Speed LED
Green
Off 10 Mbit/sec data rate is selected.
On 100 Mbit/sec data rate is selected.
Yellow On 1000 Mbit/sec data rate is selected.
SD/MMC/MS
Speed LED
Activity/Link LED